Annie’s Advent Calendar: Part 1
Note: UK terms are used throughout. This first part tells you how to make the small decorations. The next part will tell you how to make the larger decorations. The last part will tell you everything you need to complete your advent calendar and put it together
Materials For Decorations
• Small amounts of a number of different colours of cotton DK yarn.
(I used 100% cotton DK yarn: Rico Ricorumi DK in red, white, black, beige, fuchsia, orange, purple, sky blue, blue, yellow, fir green and green, but you can use any shades you like. This cotton yarn comes in 25g balls.)
• A small amount of silver yarn. (I used Rico Cotton Fashion Metallise in Steel Grey, however you could just use grey cotton yarn instead.)
- 3mm crochet hook
- Large-eyed sewing needle
Abbreviations:
ch = chain
dc = double crochet
ss = slip stitch
st(s) = stitch(es)
htr = half treble
2ch picot = work 2 ch, ss into second ch from hook.
rep = repeat
Make 5 of each of the following Small Decorations: Baubles, Parcels, Stars, Wreaths
BAUBLE
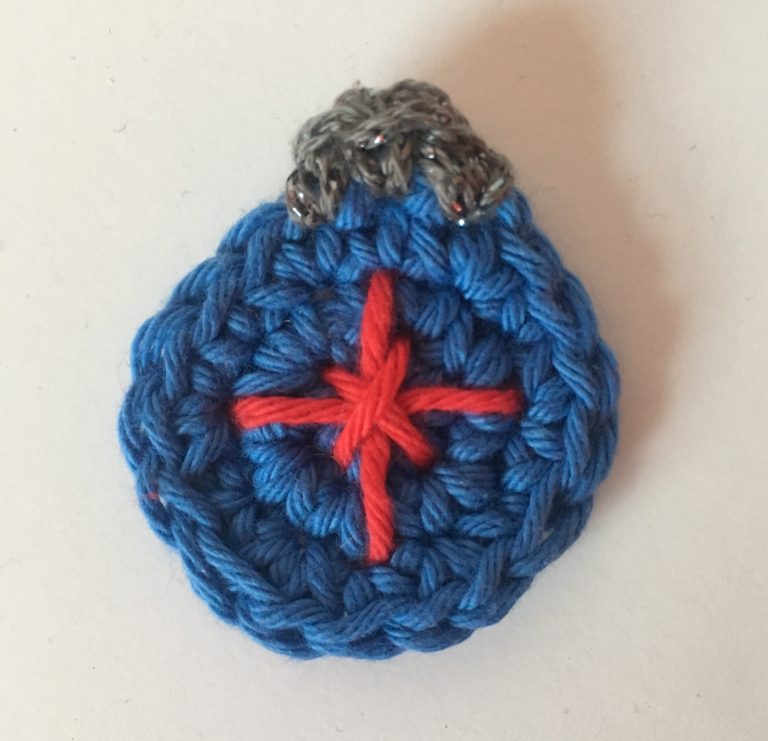
First round: working into a magic ring, ch1, then 6dc, join with ss to first dc.
Next round: ch1, 2dc in each st, join with ss to first dc. (12 sts)
Next round: ch1, (1dc in next st, 2dc in next st) 6 times, join with ss to first dc. (18sts)
Fasten off.
For top of bauble: using silver or grey join to one of the dc, ch1, dc in same st, dc in next 2sts, fasten off.
Darn in ends. With a contrast colour, embroider a large cross from top to bottom and side to side, using top of second round as a guide. Next embroider a smaller diagonal cross using the top edge of the first round as a guide.
PARCEL
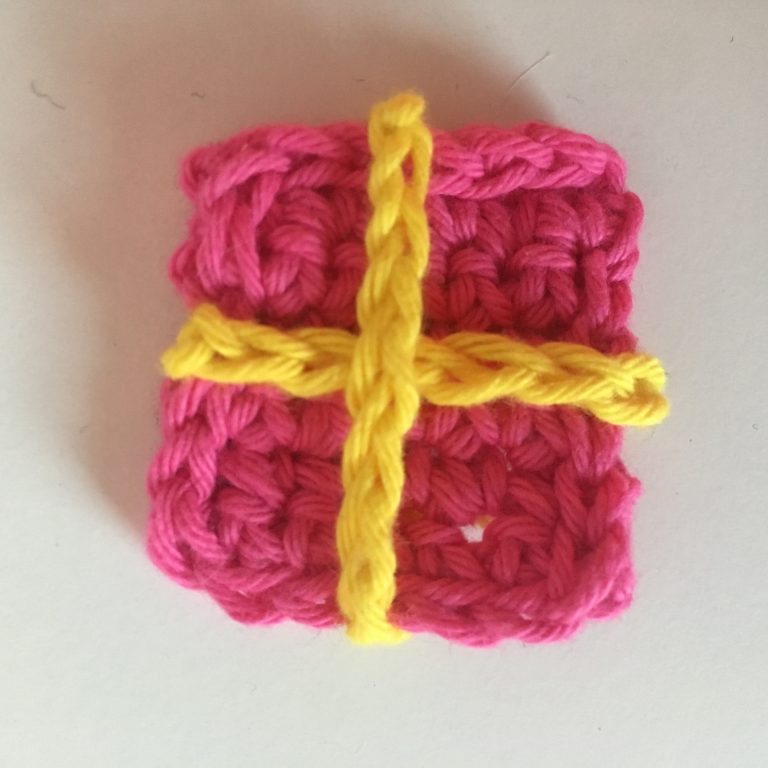
Work 7ch. Starting in 2nd ch from hook, dc in each ch across. (6sts)
Next row: turn, ch1, dc in each st across.
Repeat last row 4 times more.
Turn work by 90 degrees and work 5ss down edge of parcel. Turn 90 degrees again and work in ss across 6 ch loops at bottom. Turn by 90 degrees and work 6 ss up side. Finally work 6ss across top. Fasten off and darn in ends
To make the ties, work 8ch, fasten off. Make 2.
Position ties on front of parcel and sew in place with loose ends on the back of the parcel.
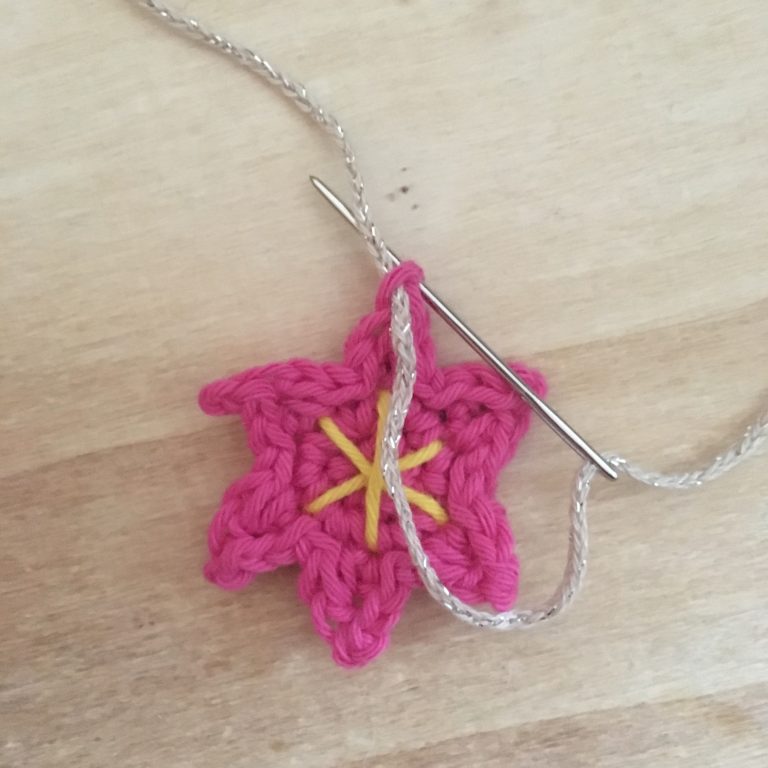
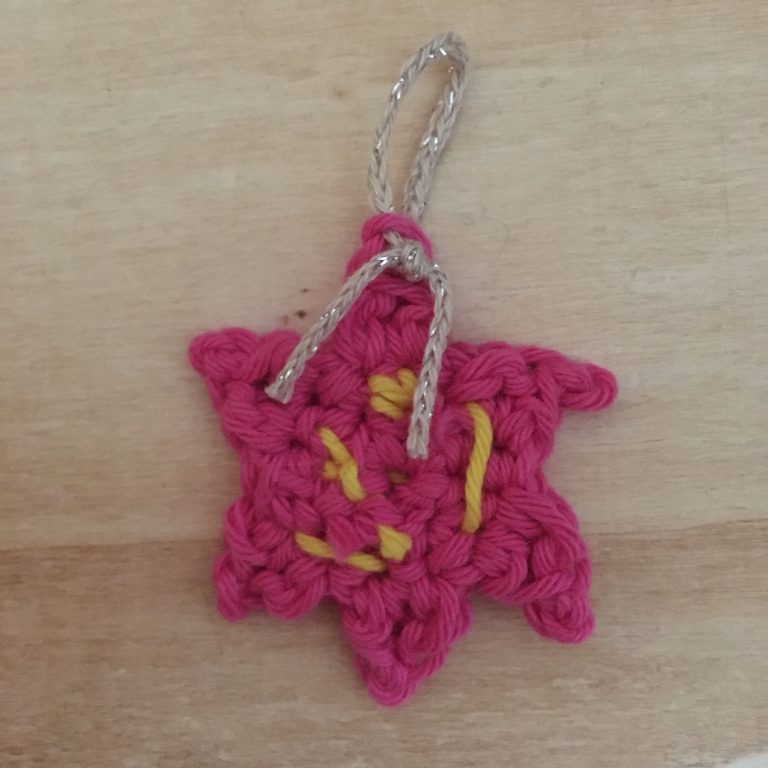
STAR
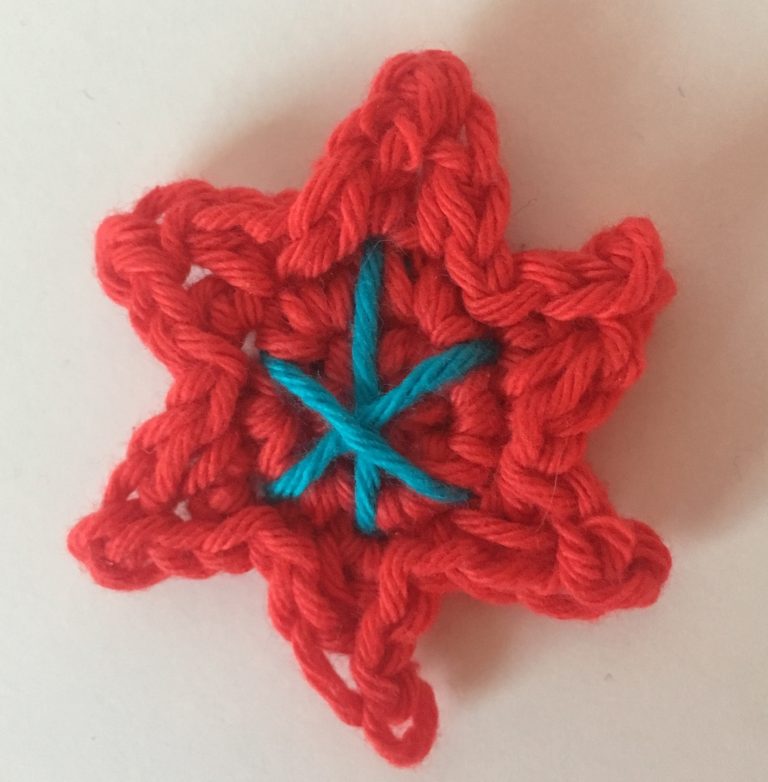
In a magic ring, work 1ch then 6dc, ss into first dc to join.
Next round: work 2dc in each st, ss into first st to join. (12sts)
Next round: *into next st work (ss, htr), 2ch picot, (htr, ss) into next st, rep from * to end. (6 points)
Fasten off. Darn in ends.
With a contrast colour, embroider a 6 point star by making three long stitches using outside of second round as a guide.
WREATH
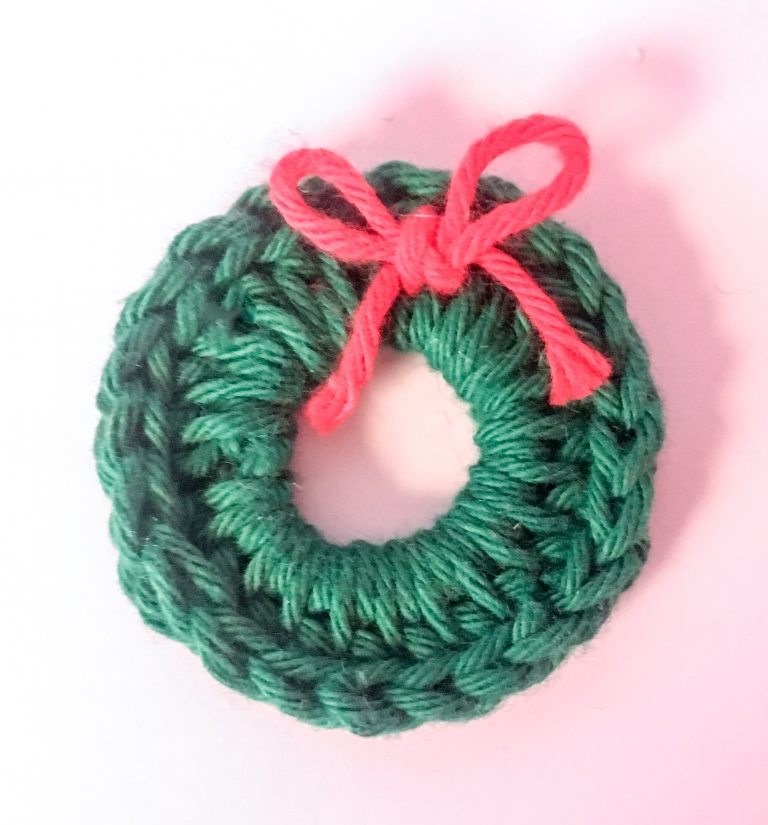
Work 10ch and join together into a ring with a ss.
Work 2ch, then 24htr into ring, join to first htr with a ss, and ss in each st around the edge. Fasten off. With a contrasting colour, use a needle to thread it from front to back at the top of the wreath leaving half the length at the front, then back through to the front. Tie the two lengths in a bow at the front and secure with a knot. Trim the ends of the yarn to the required length.
Part 2
Make 3 of the Larger Tree Decorations
Make 1 Santa Decoration
TREE
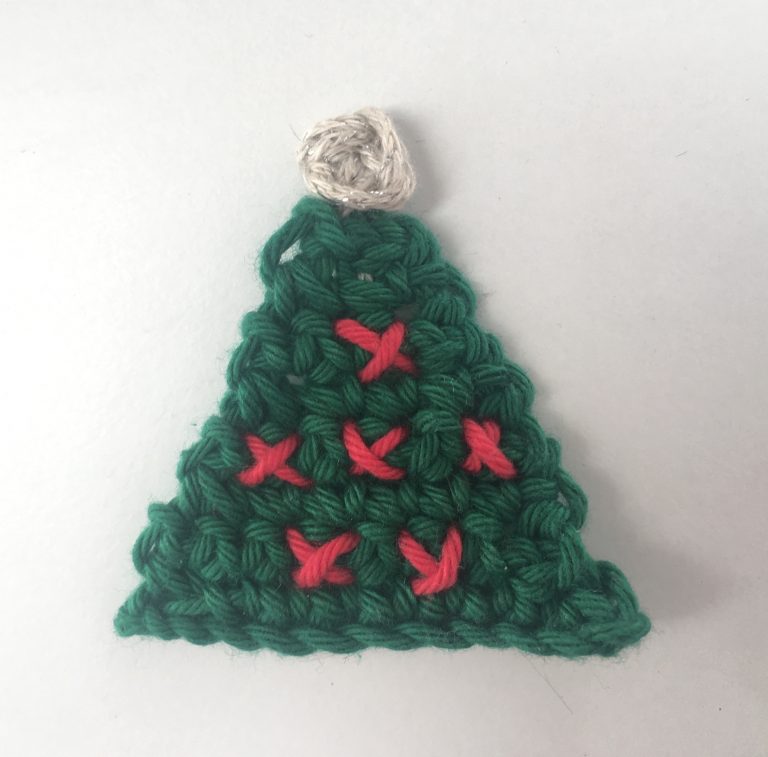
Work 11ch.
Starting in second ch from hook, work 1dc in each ch to last two ch, then work dc2tog in last 2 ch.
Each row work 1dc in each st to last 2sts then dc2tog.
Work until you have one st left, then fasten off and darn in ends.
For tiny bauble for top of tree, work 4dc in a magic ring, join to first dc with a ss and fasten off.
Sew bauble to top of tree. With a contrasting colour embroider little crosses on the tree.
SANTA
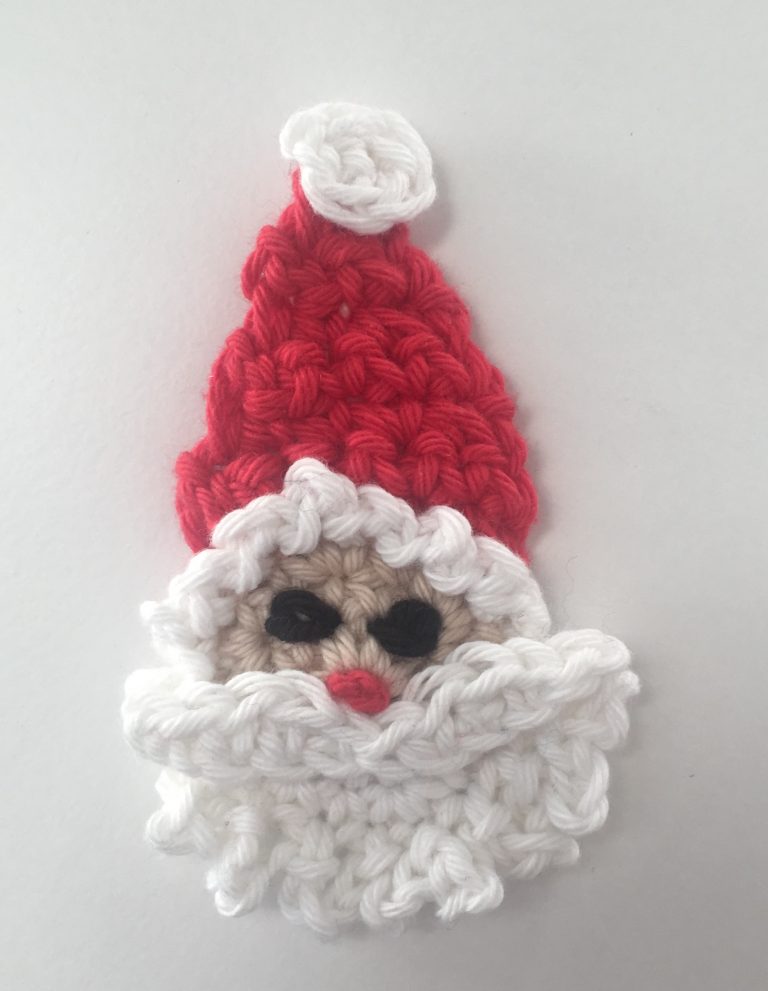
With skin-tone yarn, work 6dc into a magic ring and join to first dc with a ss.
Next round: 2dc in each of first 3sts, change to white and work 2dc in remaining 3sts.
Next round: With skin tone, (1dc, then 2dc in next st) 3 times, then change to white and (1dc, then 2dc in next st) 3 times, join to first st with ss, fasten off skin tone yarn.
Next round: For hair, in front loop only and continuing in white over skin tone, (2ch, ss into next st) 9 times, then for beard in both loops, (4ch, ss into next st) 9 times. Fasten off.
FOR HAT: With right side facing you and working into back loops only from top of face, start in second back loop, and with red yarn, work dc across 7sts, turn.
Next row: ch1, dc2tog in first 2sts, then dc in each st to end.
Repeat last row till 1st left, fasten off.
FOR BOBBLE: Using white, work 4dc in a magic ring and join with ss. Fasten off.
FOR MOUSTACHE: In white, work 10ch, then starting in 2nd ch from hook, work ss, dc, htr, dc, ss, dc, htr, dc, ss. Fasten off.
Darn in all ends. Sew bobble to top of hat and moustache to face above the beard. Embroider two eyes and a nose (I used 2 chain stitches for the eyes and a knot for the nose).
Part 3: Putting the calendar together
Materials
Scraps of felt
PVA craft glue
Metallic yarn for hanging loops (you can use the coloured cotton yarn instead if you like)
1.6-2m green ribbon (I used 15mm wide)
Sewing pins
24 buttons (they don’t have to match)
Sewing needle and thread
Sheet of cardboard
Small length of thin wood to strengthen top of card.
Cord to hang up the calendar
Method
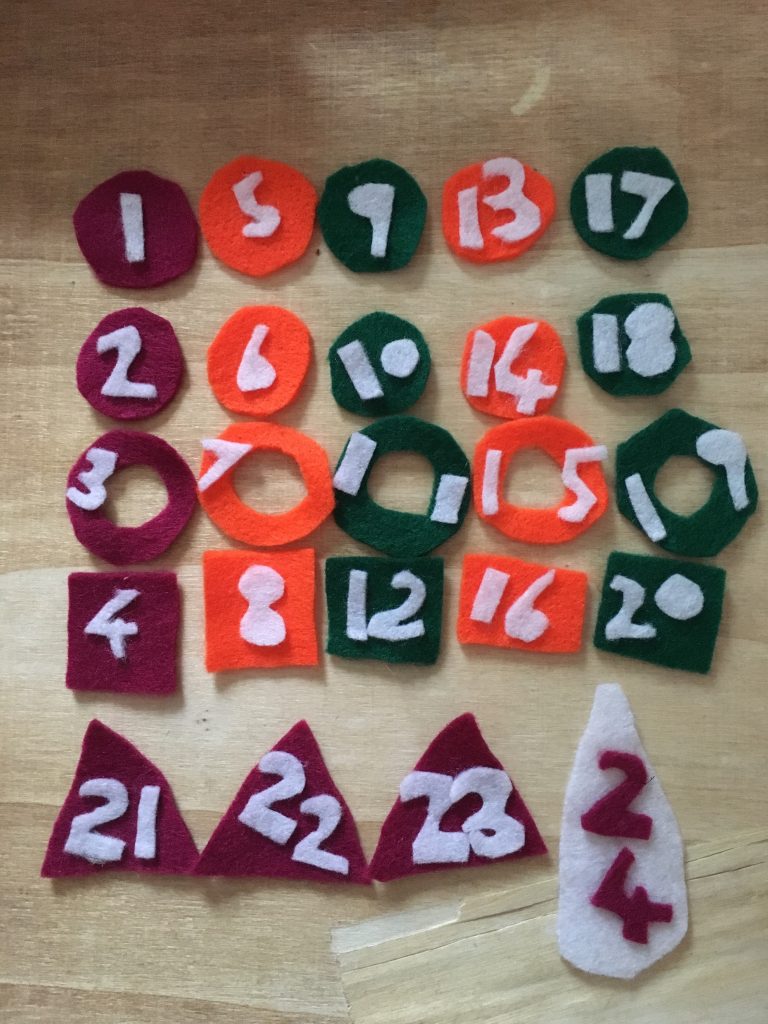
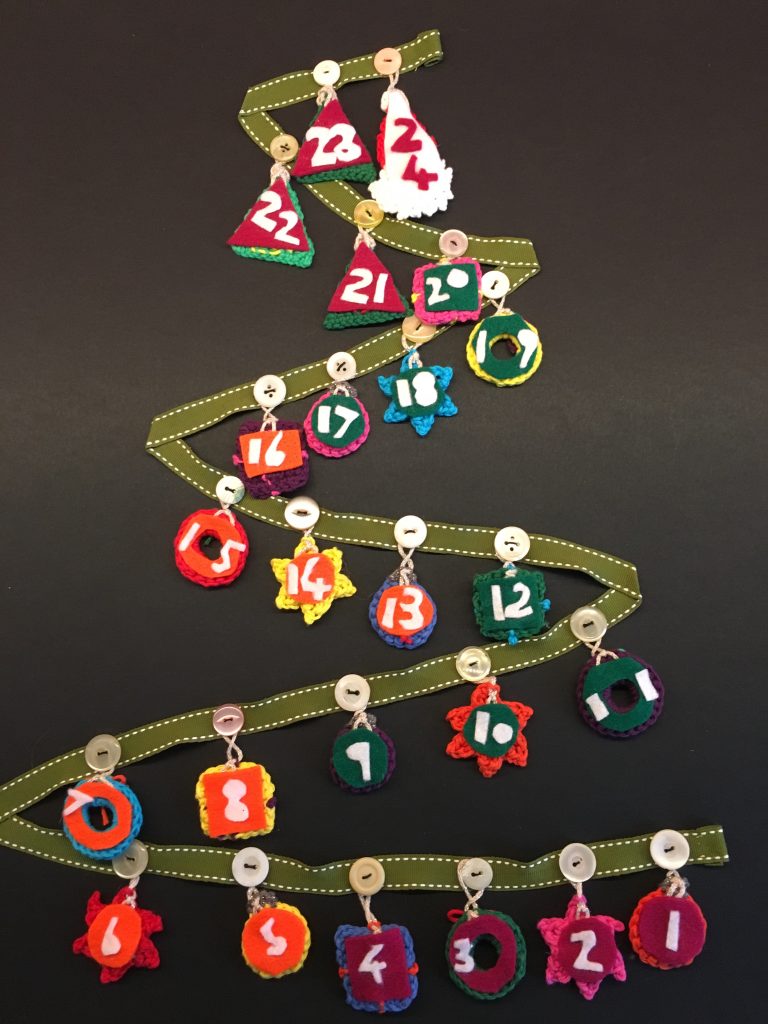
Cut out circles/squares/triangles in felt to fit back of individual motifs.
Cut out numbers 1-24 in felt small enough to fit on the felt motif backings.
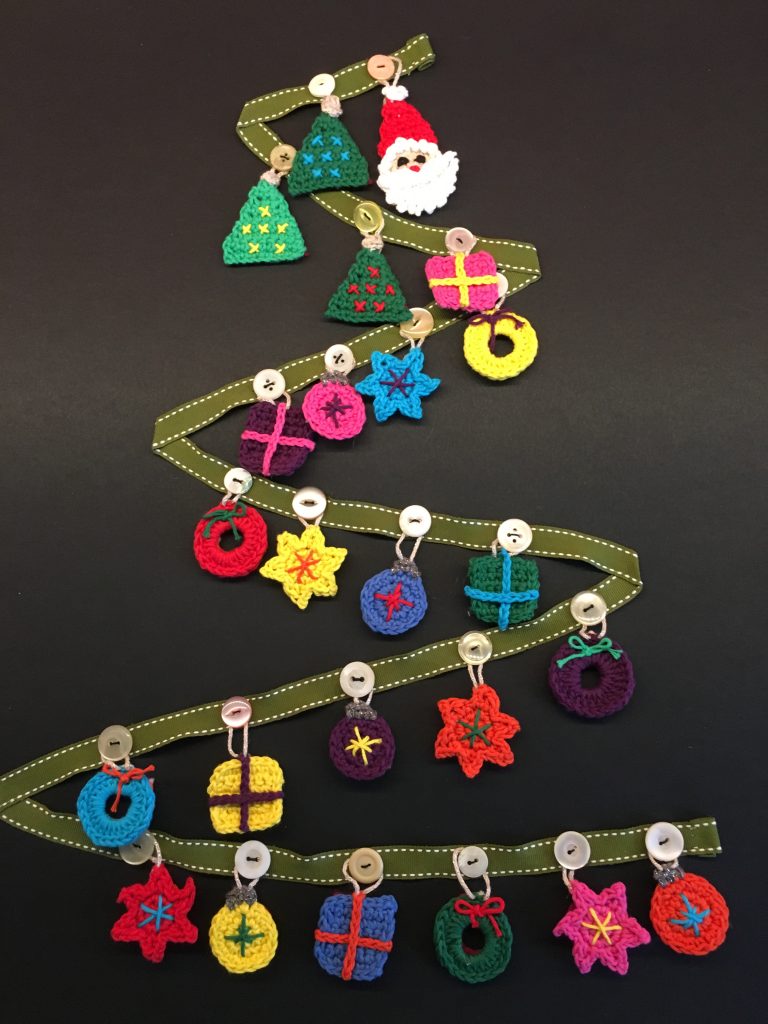
Arrange shapes so that they run in sequence (I used bauble, star, wreath, parcel) so that you don’t end up with two of the same little motifs next to each other. Stick the numbers on in sequence with PVA glue, with 21, 22 and 23 on the Christmas trees and 24 on the Santa
Sew a loop using sparkly yarn (or cotton yarn you used for motifs) on the top of each motif. You can knot the thread at the back and then let the ends hang down the back – these will be covered by the felt backing.
Arrange the crocheted motifs in order you’ve decided (ie mine would be bauble, star, parcel, wreath) so that you don’t have two of the same coloured motifs next to each other. Stick the felt backing onto the shapes with PVA glue.
Lay out the ribbon in a zigzag shape to represent a Christmas tree.
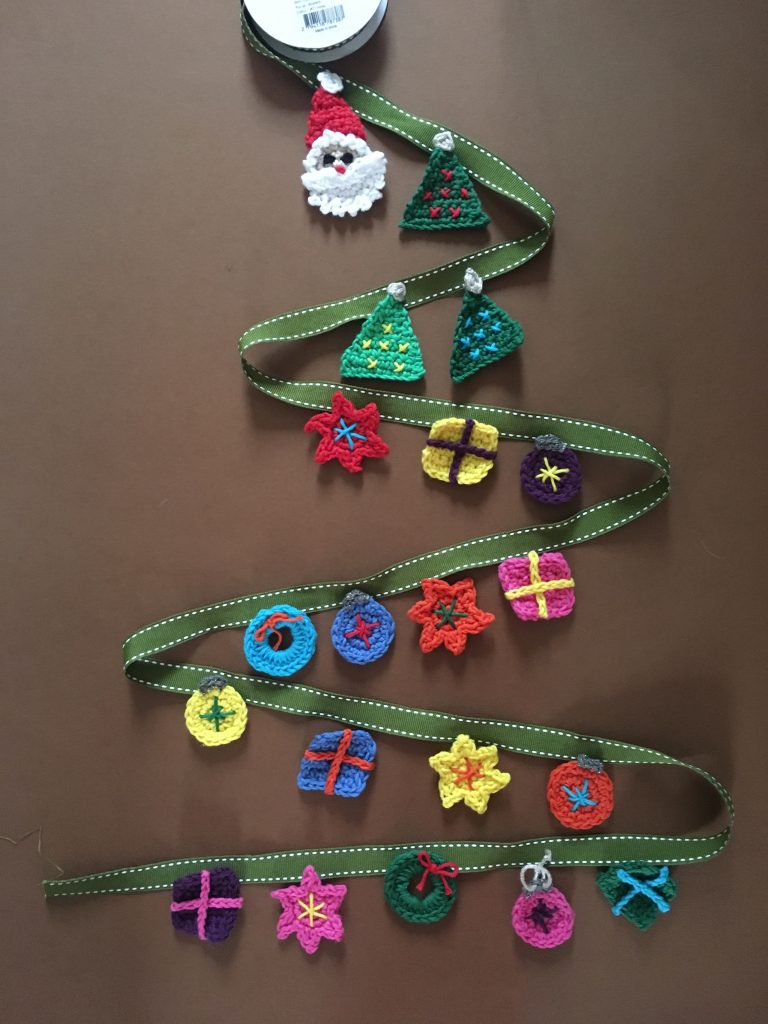
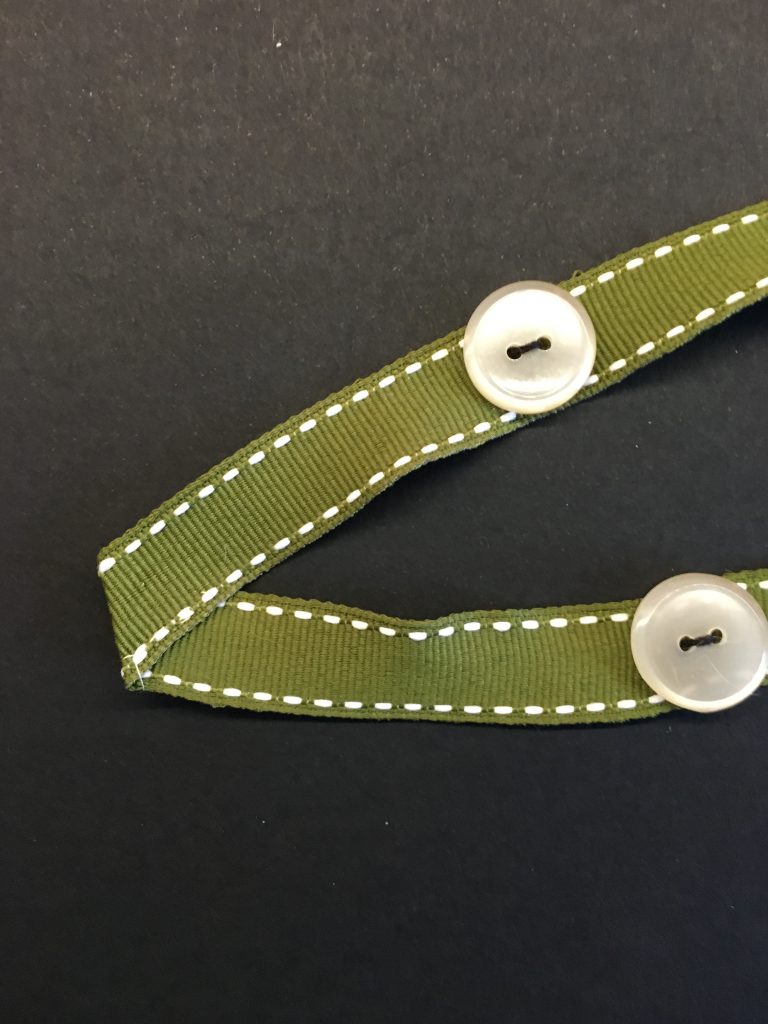
Place motifs along the ribbon and mark the position of the motifs with pins – ensure you fold the ribbon so that it lays flat on each change of direction.
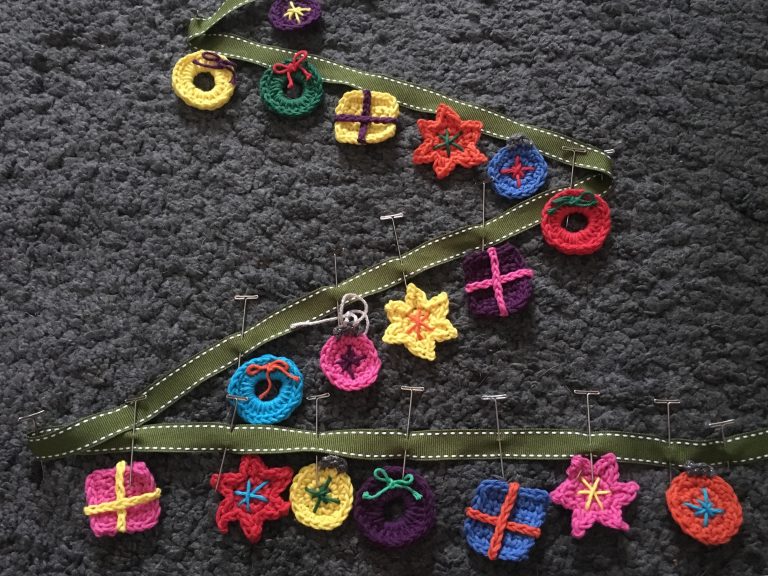
Sew one button onto the ribbon at each pin.
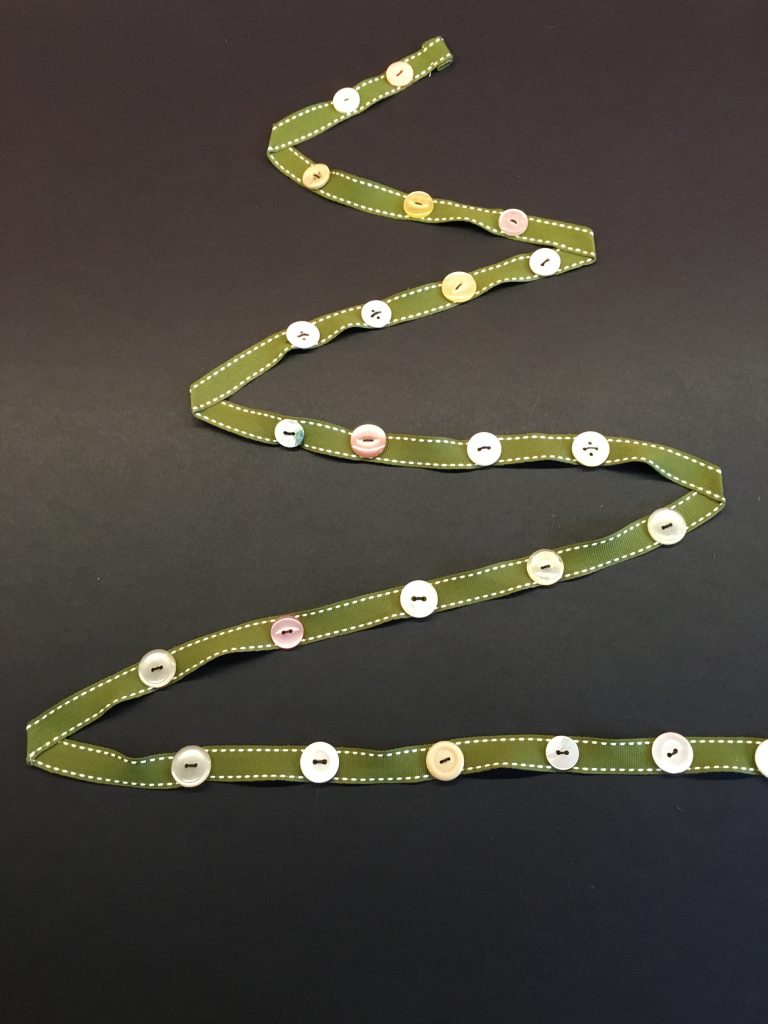
Make sure you secure the point where the ribbon changes direction with a staple or a couple of stitches.
Cut a rectangle of card big enough to fit your ribbon Christmas tree.
Stick the reinforcing wood along the back top edge of the card.
Fix cord to top of card to hang up your calendar.
Stick the ribbon in place to the card.
You can choose to start with no motifs on the tree and add one each day, or add all the motifs with the back facing the front so you can see the number, then turn one round each day.
Ta-da!!! Happy Christmas!
Please note: The pattern is © Annie Windley and is free but may not be republished, or sold. The finished advent calendar is for personal use only, and may not be offered for sale.