Helpful Notes on the Spring Bag CAL
I thought I’d add some (hopefully) helpful notes here, to explain how you can prepare each section of the Spring Bag CAL so that they’re ready for joining together eventually, then tomorrow, Part 2 of the instructions will be here…
Helpful notes 1 – Darning in the ends
As there are lots of colour changes in this pattern, guess what?! That means loads of ENDS!!!!! You’ve probably already noticed if you’ve done the first Part. And each one will need darning in, so that your work won’t unravel as soon as you begin using the bag. Make sure you leave a long enough end when you start each new colour and when you cut off the colour at the end of the round, to make it easier to darn in.
A useful technique
If you can manage it, a useful thing to do is to crochet over each new end as you go along, then at least it’s partially darned in automatically. It only works on rounds where you’re working a number of stitches in the same place though…
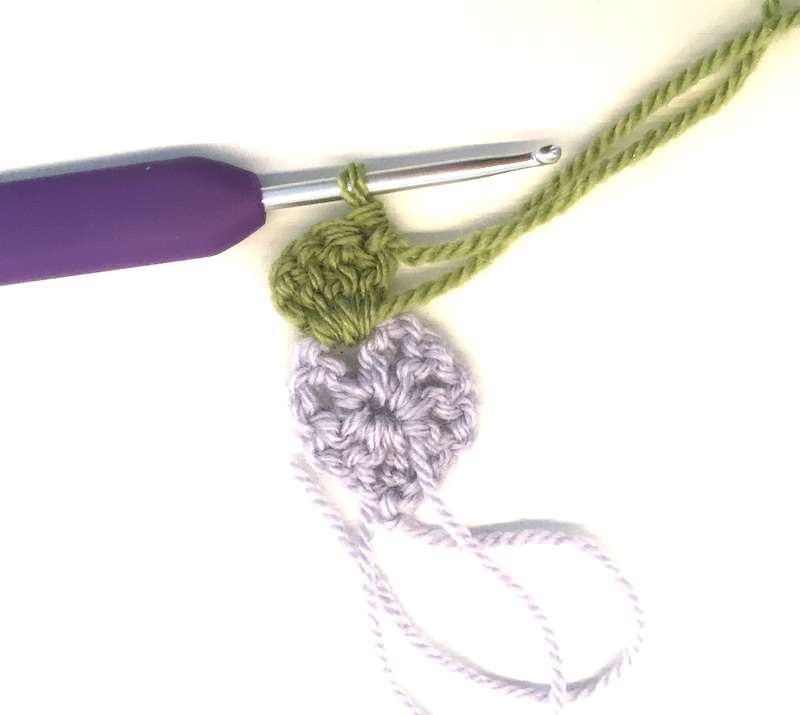
Here’s an example – it’s the second round. I’ve joined in my yarn and done the initial 2 chain stitches. You can see that I’ve placed the green loose end along the top of the lilac stitches on the first round.
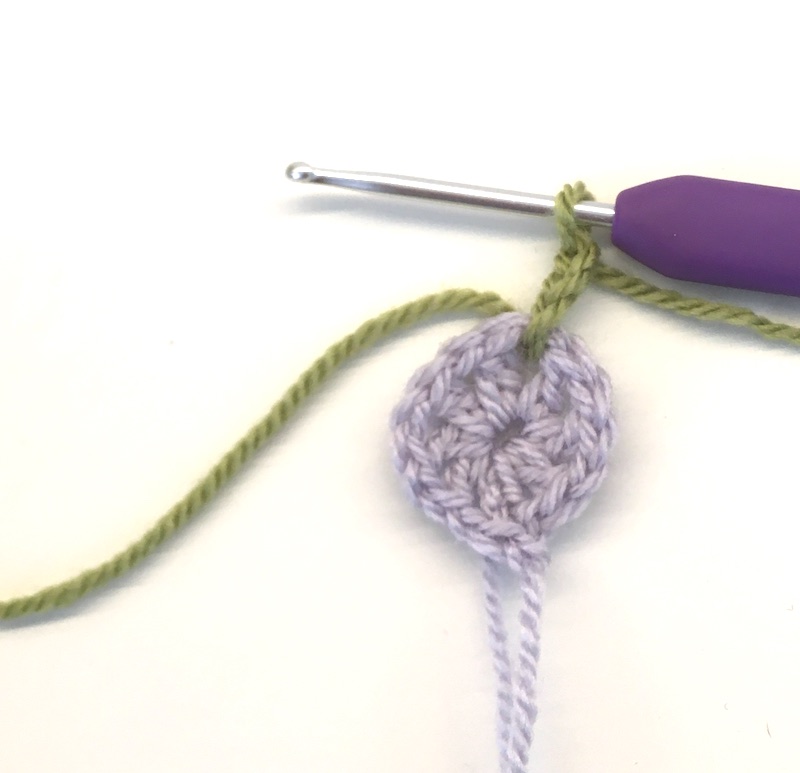
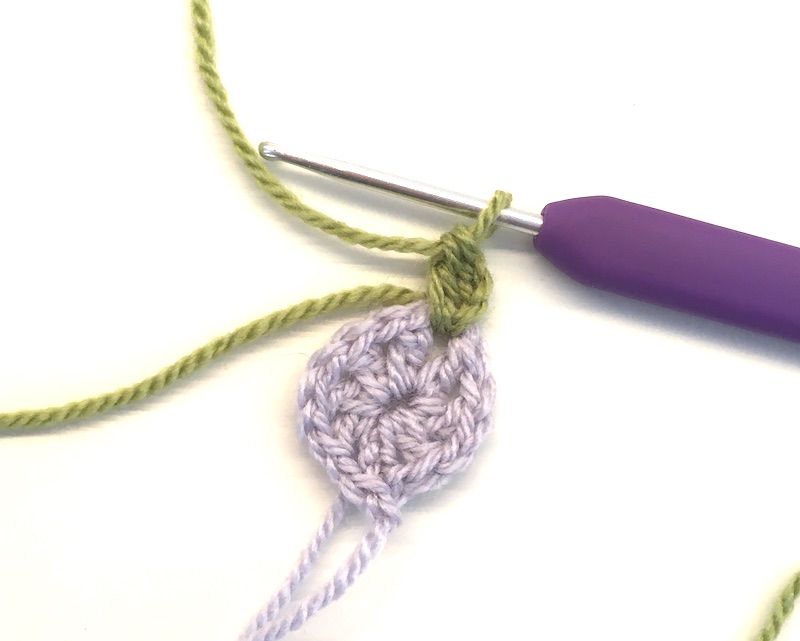
Now, when I insert the hook through the space for the first treble, I’m also putting my hook under that loose end.

Once I finish my treble, it’s secured that end in place.
I do that again with the double treble and treble.
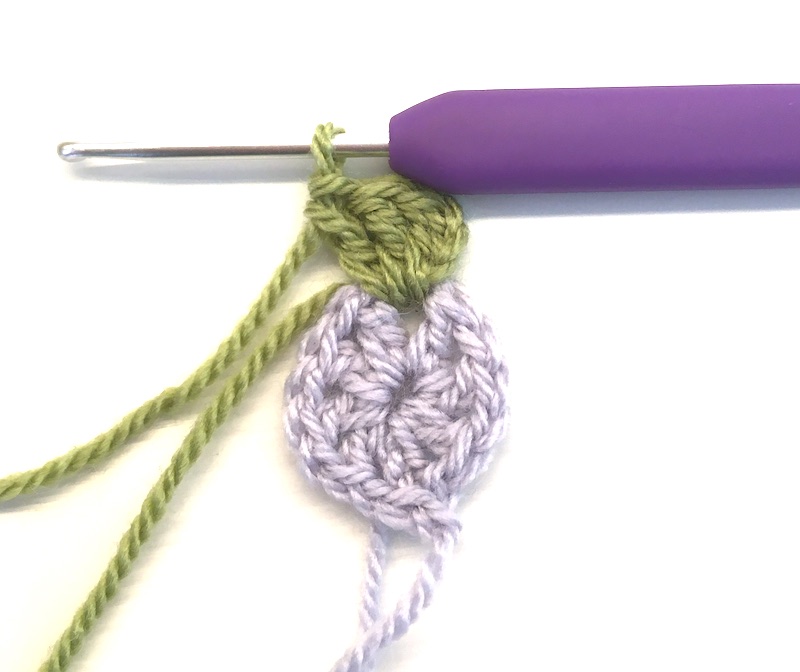
Here’s what it looks like on the back…
Now it’s quite secure, so I can leave the loose end at the back. To be on the safe side, I usually still darn the yarn back the opposite direction once I’ve finished the round, read on for how to do this…
Get your darning-in needle out
Once you’ve finished each piece of this CAL, it’s easier if you darn in any loose ends. That way, when you come to join the pieces together, there won’t be so many ends getting in the way.
You’ll be darning in on the back of the work so it isn’t visible on the front.
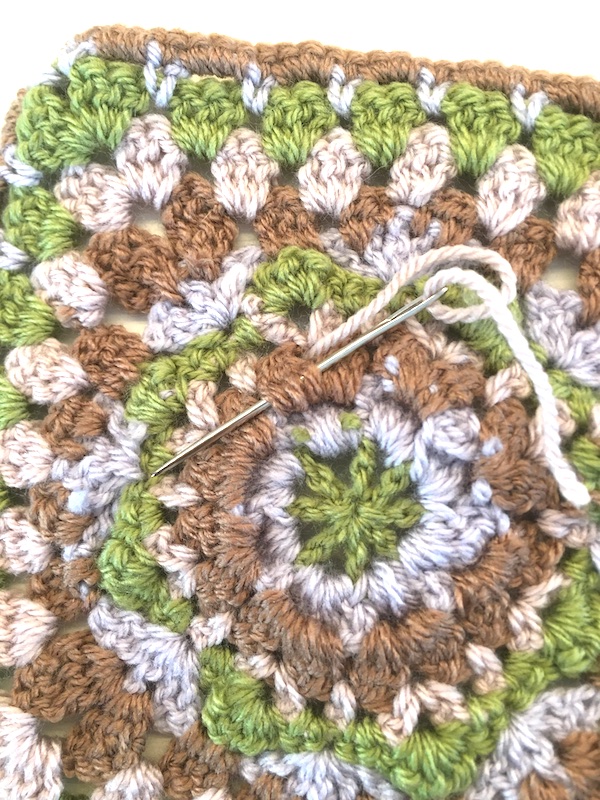
Thread that needle and look for some handy stitches that you can weave the end through… Here I’ve found some brown treble stitches to weave my pink thread through.

I put my needle through the middle of the stitches – here I’ve gone through 3 stitches.
Now I turn back the other way, miss the first stitch and thread the needle through the middle of the stitches going in the opposite direction.

This should be secure now, but you can turn and go back the other way, missing the first stitch if you prefer. Now you can trim the end off completely, safe in the knowledge that it won’t unravel.
Notes 2 – Blocking
Blocking is a step that you do to set the crocheted piece into it’s final shape. So only do this stage once you’ve finished the whole of a main square (that’ll be after Part 3 on Friday). Then block out each completed piece as it’s finished.
Get yourself a pile of towels, or fold one up so you have several layers. Using rustproof dressmaking pins (if you have rustproof ones), place your square on the towel and pin the corners so that piece is exactly a square. Don’t stretch it too much, just ease the corners slightly so that each side is straight. Now you can add a few more pins along each side.

If you have a mist spray bottle (like a plant spray), just lightly spray the square with tepid water. You don’t want to make it soaking wet, just slightly moist. If you don’t have a spray bottle, you can just cover the square with a damp cloth till it’s damp. Now leave the square until it’s completely dry.
Sometimes with acrylic yarn, an extra boost is necessary. I very carefully use my steam iron. VERY IMPORTANT DO NOT TOUCH THE CROCHETED PIECE WITH THE IRON (if you do touch acrylic yarn with a hot iron, it will ‘melt’ or fuse in place, or even stick to your iron which is not what you want at all!). I hover my steam iron a couple of inches above the pinned-out crochet piece and give it a short burst of steam. Once I’ve done this to the whole piece I leave it till it’s completely dry before taking out the pins.
So now you know all about the finishing touches, you’re ready for the next few parts of the CAL.