• All about me
  • Blog
  • Favourite links to blogs, places and people
  • Features and Interviews
    • An interview with Dee Hardwicke
    • Knitwear designer Martin Storey – an interview
    • Louisa Harding, knitwear designer talks to Annie Windley
  • How to guides
    • 1 Making a slip knot
    • 2 Cast on – a step-by-step guide
    • 3 Knit stitch – a step-by-step guide
    • 4 Purl stitch – a step-by-step guide
    • 5 Cast off – a step-by-step guide
    • 6 Making a chain stitch
    • 7 Making a double crochet stitch
    • 8 Making a treble crochet stitch
    • How to make a Basic Granny Square
    • Joining granny squares
  • Lessons in Thanet and North London
    • Crochet projects
    • Now We’re Knitting! (beginners)
  • Patterns
    • Annie’s Advent Calendar: Christmas CAL 2018
    • Carrot & pea bunting pattern
    • Fallen Leaves Autumn Cowl
    • Floral granny squares & little flowers pattern
    • Little crochet heart pattern
    • Little Tea Cosy pattern
    • Waffle Blanket
  • Shop
  • Spring Granny-Square Bag CAL pattern
Picking Up Stitches

Knitting, crochet, cross stitch and more - the wonderful world of working with wool

inspiration

Part 2 of the Spring Crochet-along – next few rounds

April 28, 2020 by Annie Leave a Comment

Part 2 coming up

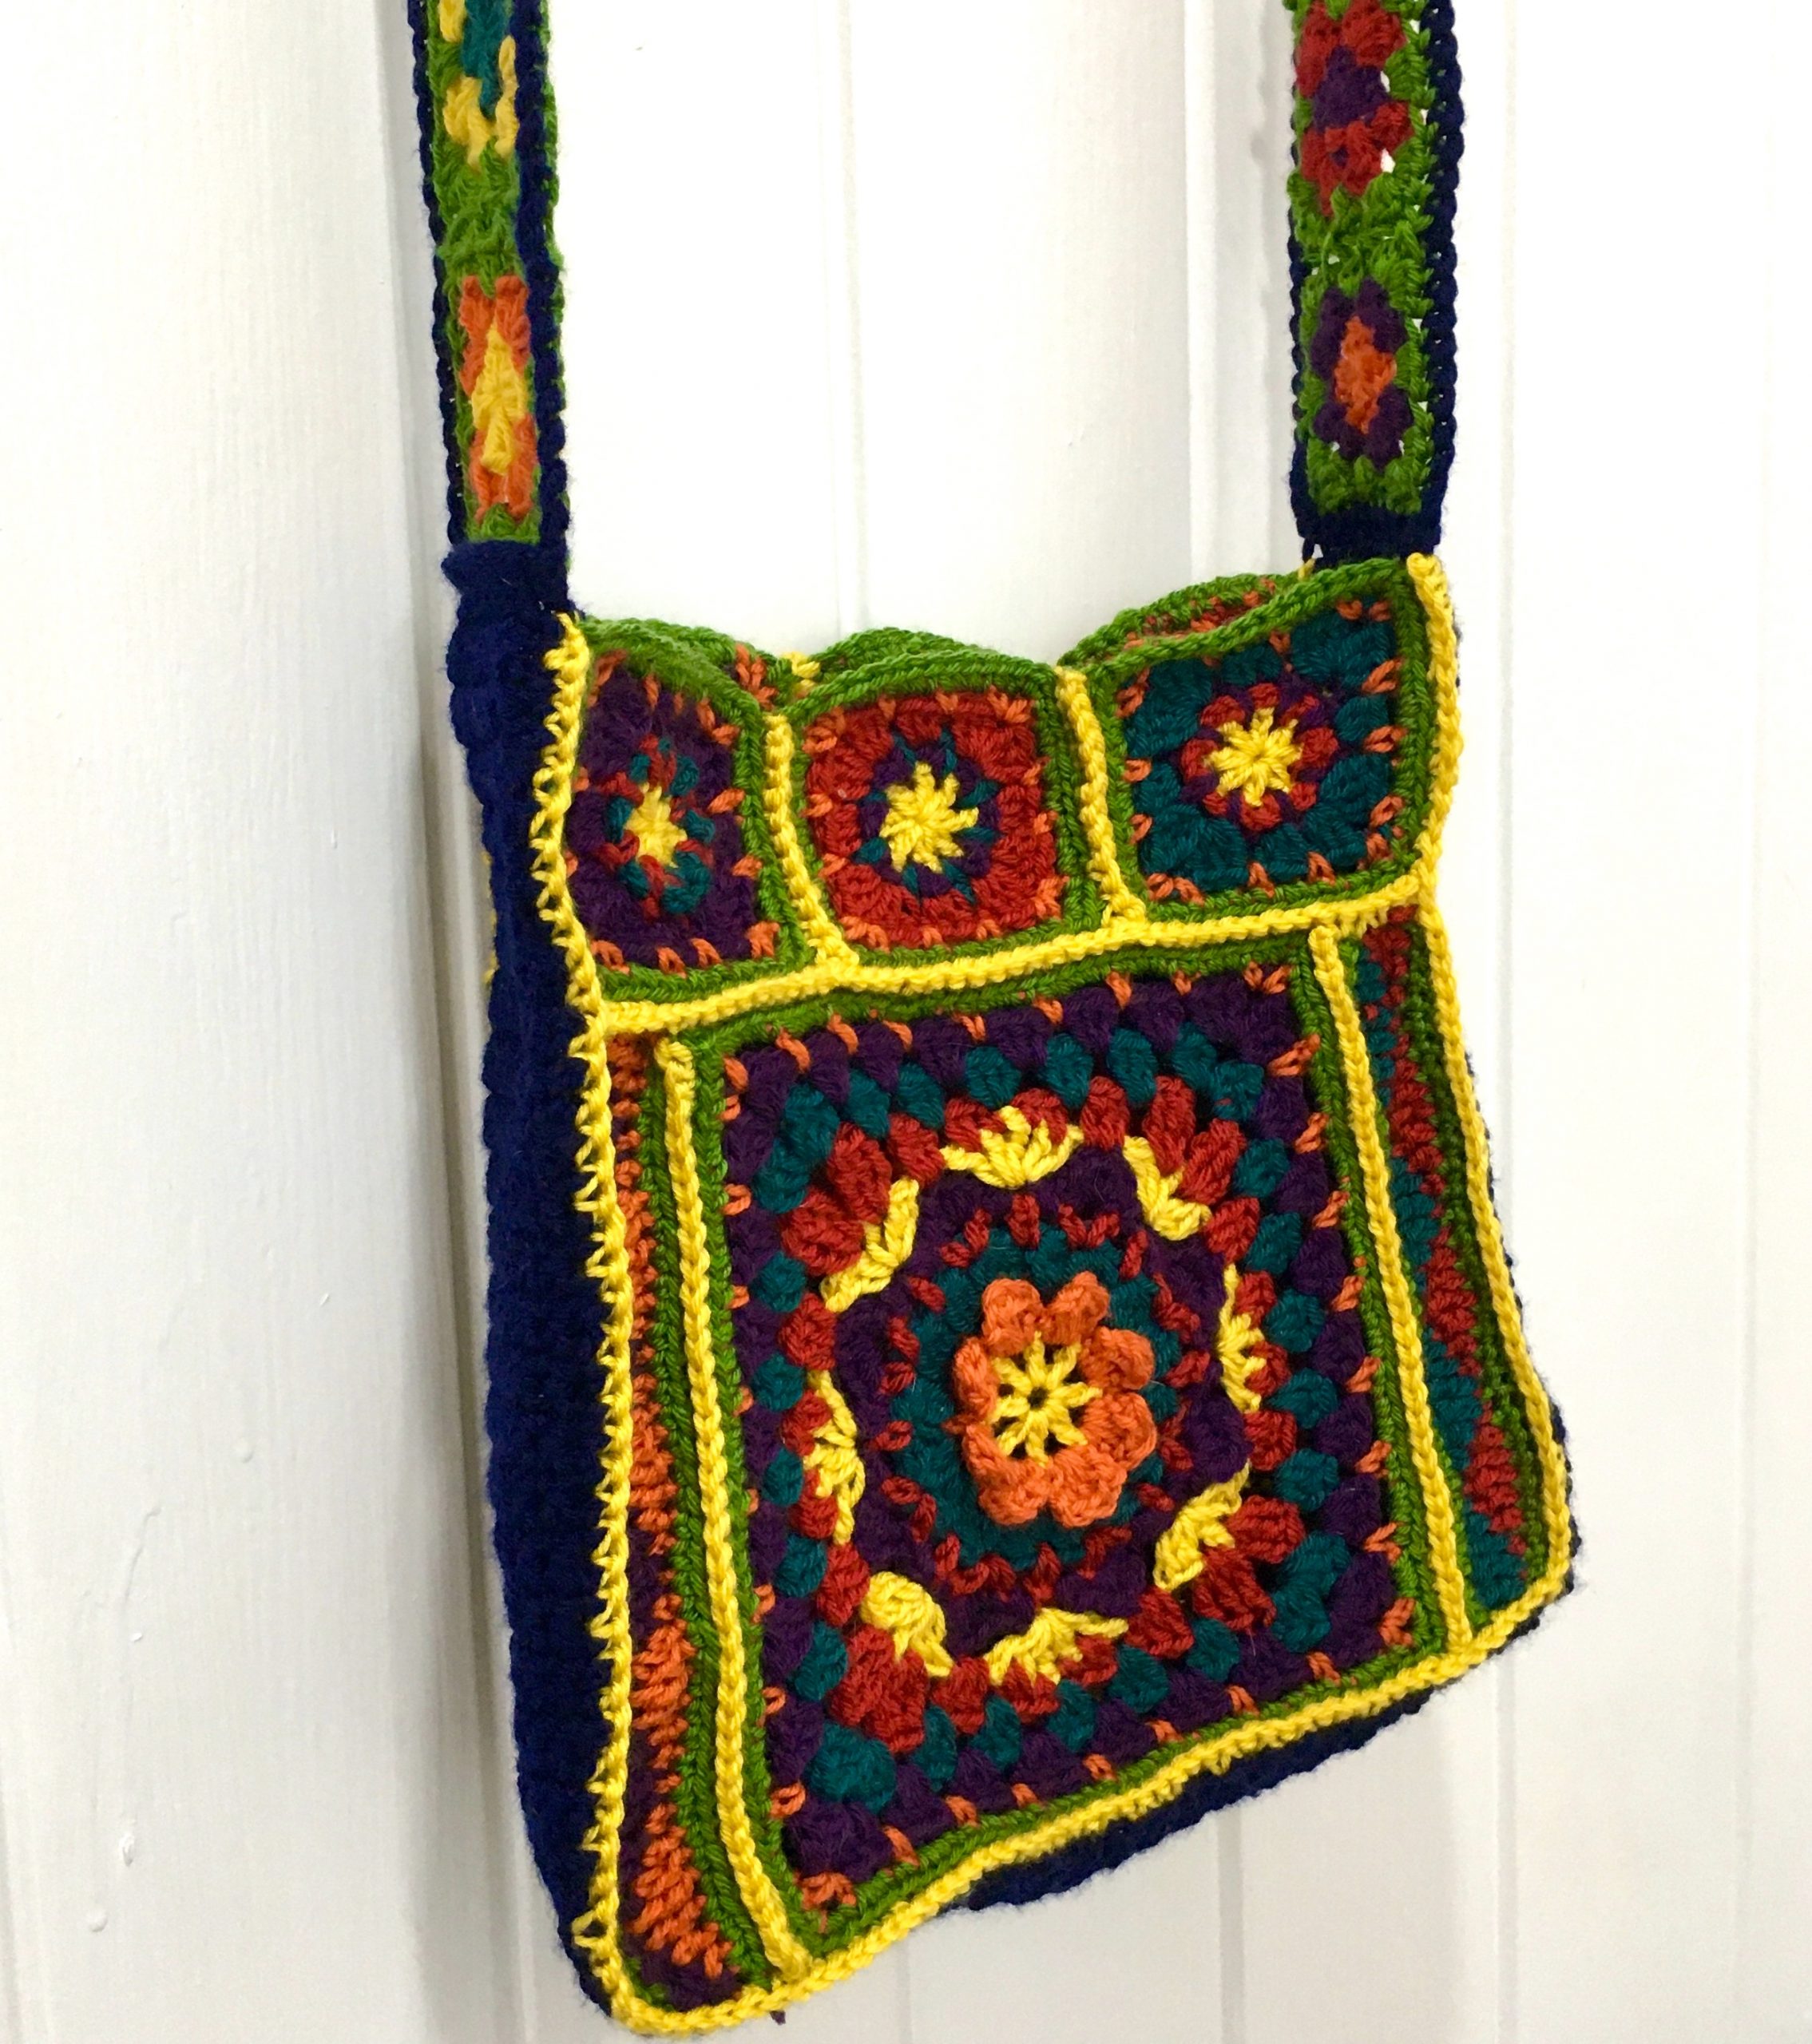
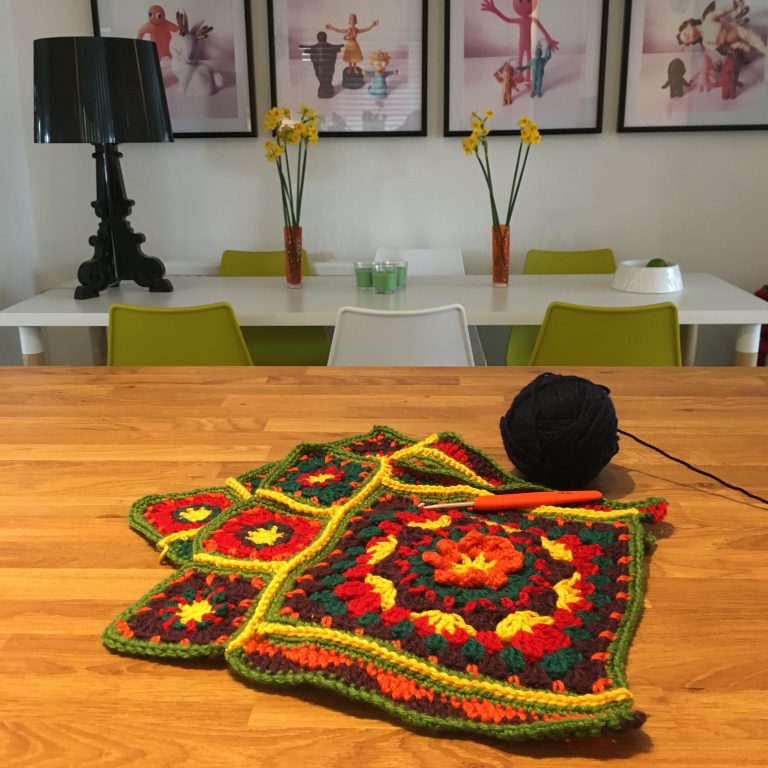
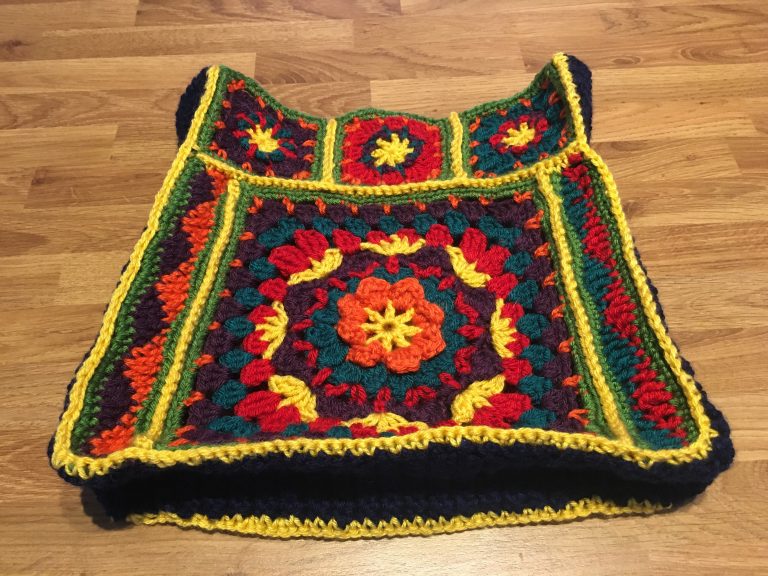
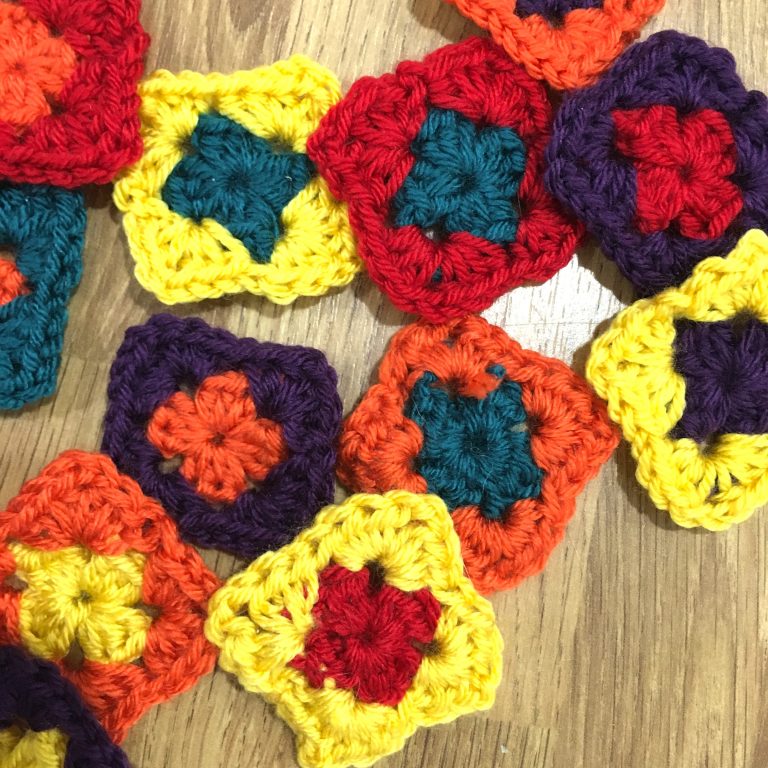
It’s Part 2 of the crochet-along. Hopefully, you’ll all have finished Rounds 1-6 on at least one of the main squares (you need two of these to make the bag). Don’t forget you can use any colour on any round, so the two squares don’t actually have to match. If you haven’t made Part 1 (the main squares rows 1-6) yet, head here to catch up. And if you prefer to just follow standard written instructions, head here instead.

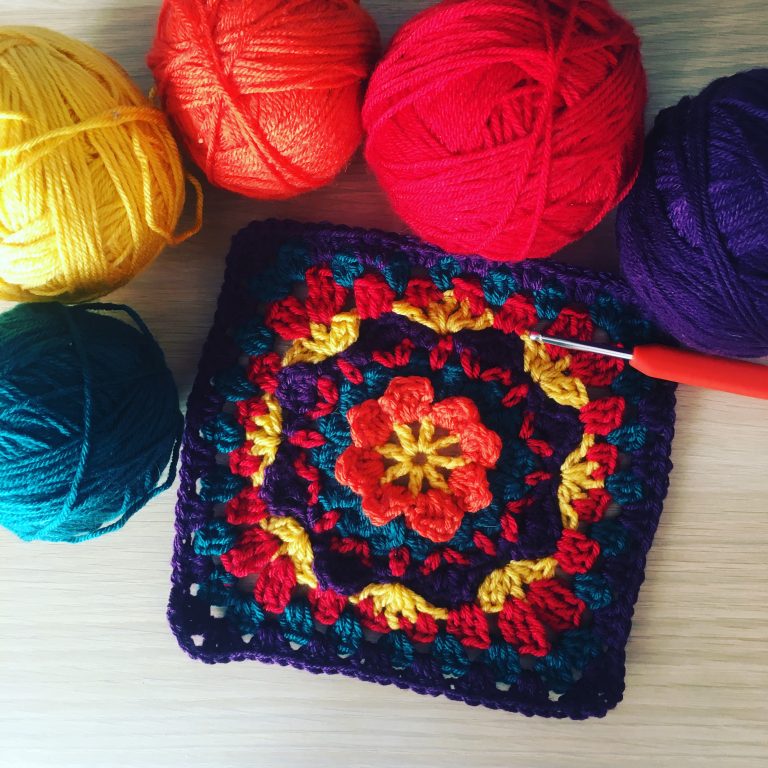
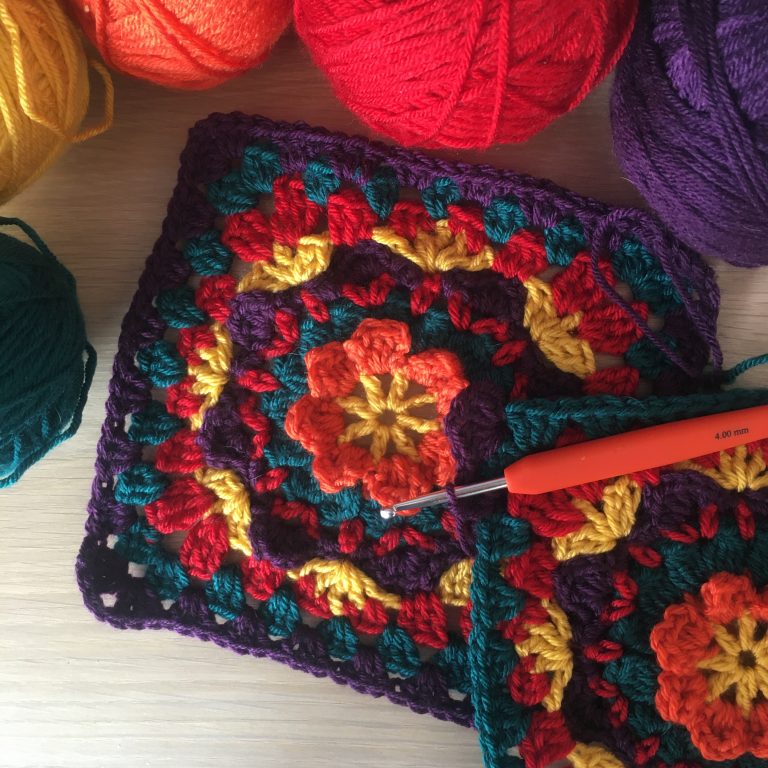
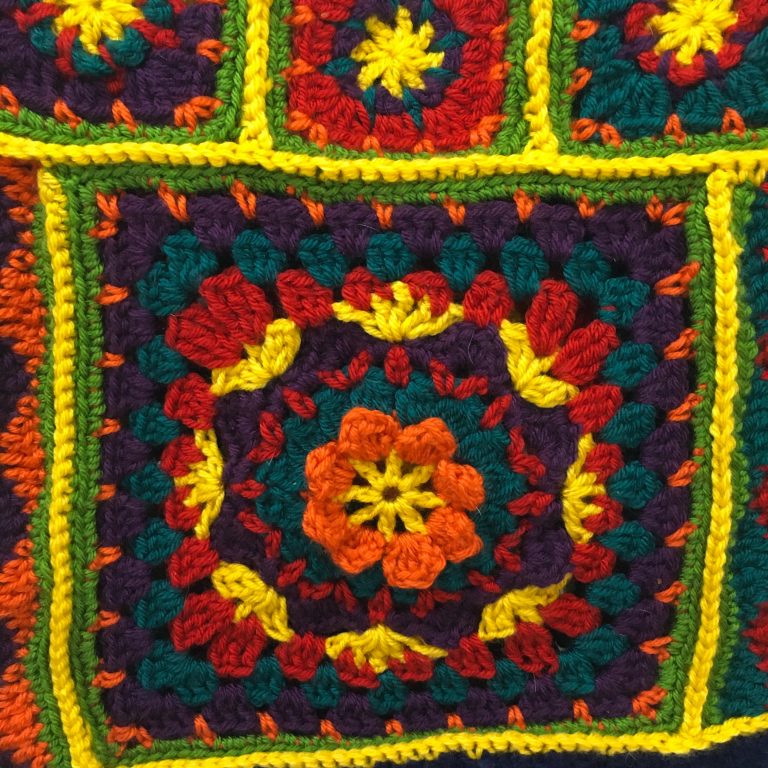
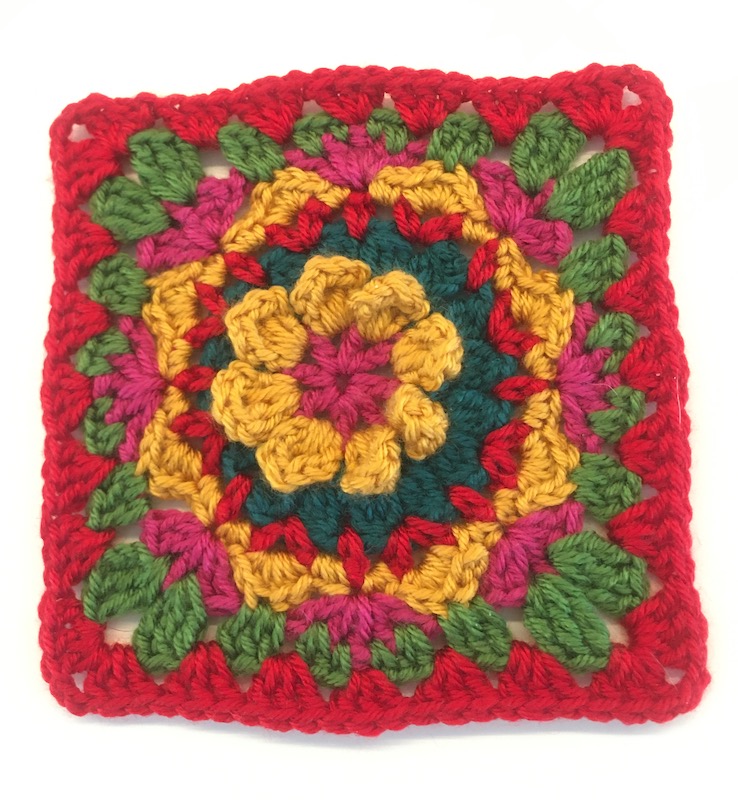
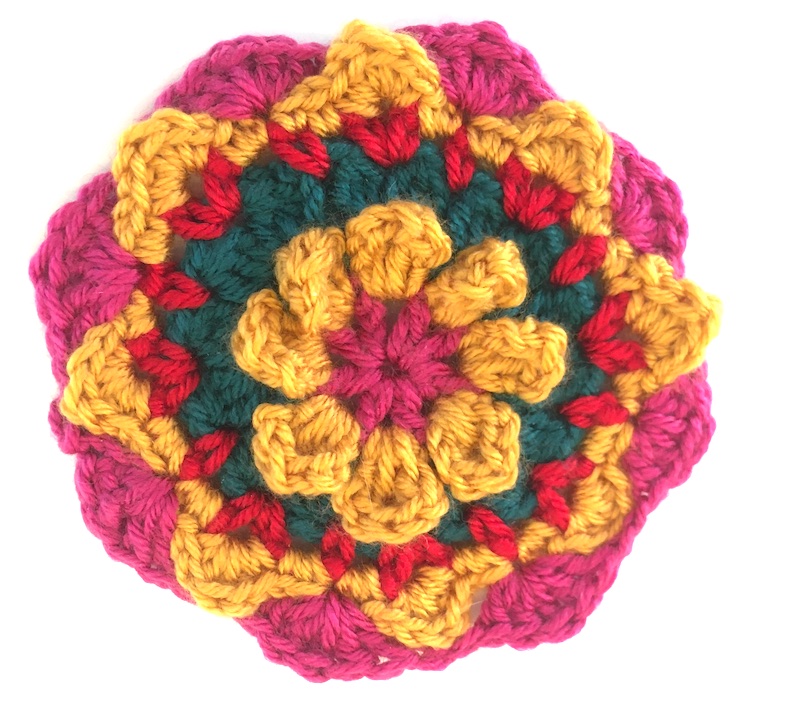
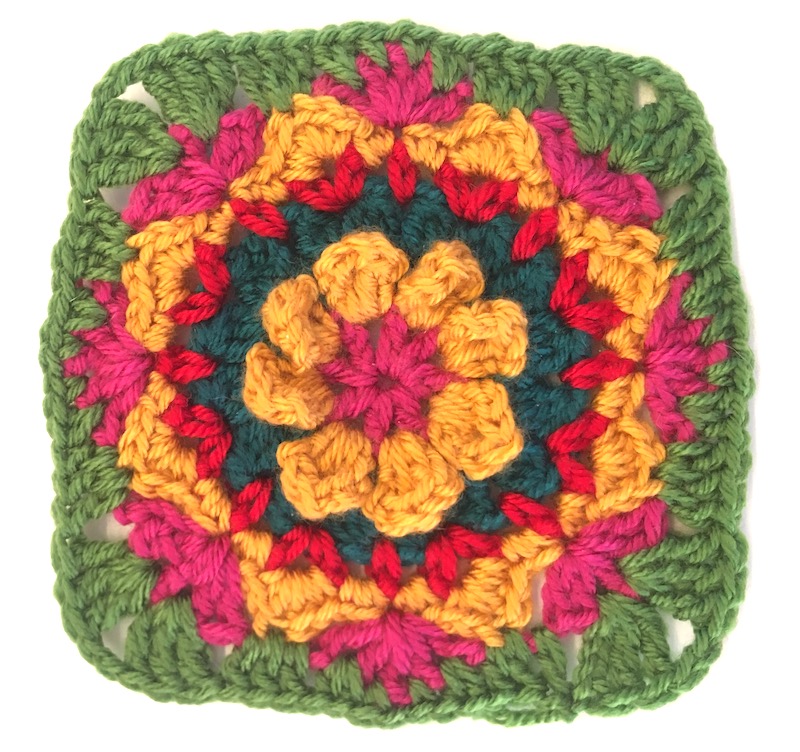
We’re going to do three rounds in this part, which turns your circle into a square – magic! By the time you finish these three rounds, your crochet piece should look like this… It won’t necessarily look square yet – don’t worry that’ll happen right at the end when all the pieces are blocked out…

Off we go…

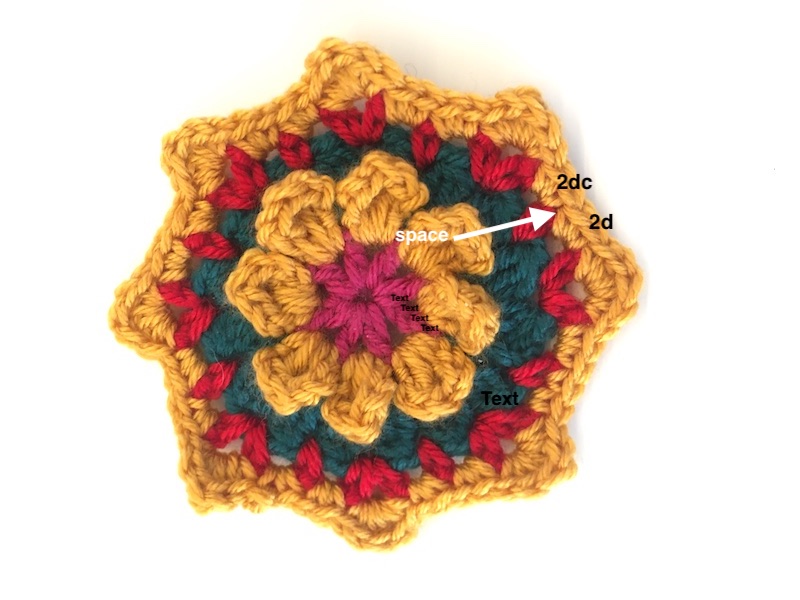
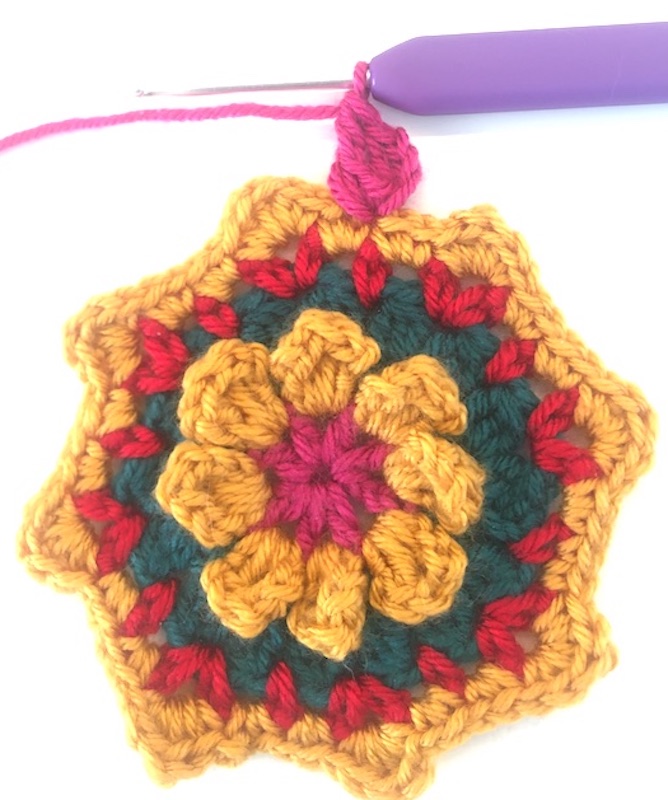
For Round 7, first take a look and you will see that there are 8 groups of stitches which form points with groups of double crochet stitches in between. To start with look at the double crochet stitches, and find a space between 2 groups of 2 dc…

Where to start on part 2 of the crochet-along

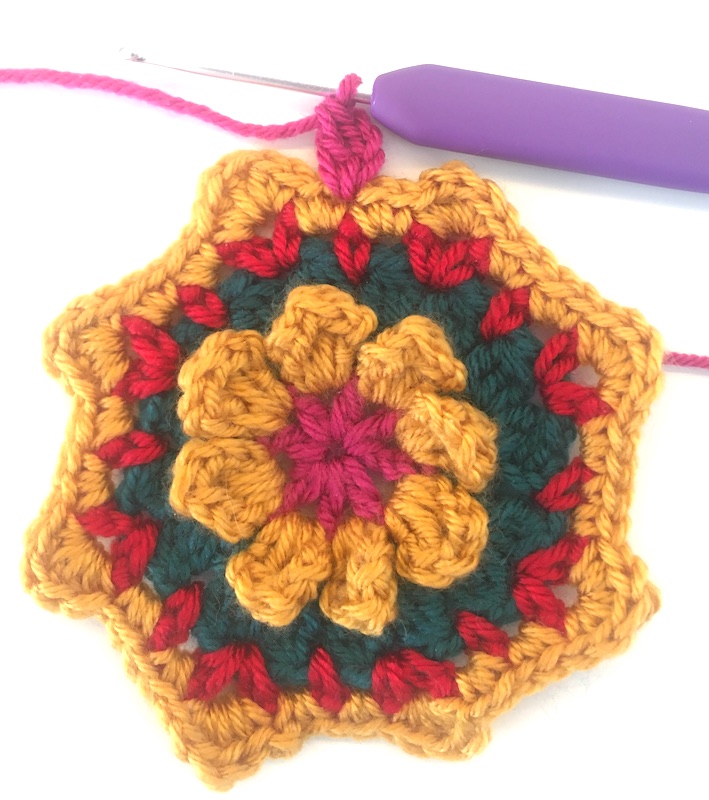
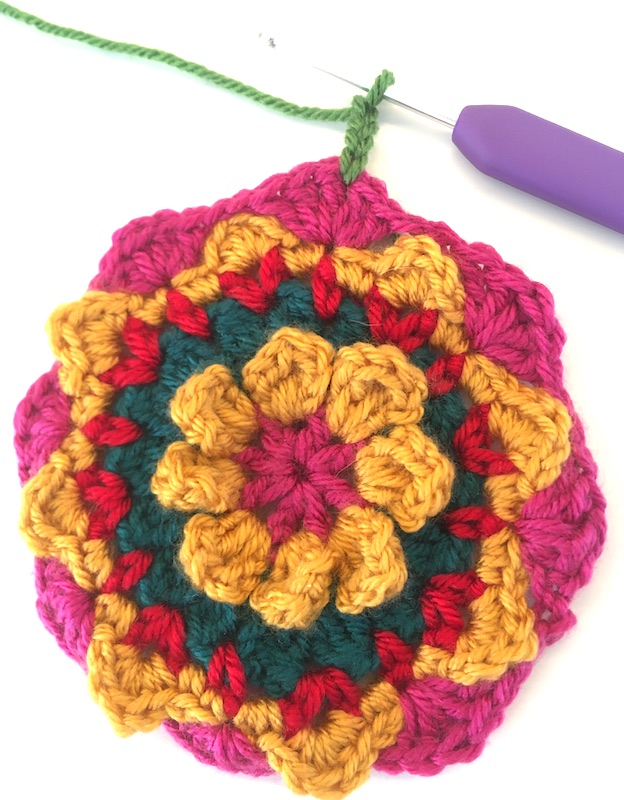
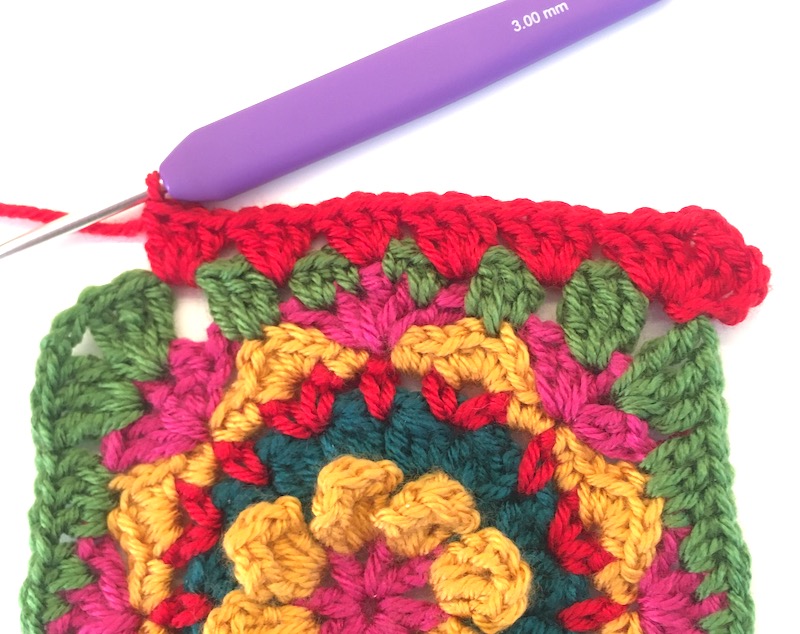
Round 7: Join yarn in a space between two pairs of double crochet stitches – in the picture below I’m working in a space at the top – and work 3 chain stitches [counts as a treble here],

then in the same space a treble, a double treble, and 2 more trebles.

Here’s the treble…
Then a double treble…
Then 2 more trebles

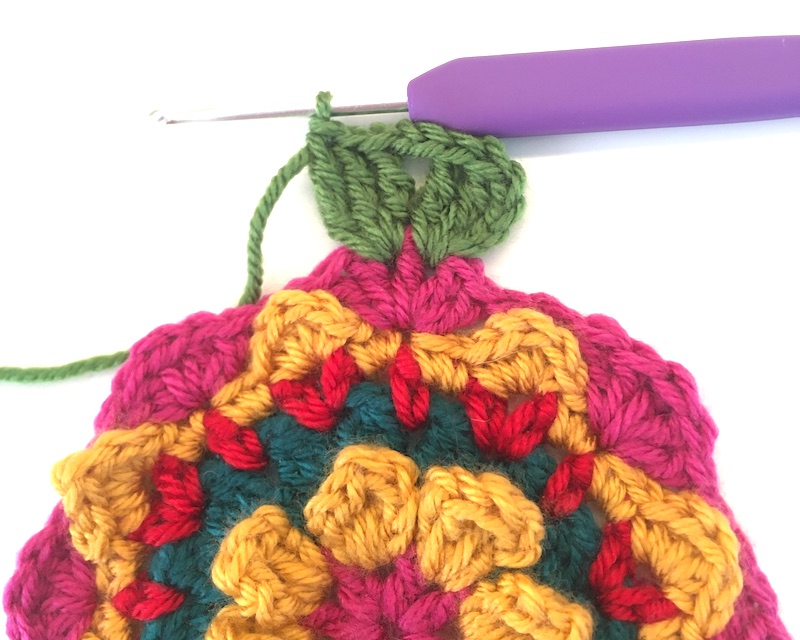
Now a bit to repeat 7 times – each makes a row of chains plus a ‘fan’: work 2 chain stitches to sit behind the pointy group of stitches (like you did on Round 3),

2 chain behind the pointy bit

and in the next space between pairs of double crochets work 2 trebles, a double treble and 2 trebles.

Here’s a pink ‘fan’ again
This is what it looks like at the back

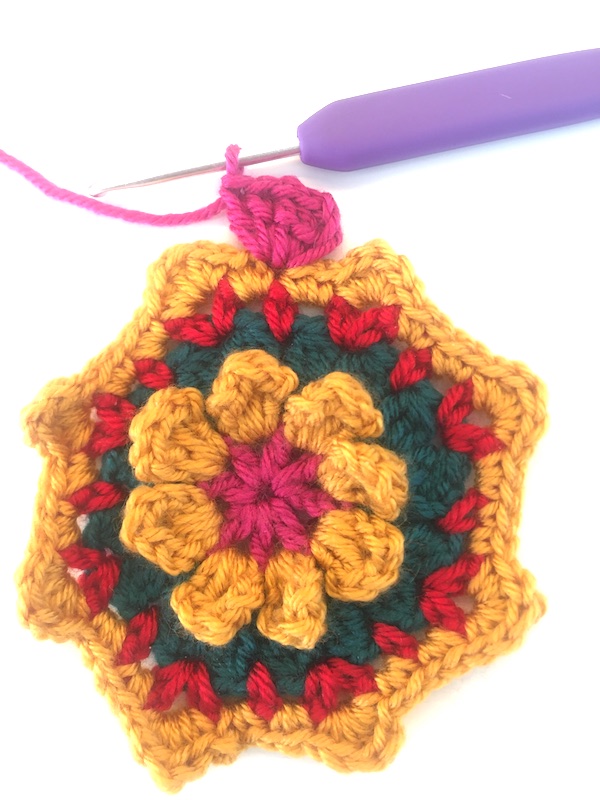
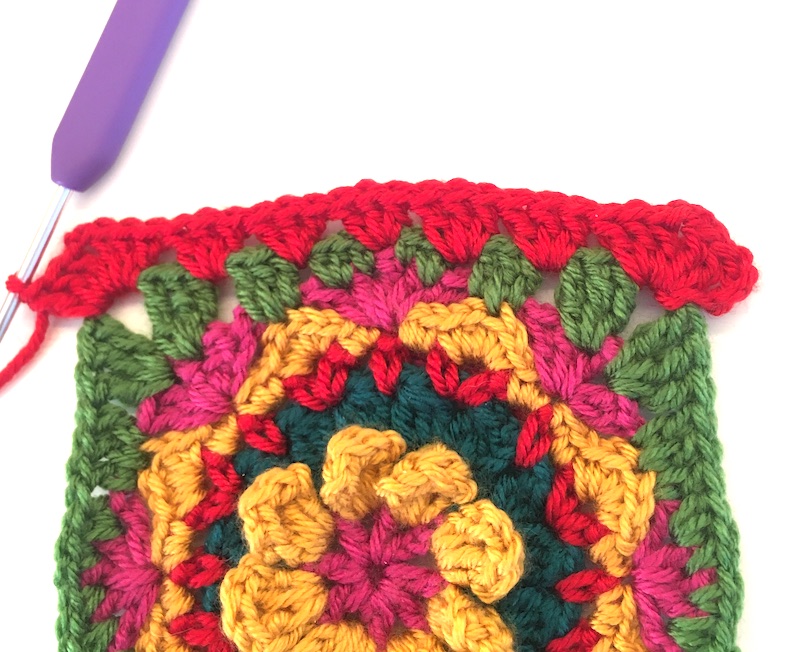
Once you’ve done all that seven times, work 2 more chain stitches and join with a slip stitch to the 3rd of the chains you did at the beginning. Fasten off.

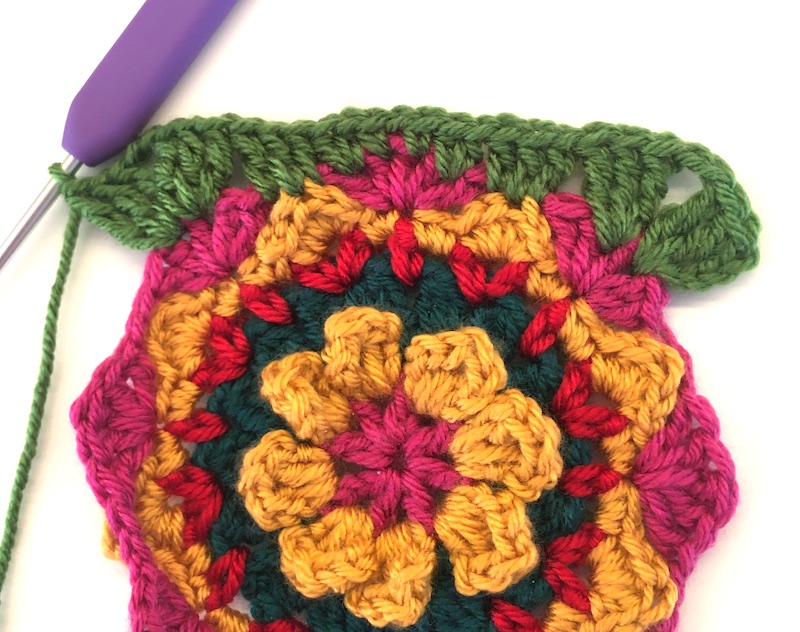
Round 8 is a bit more complicated, but, don’t worry, I’ll break it down into sections. This is the round where the circle begins to turn into a square.

First, you need to look at a ‘fan’. Find the double treble in the middle of one of the fans. You will start in the space just before the double treble, next to one of the trebles. Found it? Then you’re good to go for Round 8.

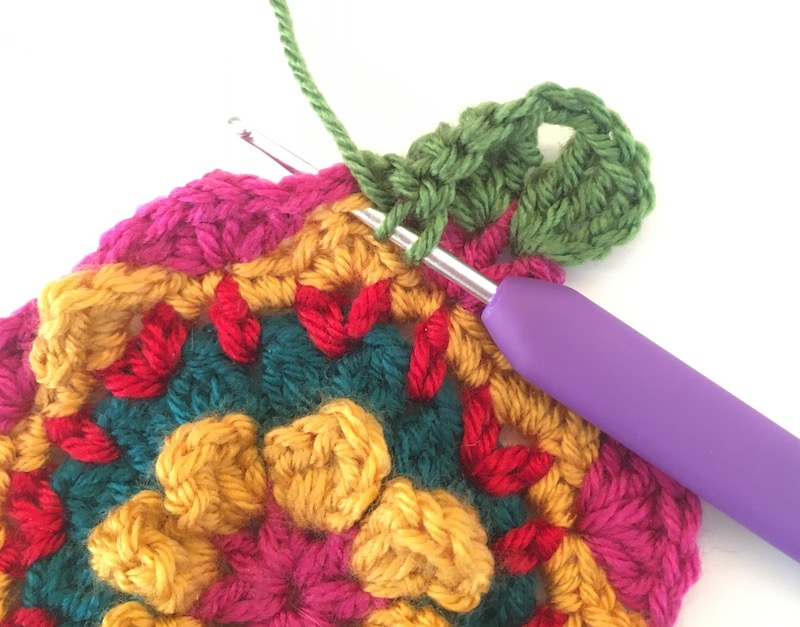
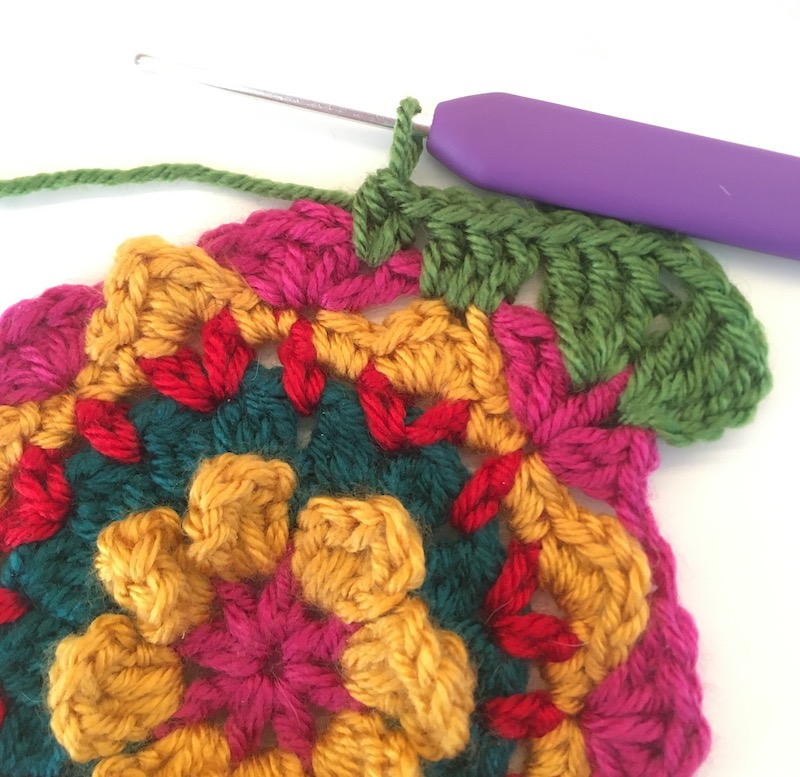
Round 8: First, we’re going to make a corner. Join the yarn in the space before a double treble on a ‘fan’ and work 4 chain stitches [this counts as a double treble here],

4ch counting as a dtr

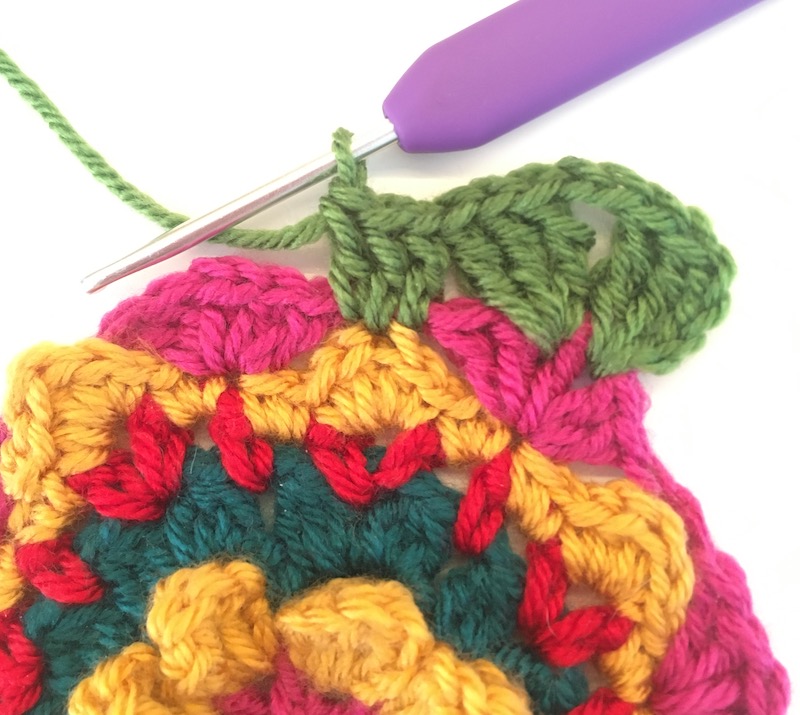
now work 2 double trebles in the same space, work 2 chain stitches then work 3 double trebles in next space [between the double treble and the next treble]. This will look like this and forms a corner of the square…

This is the finished corner

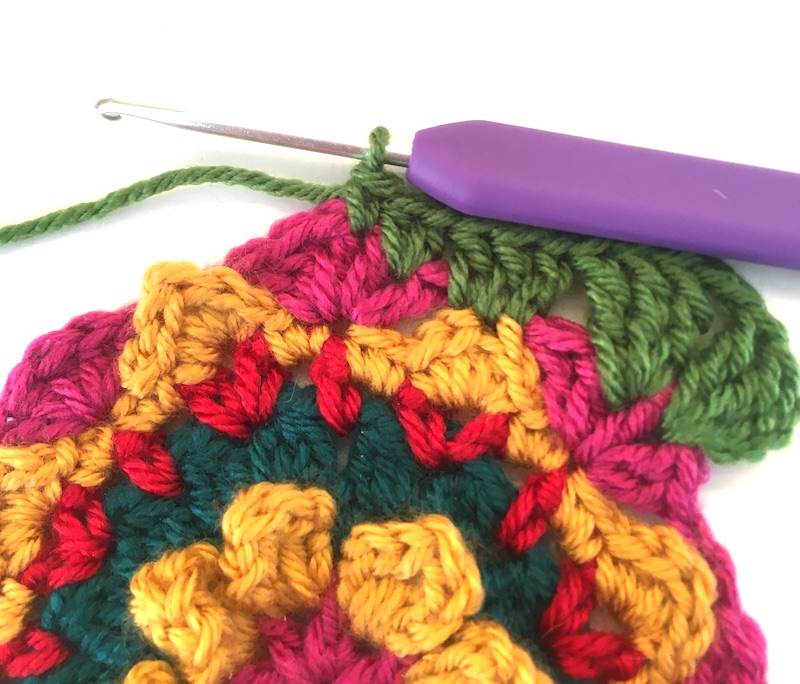
*Next on to one of the chain stitch sections behind the next point – this is where Round 8 attaches to Round 7. [Make sure you’ve noticed that asterisk as you’re going to have to come back to this point a bit further on.] First work a treble in 3-chain space,

The first treble just goes through the chain space

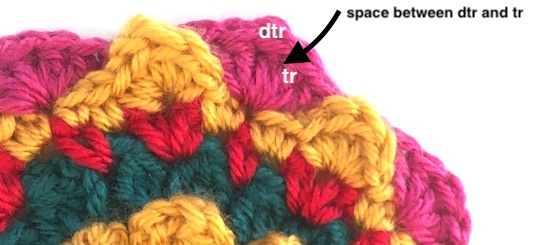
then for the next treble, you need to work it through the treble in the middle of point on round 6 – however, instead of inserting your hook through both loops of the treble like you normally would, just put it through the back loop only – then at the same time insert it through the 3-chain space – this is what links the two rounds together,

Put hook through back loop of the yellow treble and through the pink chain space
Here you can see how the stitch joins the two rounds together

Finally on this section, work a treble just through the 3-chain space.

The third treble just through the chain space

Next onto a bit that’ll form the side of the square. You’re going to be working through spaces between stitches on the ‘fan’ again. First work 2 half trebles in the space between first two stitches of the ‘fan’, a double crochet in next space [ie between a treble and the double treble], then 1chain, a double crochet in next space, 2 half trebles in final space on the fan. That’s the side done.

2htr in the first space
A dc in the next space
A chain stitch in the middle then a dc in the next space
Then 2 htr in the next space

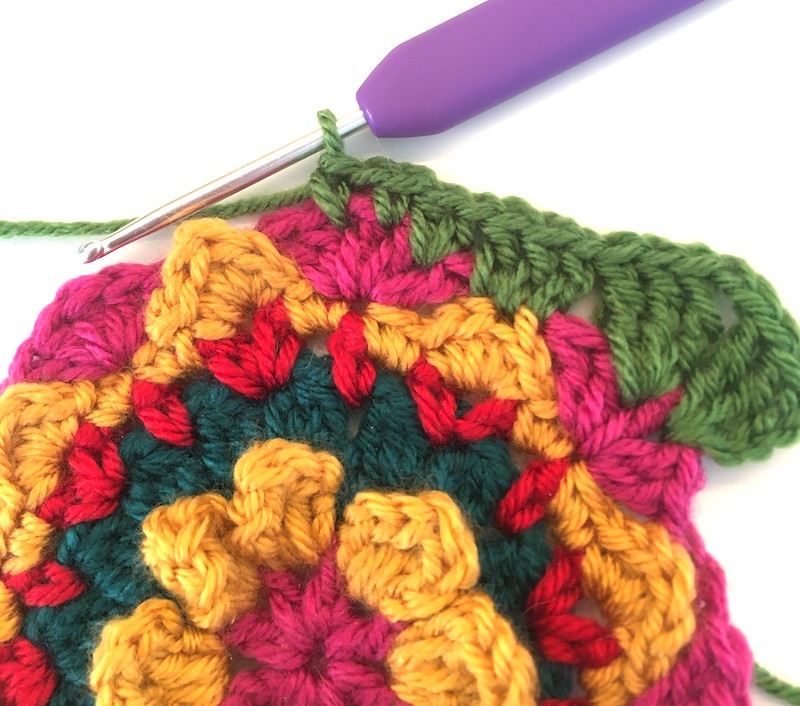
Now work the trebles in the chain space behind the point as before, remembering to link the middle treble.

Now you should be back to the corner, so you’ll work 3 double trebles in the space between the treble and double treble on the fan, then 2 chain stitches, then 3 double trebles in the space between the double treble and the treble.

Here another set of trebles and another corner is complete

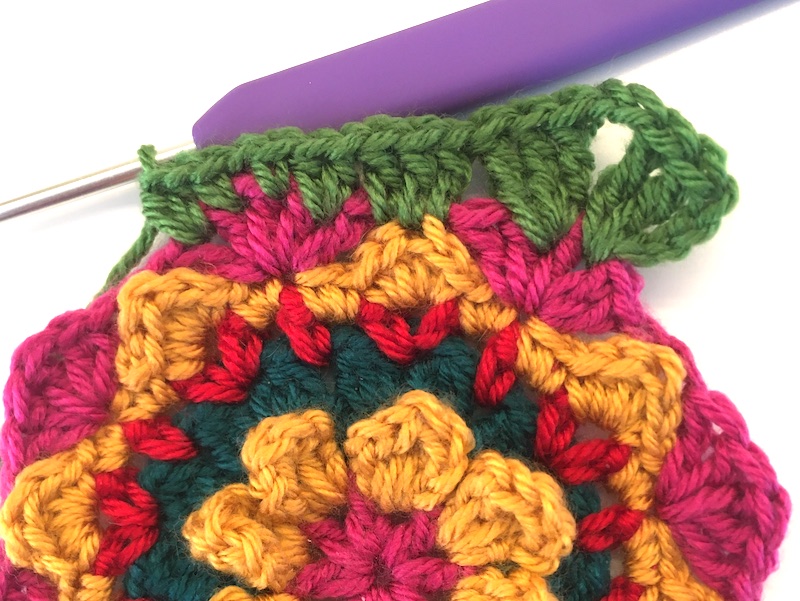
You’ve completed two corners and one side, so now repeat the whole part again from where I’ve put an asterisk * twice more and you should have all four corners. Now just work another linking section (ie tr, tr through stitch and loop, tr) , a side section (ie 2htr, dc, 1ch,dc, 2htr) and another linking section (ie tr, tr through stitch and loop, tr) and finally join with slip stitch to the fourth of the chain stitches you made at the beginning. Fasten off. 

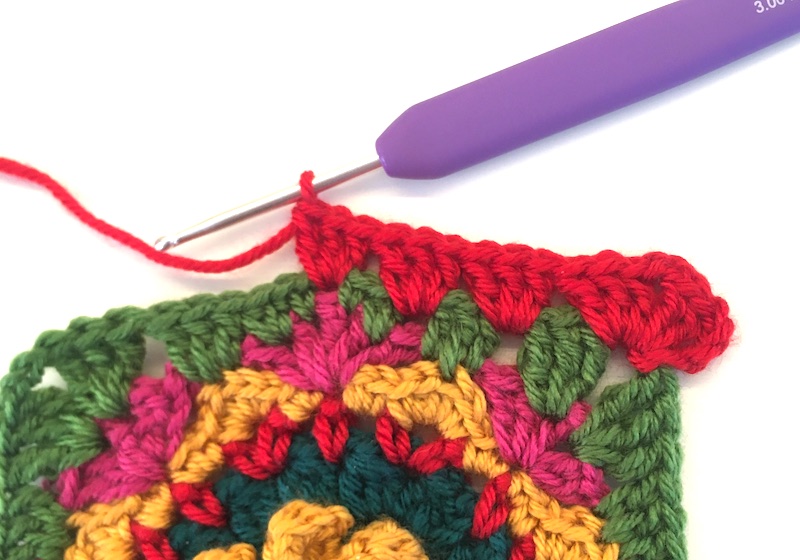
Well done for completing that epic round. You’ve now just one more to go to complete this part of the square. This round consists of groups made up of three treble stitches.

Round 9: You first need to join the yarn in one of the corner spaces and work 3 chain stitches [this counts as a treble], now 2 trebles, 2 chain stitches and 3 trebles – one corner completed.

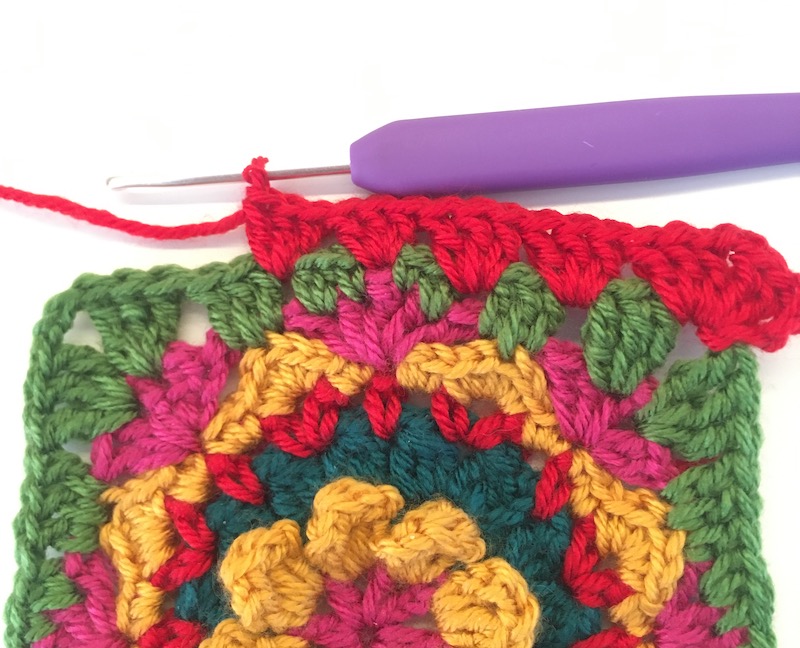
*For the side, you’re going to work 3 trebles in the space before the next 3 trebles, then 3 trebles in the space before the 2 half trebles, 3 trebles in the 1-chain space, 3 trebles in the space before next 3 trebles, 3 trebles in the next space before the 3 double trebles – you’re now back to a corner, where you’ll work into the 2-chain space in the middle with 3 trebles, 2 chain stitches and 3 trebles. This is that bit in pictures…

A corner and 3tr in first sp
Here are the next two groups of 3tr
And another group of trebles
The final group on the side
And another corner

Now you need to head back to the asterisk in this round again and work that side and another corner. Repeat this once more. Now you just have one more side left where you work across with groups of three trebles as before. Join with a slip stitch to the third or the chain stitches you made at the beginning. Fasten off.

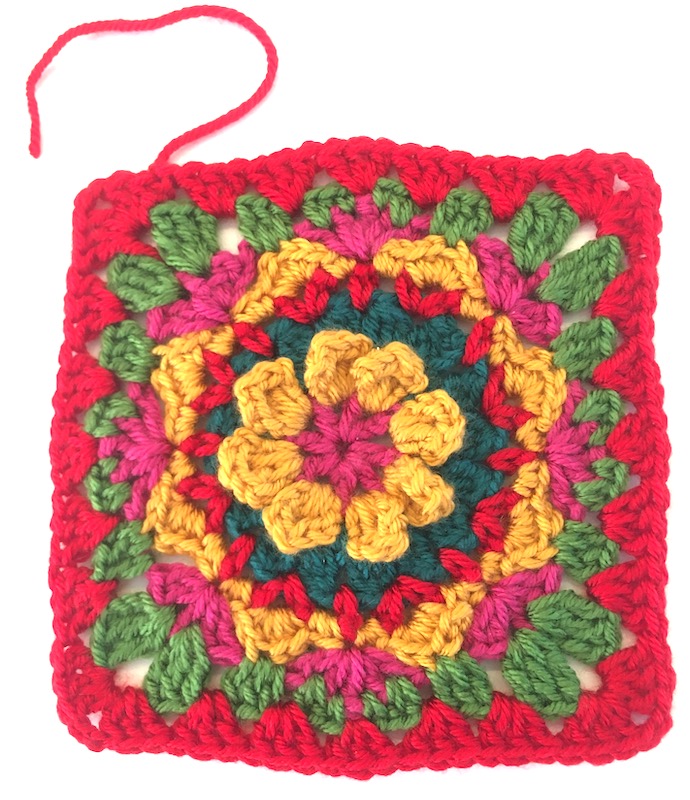
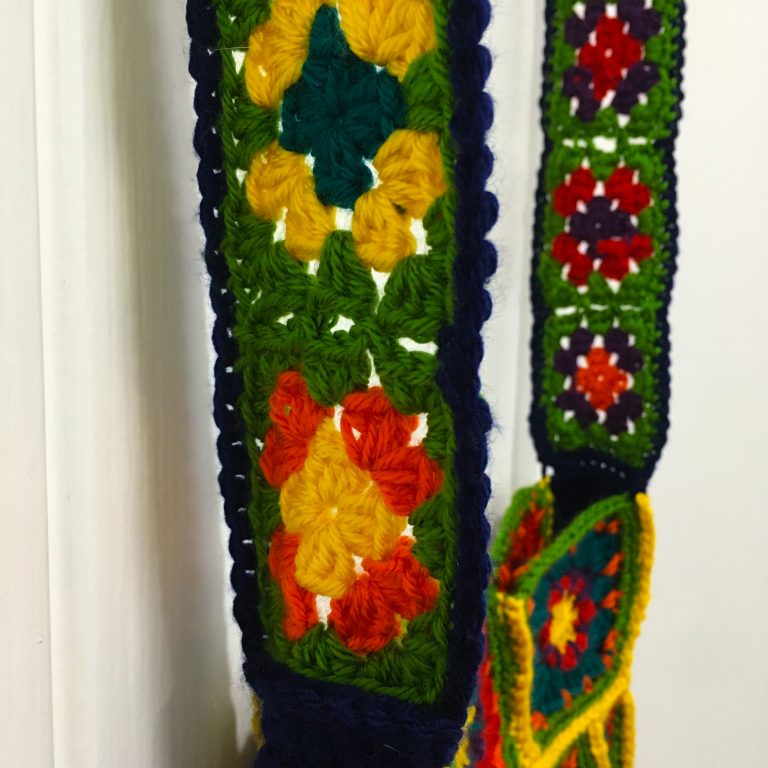
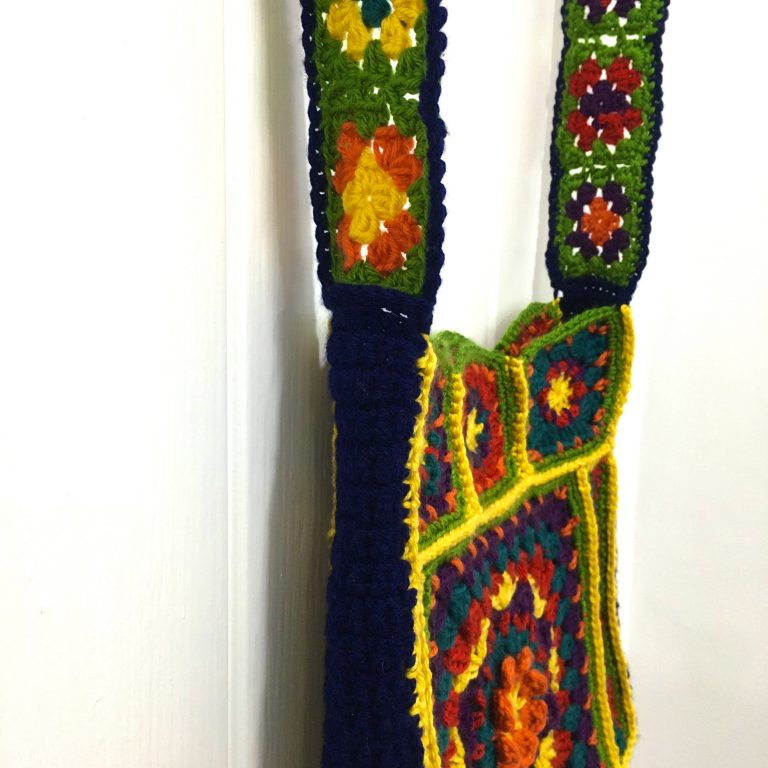
Just one more part to go and you’ll have finished the main square, so check out Part 3 here.. and keep sharing your pix on social media with the hashtag #springbagCAL

Don’t forget if you get stuck, just get in touch with me on facebook, email or instagram and I’ll try to help.

Posted in: crochet, Crochet patterns, inspiration Tagged: CAL, crochet, crochet along, lockdown crochet project

Granny-Square Bag is in the bag!

February 28, 2020 by Annie Leave a Comment
GRANNY-square bag on door

Granny-Square Bag begins

I’ve been thinking of making a granny-square bag for some time – I thought it would make a perfect CAL, (crochet along). However what with moving house (which took over a year, and involved  all my craft supplies being packed away in boxes) I didn’t seem to have either the time or space to begin on a new design project.

However, now I’m happily ensconced in my seaside home in Kent, and my dedicated craft room at the end of the garden is nigh on finished, I’ve had time to sit down and pick up my set of Knitpro Waves crochet hooks again and thought you might like to know how I went about designing the bag!

Making a start

I already had lots of Deramores Studio DK yarn in a whole host of colours, so I decided that this granny-square bag was definitely going to be a multicoloured one! So, I chose a jewel palette of yellow, red, orange, deep purple, dark teal, green and navy. Finally, I took the plunge and drew a rough picture of how I’d like to bag to look. A big square on each side, surrounded by small squares and panels down the side, and a long strap made of small squares.

The main granny-square bag motifs

Granny-square bag main panel

It was fun mixing and matching the colours and deciding on the design of the square as I went along.  I knew I’d like to incorporate a daisy flower in the middle, but apart from that it was trial and error to achieve a square I was happy with. And I quickly made another for the other side to match. What do you think of it? 

Granny square bag both main pieces

Working on the top strip

The small squares along the top have references to the main square and I came up with 6 colour variations, always starting with a yellow centre to mirror the main motif and also finishing with a green row of double crochet. Before I moved on to the side panels I joined the squares into a strip, so that I could see exactly how wide the side panels should be. I decided to complete all the joins in yellow to match  centres of the squares which helped tie the whole design together. The joins were all going to be double crochet ones, to create a touch of raised texture.

The panels

Now I could see exactly how wide the side panels of the granny-square bag should be, I worked a strip to fit.

granny square bag main parts completed

I starting and ending with a row of green double crochet and crocheting a couple of rows of waves, but starting each row from the same edge, rather than turning the work. I then joined the strips to the main square, then finally this section to the strip of squares. The main parts of the bag were now finished.

Joining the sides together

As there was so much colour work going on, I decided to make a plain gusset – crocheting a  5cm wide strip in navy double crochet.

Again, I used the yellow double crochet join to fix this in place around three sides of the main bag panels.

I eased it around the corners, working a few extra dc stitches at the point that I needed to change direction.

The strap

Now it was time to turn my attention to the strap.

I began crocheting simple little two-round granny squares, in as many variations of colour as I could.

granny squard bag strap

I then completed these with green as their final round, joining them together with the Join-As-You-Go method as I went along. 

Then  it was just a matter of deciding when to stop and then attaching the strap to the gusset. Finally I crocheted around the edges of the strap with navy to tie it in with the gusset of the bag.  Ta-da!!

I may add a cotton lining once I’ve unpacked my sewing machine, but I’m really pleased with the outcome so far…

If you’d like to learn to make a granny square

There are instructions of how to crochet a basic granny square here on my website, and if you’re a beginner and live in London or Thanet and would like me to teach you how to crochet a granny square in a 1-2-1 lesson, there’s more info here

Posted in: crochet, inspiration Tagged: crochet

Broadstairs – yes, we’ve moved to the coast!

January 31, 2020 by Annie 4 Comments
Broadstairs beach

Broadstairs by the sea!

I’ve moved – Broadstairs is now the place we call home. More precisely, the lovely village of St Peter’s on the edge of town…

Broadstairs St Peters village sign

Yes, after decades in North London, we’ve taken the plunge and moved to the Kent seaside. It’s a beautiful little seaside town, with stunning bays and cliffs and lots of shoreline walks.

Broadstairs beach in winter

My new village not only has a village green, complete with stocks for anyone who misbehaves, it also has a stunning Medieval church – St Peter-in-Thanet – and one of the longest churchyards in the country that leads out to fields!

St Peters Thanet and graveyard

The medieval church of St Peter-in-Thanet

Angel statue in st peters thanet graveyard

The graveyard is a peaceful place to visit

Fields at end of graveyard of St Peters Thanet

The view of the fields from the end of the graveyard

Field of cauliflowers

Cauliflowers growing in the field beyond the woods

Floral delights

You probably know that I love crocheting flowers (like my floral wreaths and Flora gloves) so I’m more than happy that I’ve now got my first ever garden.  I’m currently swotting up on what to do when, and being surprised by all the lovely bulbs and flowers that are appearing all over.

Christmas rose hellebore

Beautiful Christmas rose Hellebore

Bulbs appearing in the garden

Gorgeously scented winter honeysuckle is blooming now and smells wonderful.

There’s also a bird feeding station just outside our living room window, and I’m also enjoying a spot of birdwatching from the warm – robins, magpies, collared doves, sparrows, blue tits, long-tailed tits, wood pigeons, blackbirds and starlings are all regular visitors (as well as the greedy squirrels).

robin on the fence

Lily’s enjoying watching the birds too!

Dedicated craft room!

Best of all, I now have a dedicated craft room at the end of the garden, with the woods behind it, so, as soon as I finish unpacking, I’ll be organising my yarn and fabric and getting cracking on some brand new designs.

Broadstairs craft room in garden by day

I can even use it at night!

garden with lights at night

Lessons in Thanet

My move, of course, means that I’ll no longer be available to teach in London all the time, though I will be returning on a regular basis (as long as enough people want to learn on the same day). So if you’d like to have a lesson, just join my mailing list, or drop me a line so that I can tell you when I’ll next be back.

It also means that I can now teach in the Broadstairs-Margate-Ramsgate area as well – I already have a few lovely places to teach, so I’m looking forward to meeting some Thanet crafters soon… (If you’re interested in a lesson, email me at pickingupstitches@gmail.com.)

PS Lily’s loving life in Broadstairs too!

Lily on the prom

Posted in: classes, inspiration, Thanet news, Uncategorized Tagged: Broadstairs, crochet, knitting, lessons, Thanet
« Previous 1 2 3 4 … 8 Next »

Recent Posts

  • Bright yarn to get you noticed!
  • Crocheted daffodils for Easter
  • Spring crochet in pastel shades
  • Easter Bunnies
  • December is here!

Archives

  • November 2025
  • March 2024
  • February 2024
  • February 2023
  • December 2022
  • May 2022
  • November 2021
  • February 2021
  • November 2020
  • May 2020
  • April 2020
  • February 2020
  • January 2020
  • November 2019
  • January 2019
  • December 2018
  • November 2018
  • September 2018
  • July 2018
  • April 2018
  • March 2018
  • February 2018
  • December 2017
  • October 2017
  • September 2017
  • August 2017
  • July 2017
  • June 2017
  • May 2017
  • April 2017

Categories

  • Bunting
  • Christmas
  • classes
  • craft fair
  • crochet
  • Crochet patterns
  • granny squares
  • inspiration
  • Interviews
  • knitting
  • knitting patterns
  • Thanet news
  • Uncategorized
  • workshops

Pages

  • All about me
  • Blog
  • Favourite links to blogs, places and people
  • Features and Interviews
    • An interview with Dee Hardwicke
    • Knitwear designer Martin Storey – an interview
    • Louisa Harding, knitwear designer talks to Annie Windley
  • How to guides
    • 1 Making a slip knot
    • 2 Cast on – a step-by-step guide
    • 3 Knit stitch – a step-by-step guide
    • 4 Purl stitch – a step-by-step guide
    • 5 Cast off – a step-by-step guide
    • 6 Making a chain stitch
    • 7 Making a double crochet stitch
    • 8 Making a treble crochet stitch
    • How to make a Basic Granny Square
    • Joining granny squares
  • Lessons in Thanet and North London
    • Crochet projects
    • Now We’re Knitting! (beginners)
  • Patterns
    • Annie’s Advent Calendar: Christmas CAL 2018
    • Carrot & pea bunting pattern
    • Fallen Leaves Autumn Cowl
    • Floral granny squares & little flowers pattern
    • Little crochet heart pattern
    • Little Tea Cosy pattern
    • Waffle Blanket
  • Shop
  • Spring Granny-Square Bag CAL pattern

Meta

  • Log in
  • Entries feed
  • Comments feed
  • WordPress.org

Follow me on social media

Twitter
Facebook
Instagram

Copyright © 2025 Picking Up Stitches.

Omega WordPress Theme by ThemeHall