Part 3 starts here…
If you missed the first parts, head back here to begin. And to recap on part 2 (rounds 6-9) see here.
There are just three more rounds left to go to complete the main square and Part 3 tells you how to work these – don’t forget, you need to make two of these. And if you want the standard written instructions, they’re here.
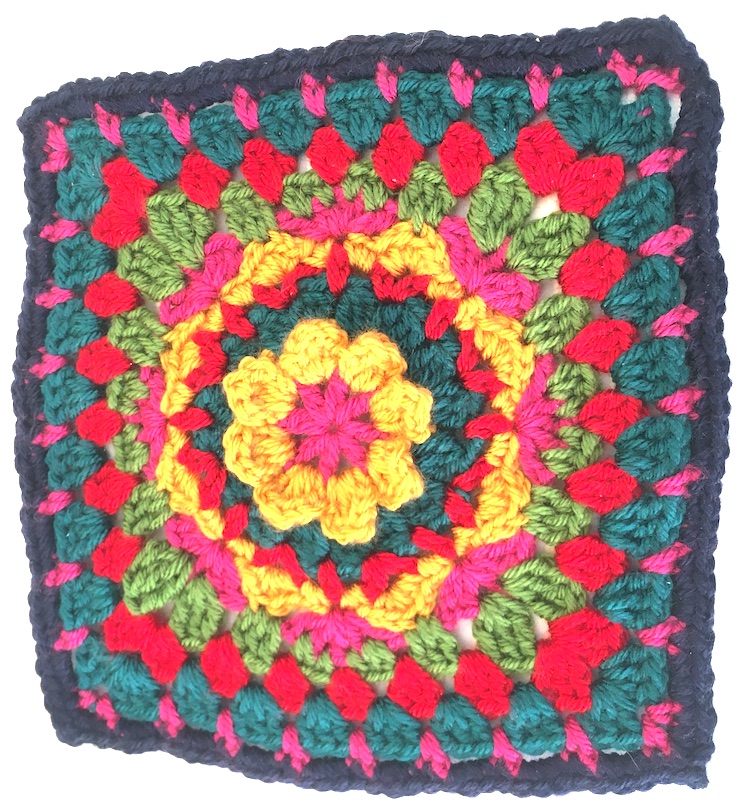
Here’s what the completed square will look like… Again, don’t worry that it’s not exactly square at this point.
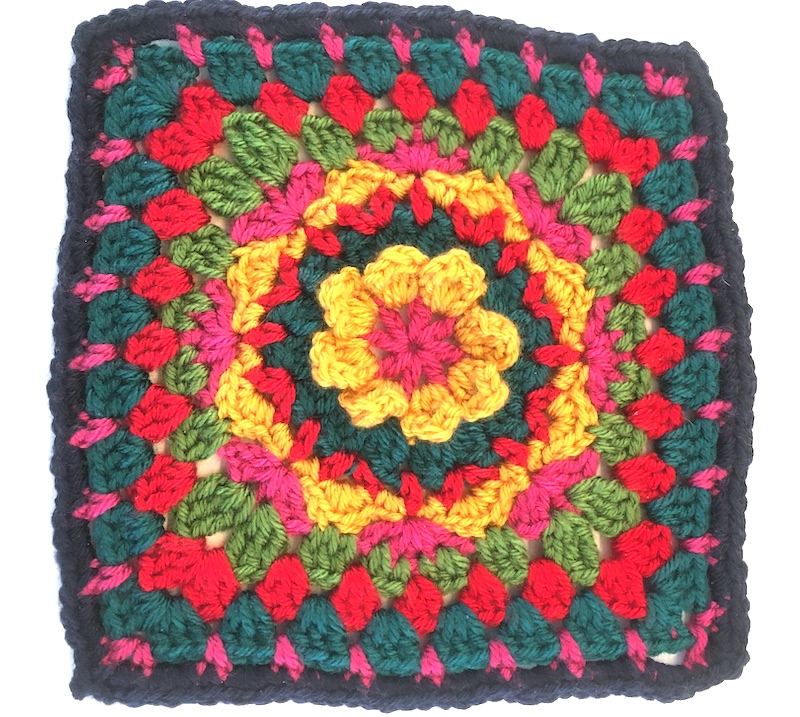
The next round is a normal granny square round for anyone who’s made a granny square before – it’s worked with groups of 3 trebles in each space across the sides, and 3 trebles, 2 chain stitches and 3 trebles in each corner.
Round 10: Join yarn in a corner, work 3 chain stitches [this counts as a treble here], 2 trebles, 2 chain stitches and 3 trebles.

* Now work 3 trebles in each space between the groups of trebles on the row below until you get to the next corner,**
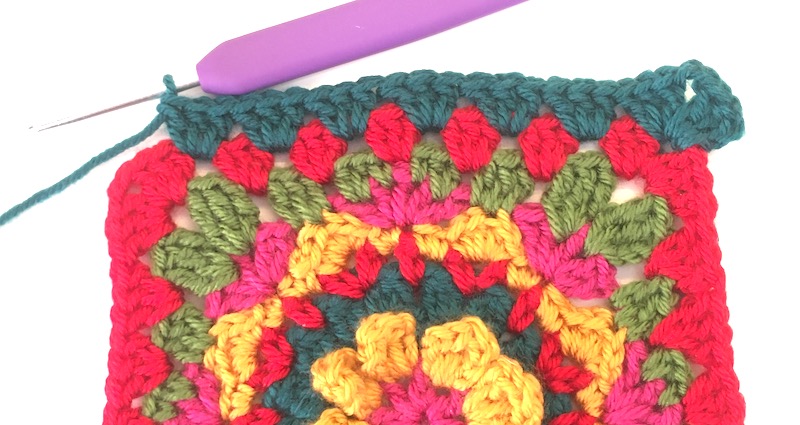
in the corner 2-chain space, work 3 trebles, 2 chains, and 3 trebles.
You need to repeat the last bit, from the asterisk * twice – you’ll now have worked 4 corners and 3 sides. To complete the last side, work from the single asterisk * and stop at the double asterisk **. To finish, join with slip stitch to the 3rd ch. Fasten off.
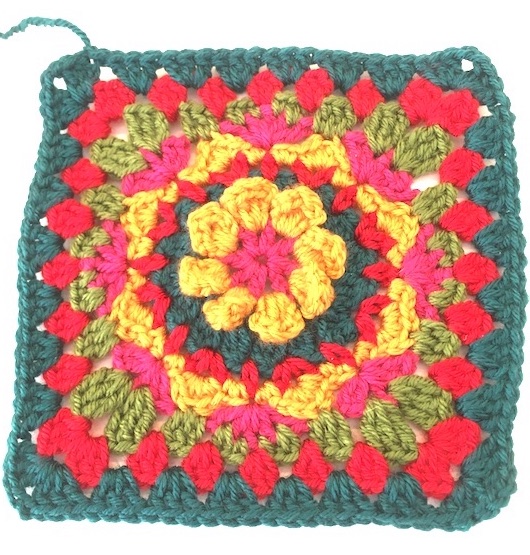
Round 11: Join yarn in corner and work 3ch [this counts as a dc and 2ch], then work a double crochet.
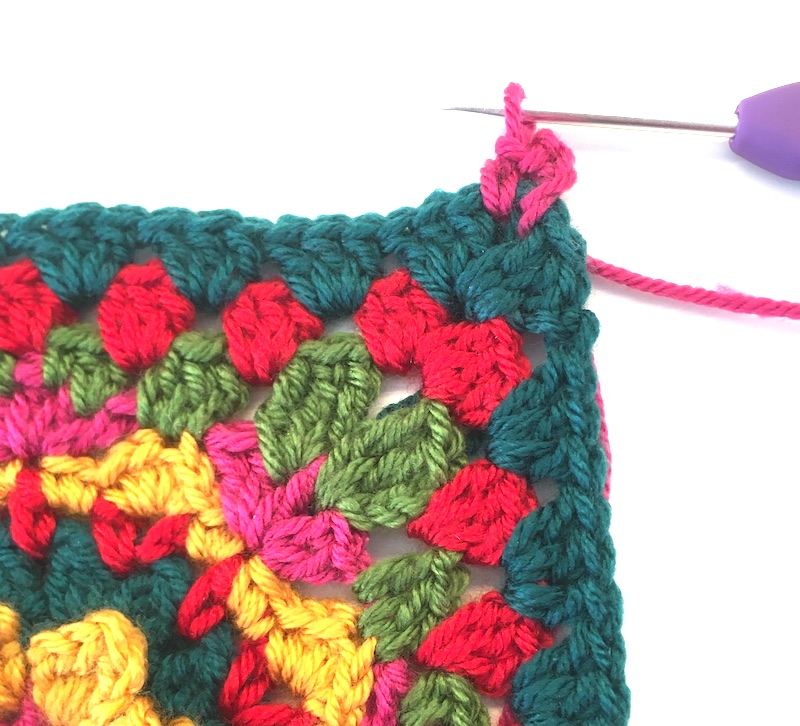
*Now work (3 chain and a double crochet in next space)
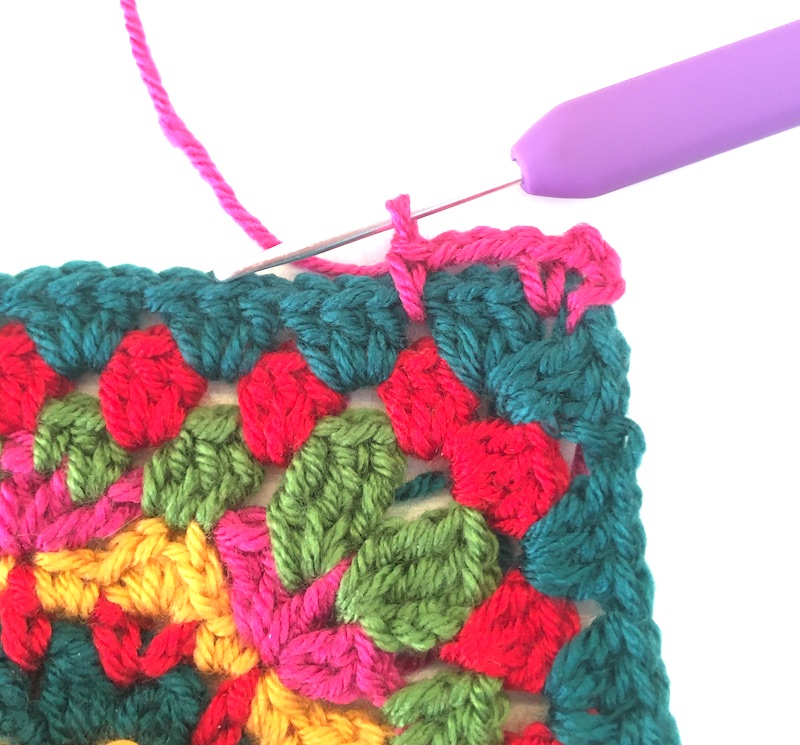
repeat this step (ie 3ch and a dc in the space) until you get to the next corner,
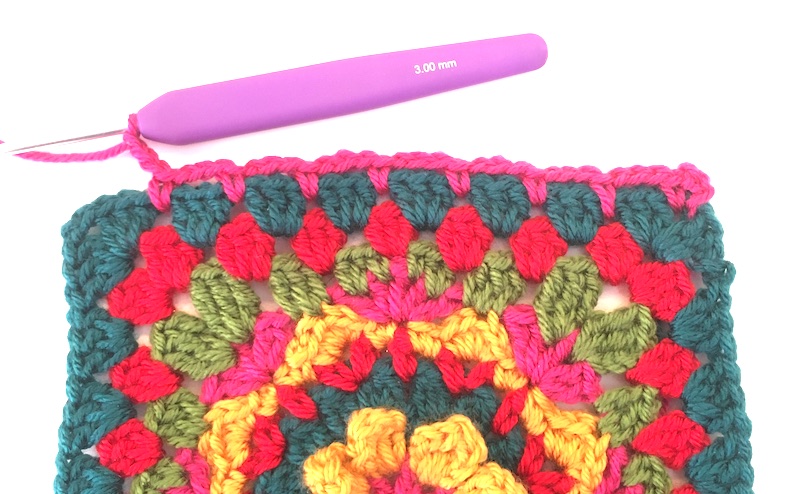
then work 3 chain **and, in the 2-chain space work (1dc, 2ch, 1dc).
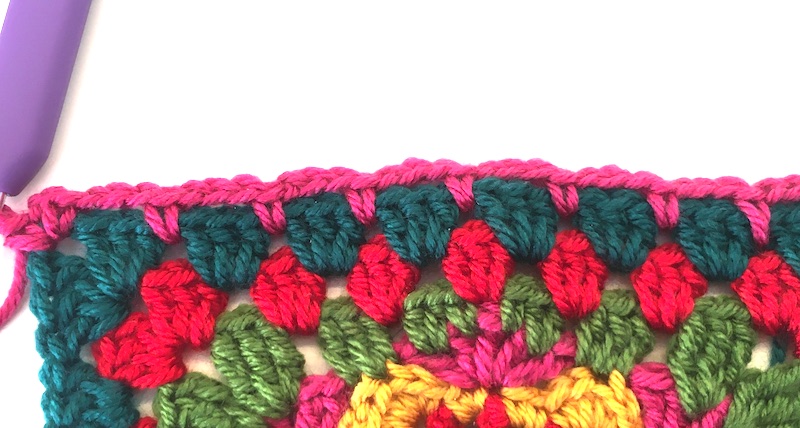
Now go back and repeat repeat from the single asterisk * twice, then from the single asterisk * to the double asterisk **. Finally join with a slip stitch to the first ch. Fasten off.
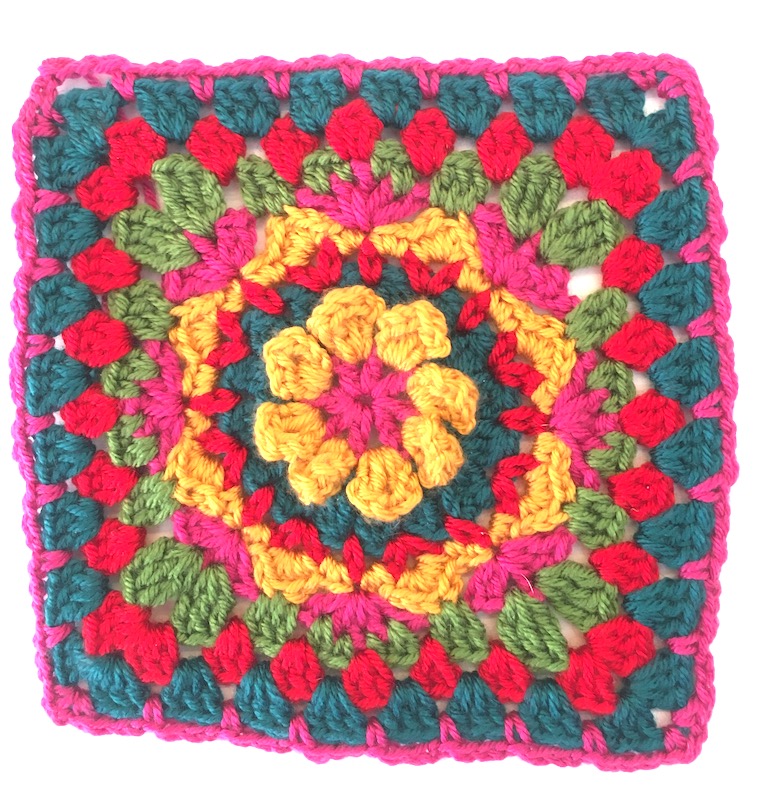
Now for the last round – hurray! This one works a double crochet edging all the way round. You’ll be working both into stitches and through the chain spaces on the previous round.
Round 12: Join the yarn in a corner space, work 3 chain [counts as dc, 2ch], and a double crochet.
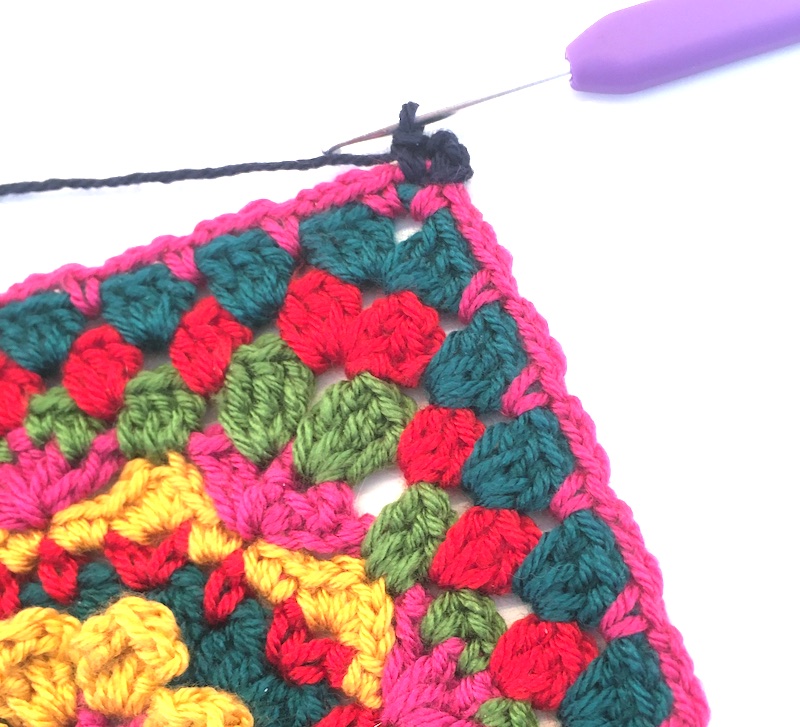
Now you need to repeat the same thing all the way across the side – *a double crochet in the double crochet stitch on the row below,
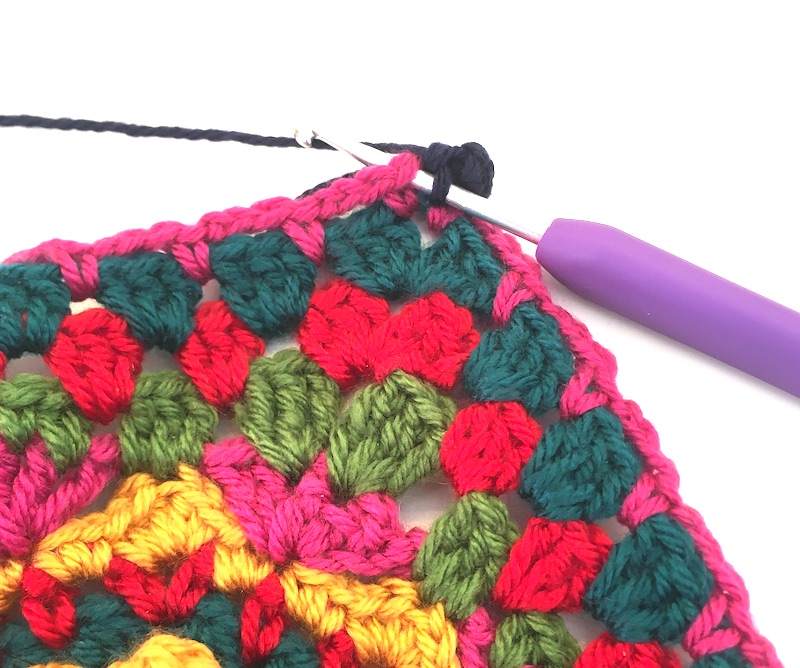
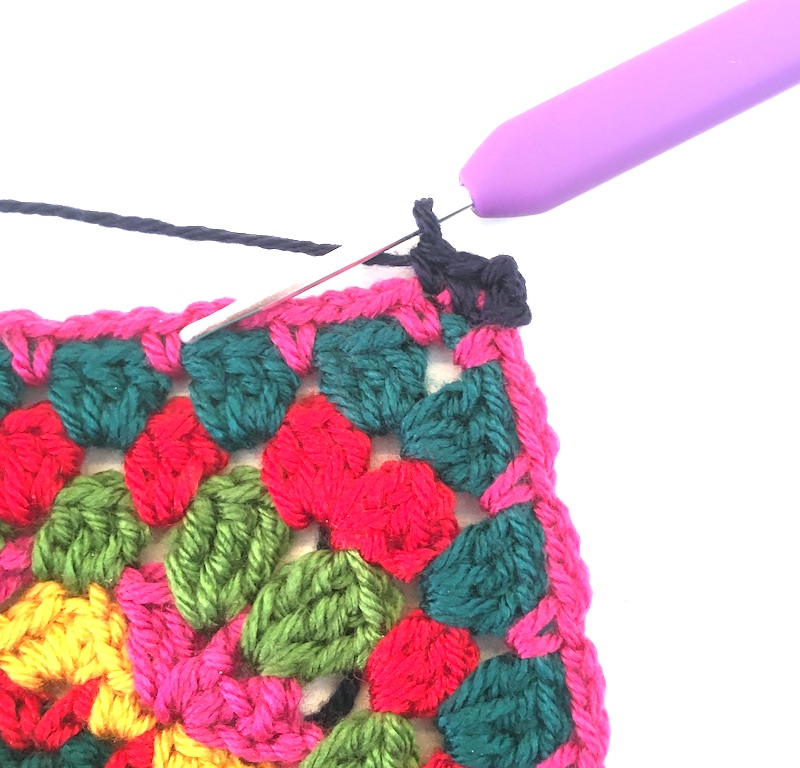
and 3dc in the 3-chain space,
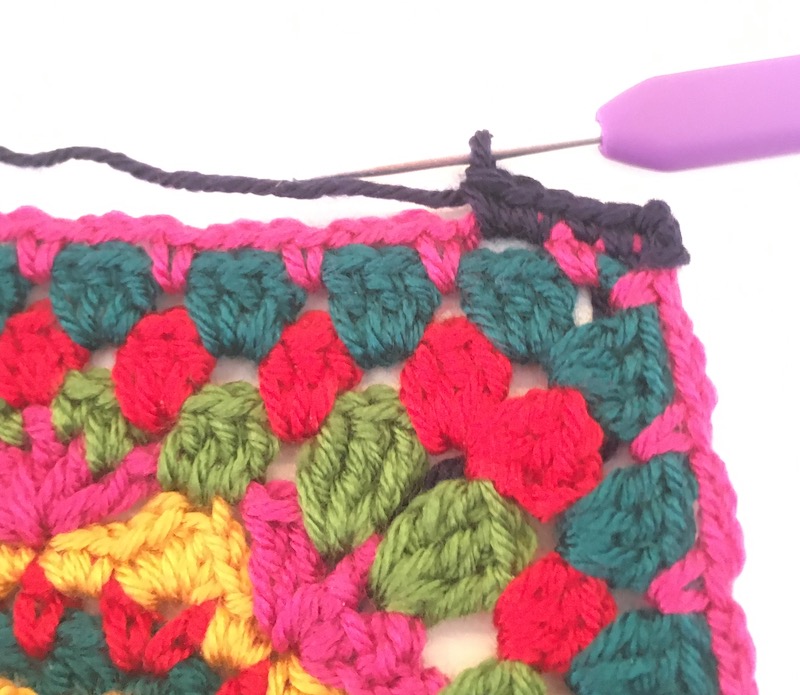
when you get to the corner you’ll do a double crochet in the stitch before the corner space ** (Remember that where you joined the previous row together, there’ll be a ss into a chain stitch, and this will be counted as a dc, so don’t forget to work a dc into that)
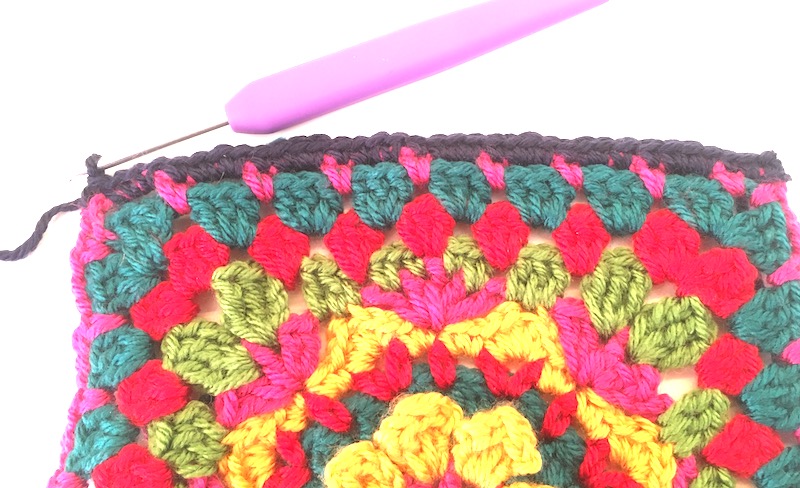
then in the corner space work (dc, 2ch, dc). Now repeat from the single asterisk * twice, then go back and work from * to **. Finally join with ss to first ch. Fasten off.
You should have 35 dc on each side with a chain (at the corners) at each end, so altogether a side is 37 stitches wide.
Next week we’re going to make the small squares that sit across the top of this square and and side panels of the front and back, and the gusset that goes round the bag so make sure you’ve completed your main squares by then…
The next part of the pattern – Part 4 – can be found here . And meanwhile, I’d love to see some of your squares on social media with the hashtag #SpringBagCAL
Don’t forget if you get stuck, just get in touch with me on facebook, email or instagram and I’ll try to help.
