A lining for your bag
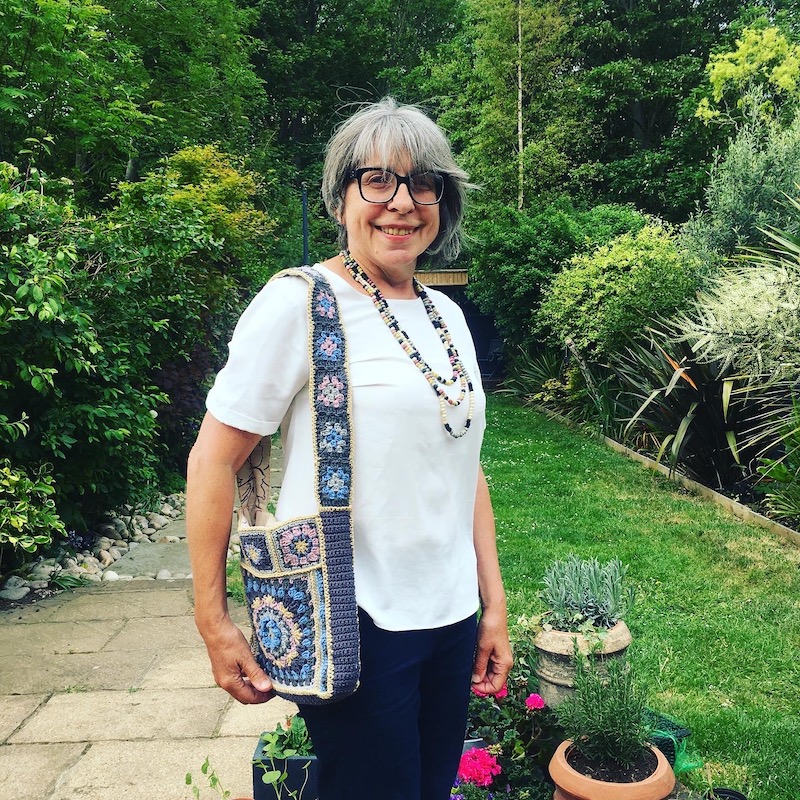
I decided to add a lining to my finished crocheted Spring Granny Square Bag. I’m no expert at sewing, so I thought I’d draw some diagrams which hopefully might help any of you who haven’t done much sewing like me!
And if you haven’t crocheted a bag yet, why not head back and start here.
Choosing the fabric
Luckily I had lots of scraps of fabric in my craft room – collected from working on women’s magazines over the years – there were always lots of samples left over from features that were just too good to throw out!
I decided on a stiff cotton upholstery fabric that held its shape well but wasn’t too stiff and bulky. It’s best to choose something with a bit of substance to help the bag keep its shape – so avoid flimsy or shiny fabrics.
Now I had to work out which way the grainline ran. This is a technical term, I know, but it’s important when cutting out pieces – if you don’t cut along the grainline when making this lining, the fabric may stretch out of shape. The fabric has threads that run both ways if you look carefully – imagine a weaving loom, with some threads going from top to bottom (the warp thread – which is the grainline direction) and the shuttle weaving in and out of these threads from left to right and back again (the weft threads). At each side of the fabric is a selvedge – these are the finished edges down either side that don’t fray – you’ll often find information printed down this edge of the fabric.
The grainline runs up and down the fabric, parallel to the selvedges.
Here’s a picture of the selvedge of the fabric I used. You can see there’s a handy arrow showing the direction of the grainline.
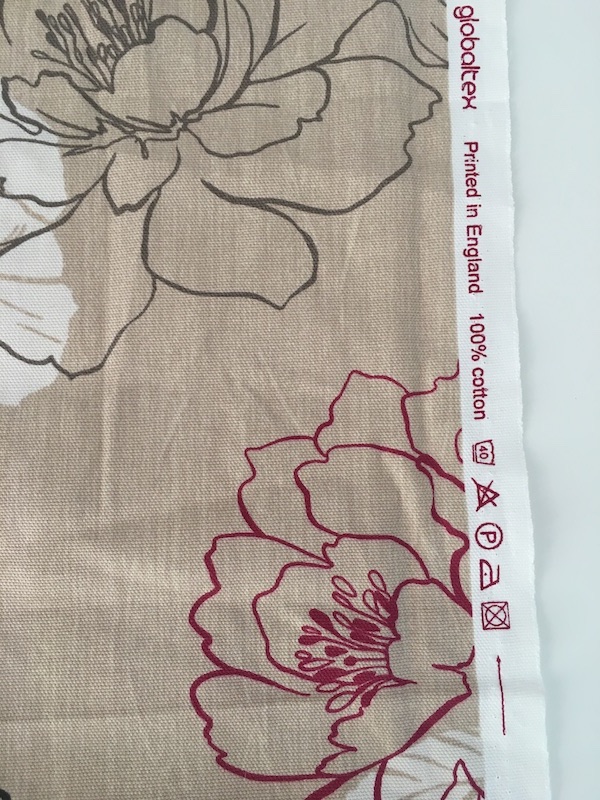
So the grainline is running up and down the length of the fabric.
Now you need to measure your finished bag carefully.
Measure the main square on the front – from side to side (A) and top to bottom (B). Note down these measurements – my bag was exactly square 25cm x 25cm, but it doesn’t matter if yours isn’t, just note down the measurements you have.
Now to these measurements I needed to add extra on each side for the seams – this is called the seam allowance – and extra at the top that would be folded down to create a hem at the top of the bag eventually. I added 1.5cm for the seam allowance to each of the sides, and the bottom, and I added 3.5cm at the top. I needed two pieces this size. The grainline would run from top to bottom (along the dotted line marked B). These front and back pieces would be 28cm x 30cm in my case… (1.5cm + 25cm + 1.5cm wide and 1.5cm + 25cm + 3.5cm top to bottom).
My pattern looked something like this…

Now I measured each side of the gusset – from side to side – the narrow measurement – (C) – and from top to bottom (B) which should be exactly the same size as the side of the main square. Mine measured 5cm across and 25cm from top to bottom. Again, I added 1.5cm to each side and to the bottom and 3.5cm to the top. The grainline would run from top to bottom (line B). So these pieces for me would be 8cm (ie 1.5cm + 5cm + 1.5cm) by 30cm (ie 1.5cm + 25cm + 3.5cm)

Then I measured the gusset at the bottom. The width was the same as before (C) and the length was the same as the bottom of the main square (A). As my square was 25cm wide, this strip was 5cm x 25cm. Again, don’t worry if your bottom piece is not the same as your two sides, just make sure you have the correct measurements for your bag. To this piece I added a seam allowance of 1.5cm on each side. So my final piece was 8cm (ie 1.5cm + 5cm + 1.5cm) by 28cm (ie 1.5cm + 25cm + 1.5cm).

This time the grainline ran along the strip (line A).
Now I just needed to measure the strap. The width (D) and the length (E). Mine measured 6.5cm by 78cm. I added 1.5cm to each long side and 3.5cm to each short end so my strip was 9.5cm (ie 1.5cm +6.5cm + 1.5cm) by 85cm (ie 3.5cm + 78cm + 3.5cm). The grainline ran along the strip (line E)

I carefully cut pieces out of my fabric. If you wanted you could make paper templates first to make sure you have the right sizes and then pin these to your fabric and cut them out.
Next you need to mark two points at the bottom of each main square – this point should be exactly 1.5cm up from the bottom and exactly 1.5cm in from the side. Mark each point clearly on the wrong side of the fabric.
Now finally it was time to start sewing the pieces together! It doesn’t really matter what colour thread you use in your machine as the stitches won’t show.
First place a side gusset piece and a main square right sides together. Make sure you have the wrong side of the main square facing you while you sew so you can see that point you marked. Sew carefully from the top, 1.5cm in from the edge and stop exactly at the marked point.
Now sew the other side gusset piece to the main square in the same way.
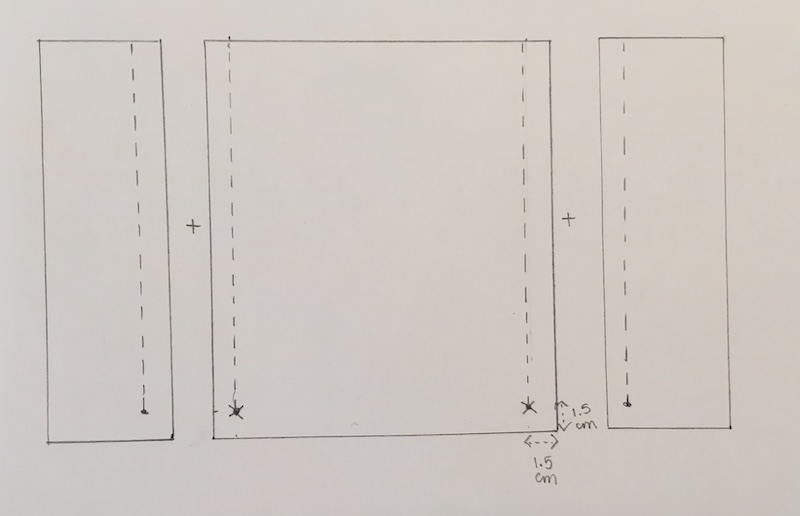
The pieces go in this order and you’ll be sewing along the dotted lines
Once you’ve sewn two side gusset pieces on, use an iron to press the seam open on the wrong side so it lays flat.
Now take the other main square and sew the strips to this too… You should end up with a tube. Make sure you press the seams open again after you’ve done this.
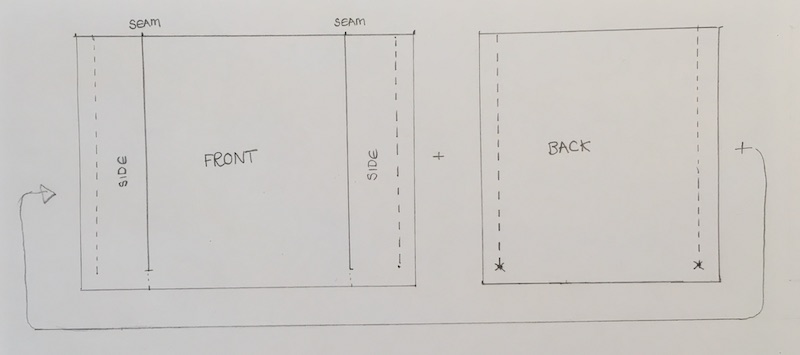
Now this next bit is a little fiddly, so make sure you pin the pieces in place before you sew. Place the bottom of the gusset right sides together with the bottom of one of the main squares and sew along the edge 1.5cm in, starting at a marked point and stopping at the other marked point. Now sew it to the bottom of the other main square. The short ends of this gusset piece are still open at this point.
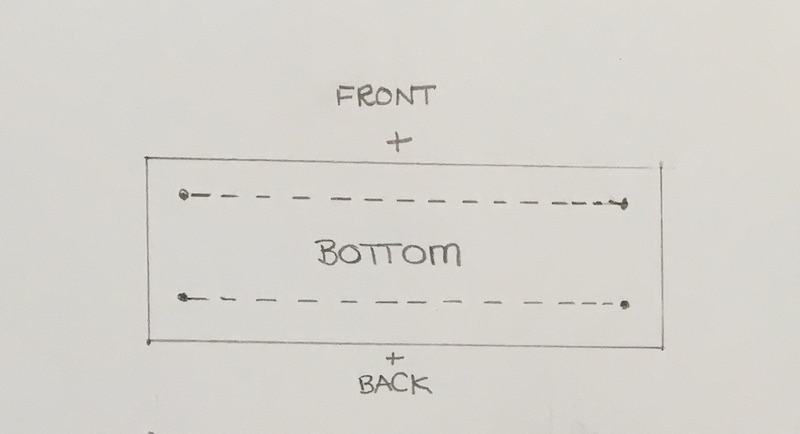
Now you have another couple of seams to press flat with your iron – and this is getting more fiddly.
Next you need to put the lining flat on the table and carefully pin the short sides. This time, sew really carefully 1.5cm in from the edge, pulling all the extra fabric out of the way as you go, so you don’t accidentally catch any fabric by accident.
You can now carefully trim away a bit of the excess at each of these bottom four corners by cutting diagonally across at each point – make sure you don’t cut too close to the stitches though, as these points on the bag need to be strong as you will be carrying things in the bag eventually.
Now you can slip this lining into the bag to try it out – the right side of the fabric will be visible in the bag, with the wrong side against the crocheted sides of the bag. There should be about 3.5cm sticking out at the top all the way around. Fold the fabric down (wrong side to wrong side).
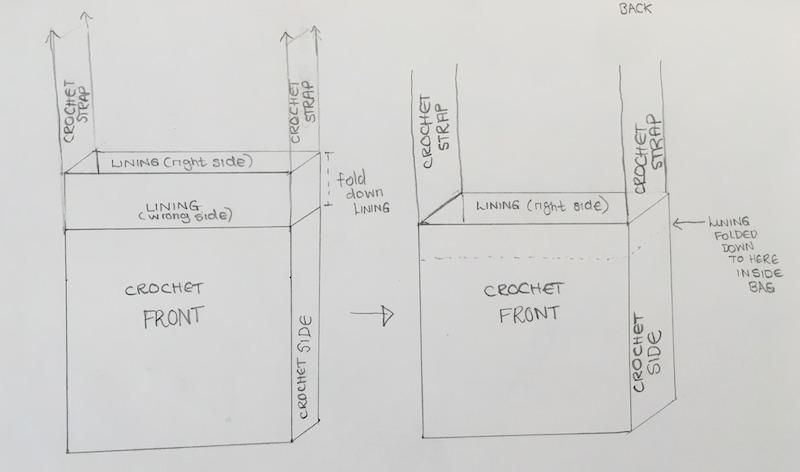
Now take the lining out again and press the fold.
Next take the strap lining, and pin it to the strap, wrong side to wrong side. Make sure there is 3.5cm overlapping on the inside at each short side. Turn in 1.5cm along each long side and pin then carefully sew along these long sides. You may wish to use your machine (but in this case, choose a suitable colour of sewing thread, as the stitches may be visible), sewing very close to the edge, however I chose to sew by hand, with tiny oversewing stitches.
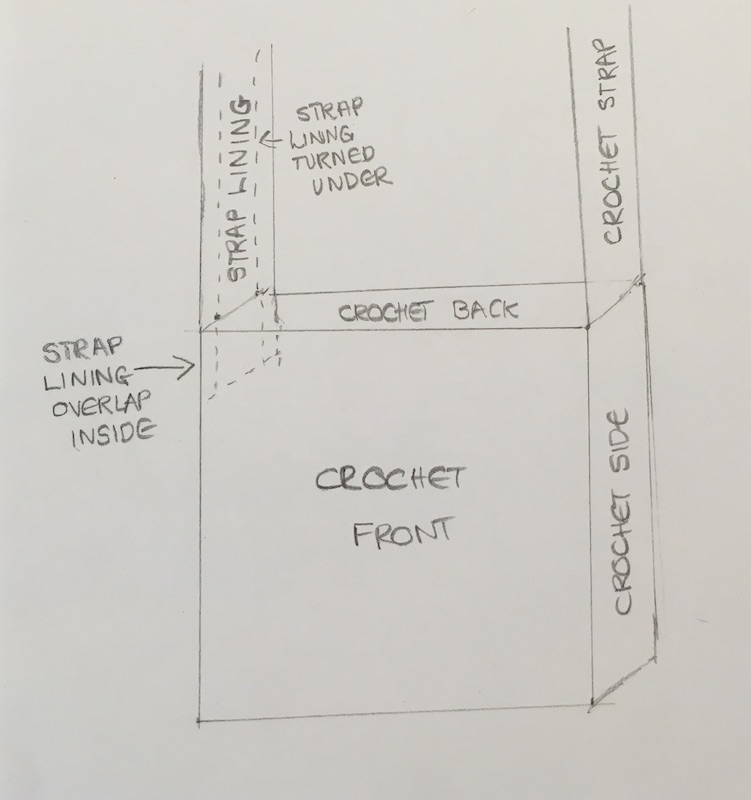
Now you’re ready to slip the lining back into the bag. This will cover up the overlap from the strap ends. Then carefully sew all the way around the edge – again, I chose to do this by hand.
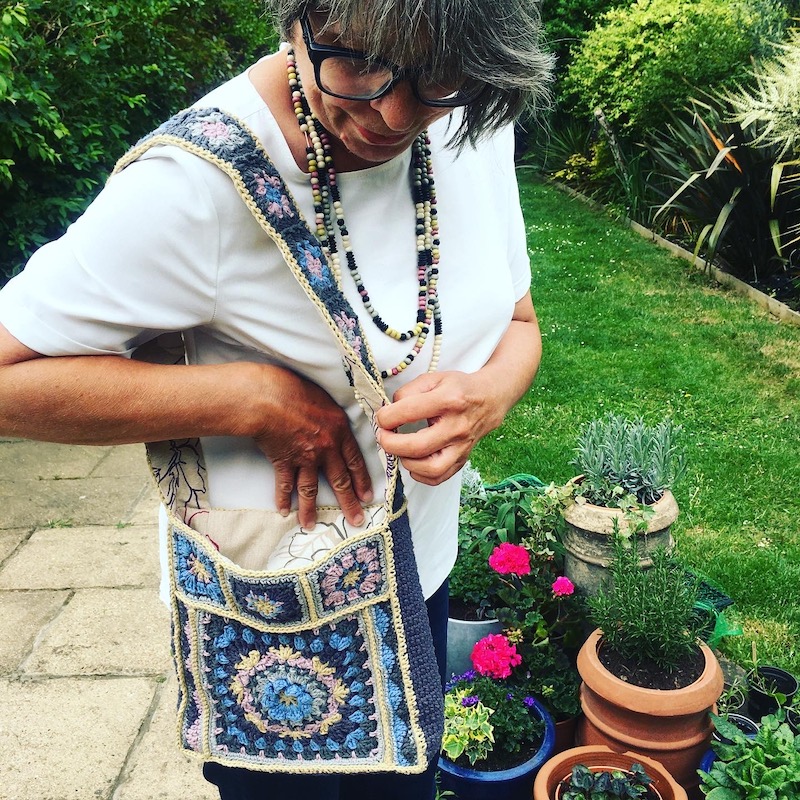
Here are some close-ups of my bag and lining…

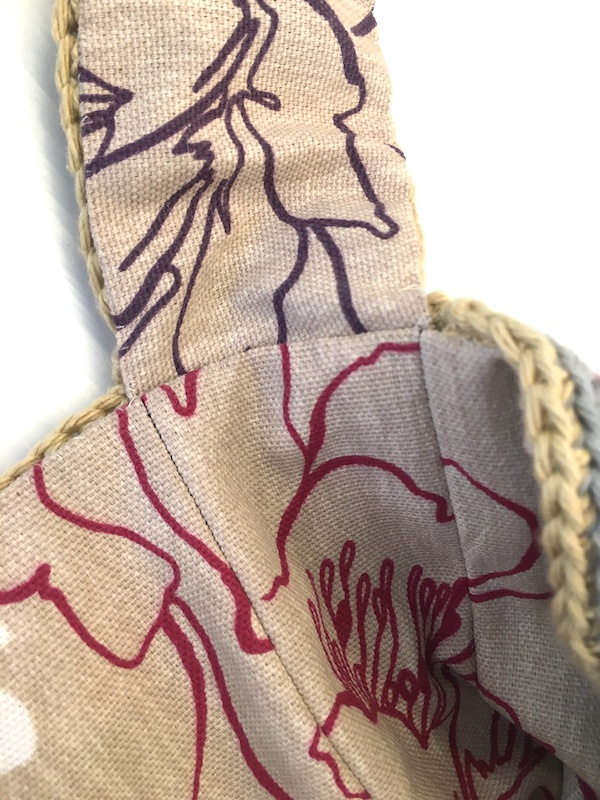
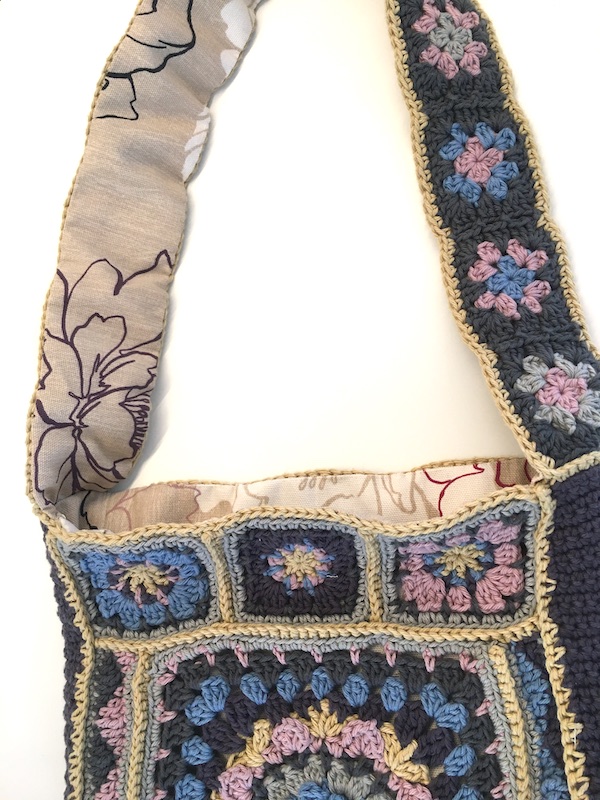
I’m really happy with how it turned out, as you can see!
