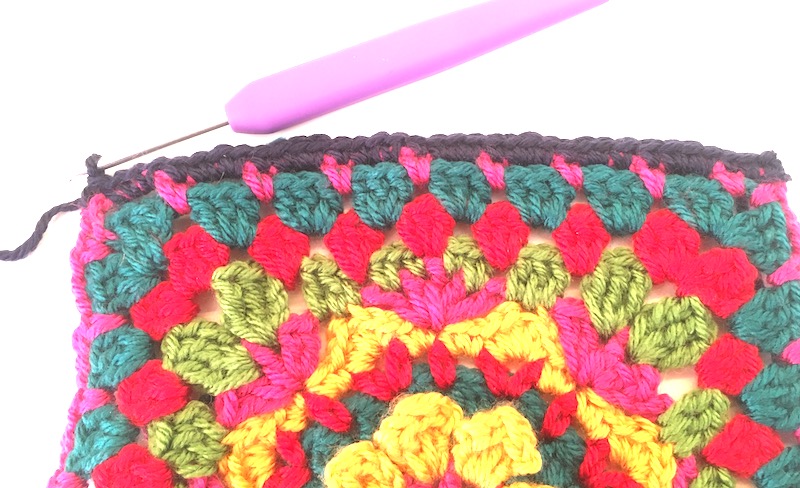
On to Part 4 – the squares along the top of the square
Part 4 of the crochet-along starts here, but i you’ve just found this page, you can start with these squares, and then go back and do Parts 1 (rows 1-6 of main squares), Part 2 (rows 7-9), and 3 (finishing the main squares) starting here. But if you prefer standard written instructions instead of the version with pictures, head here.
And don’t forget, if you’re still on one of the previous parts, it doesn’t matter – there’s no rush, just take as long as you want!
SMALL SQUARES (make 6)
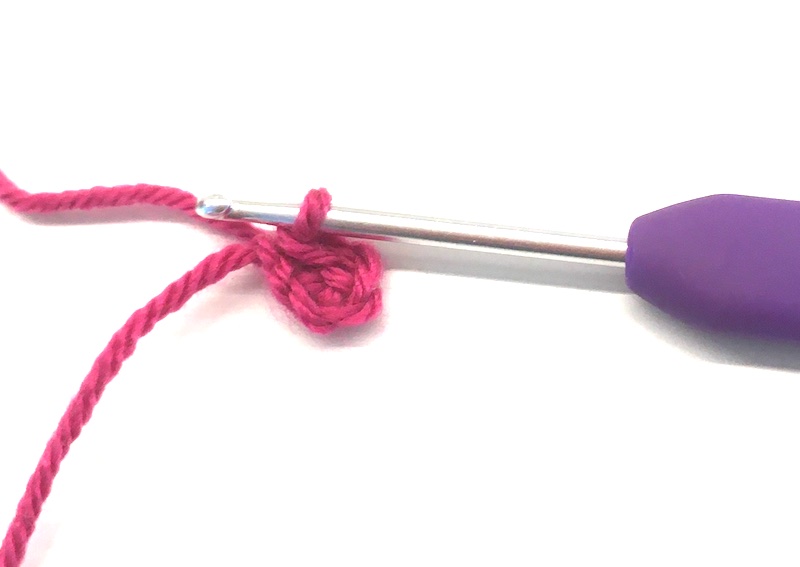
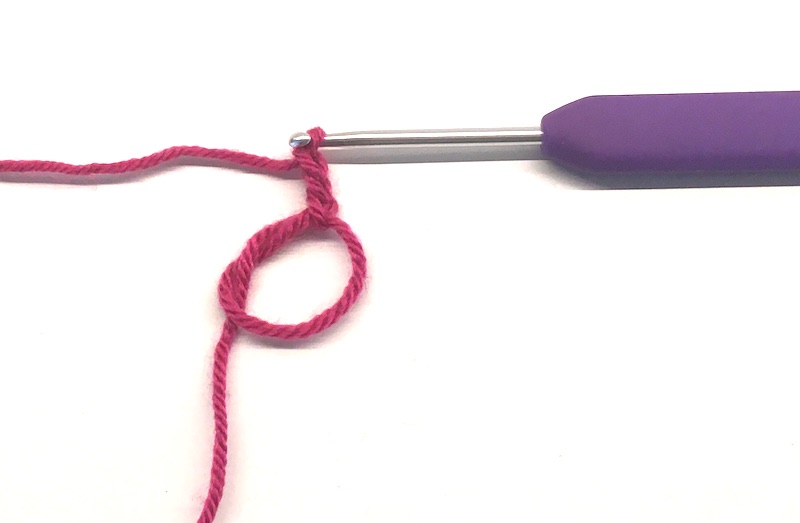
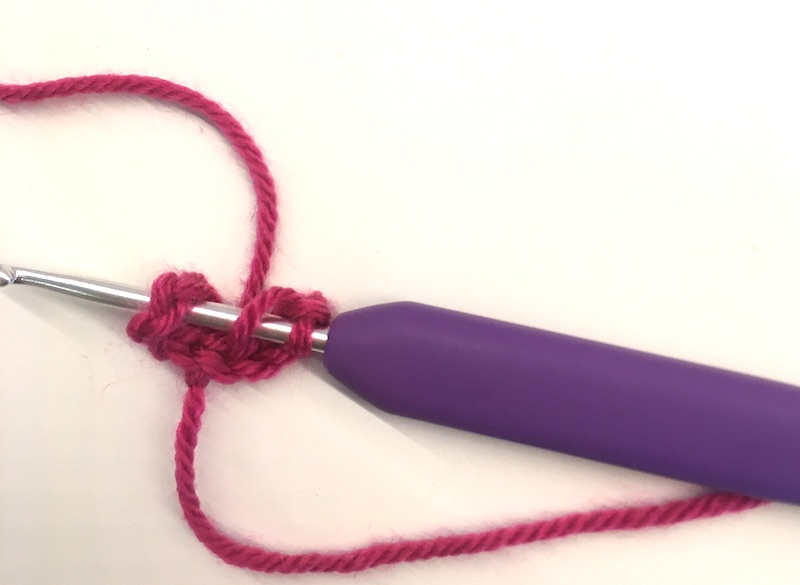
Round 1: Either make a circle from 4 chain stitches joined with a slip stitch, or start with a magic circle.
Either start with chain stitches……joined into a circle with a slip stitchOr start in a magic circle
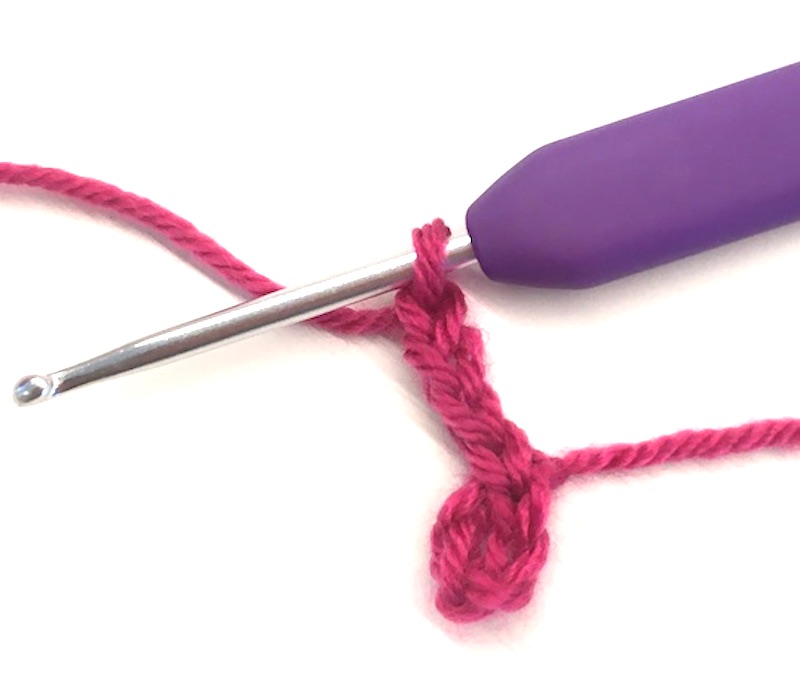
Now work 3 chain stitches [counts as a half treble and 1 chain], then work (htr, 1ch) seven times, and join with ss to the 3rd chain at the start.
Working the first round starting with the chain ringHere’s the half trebles worked into a magic circle
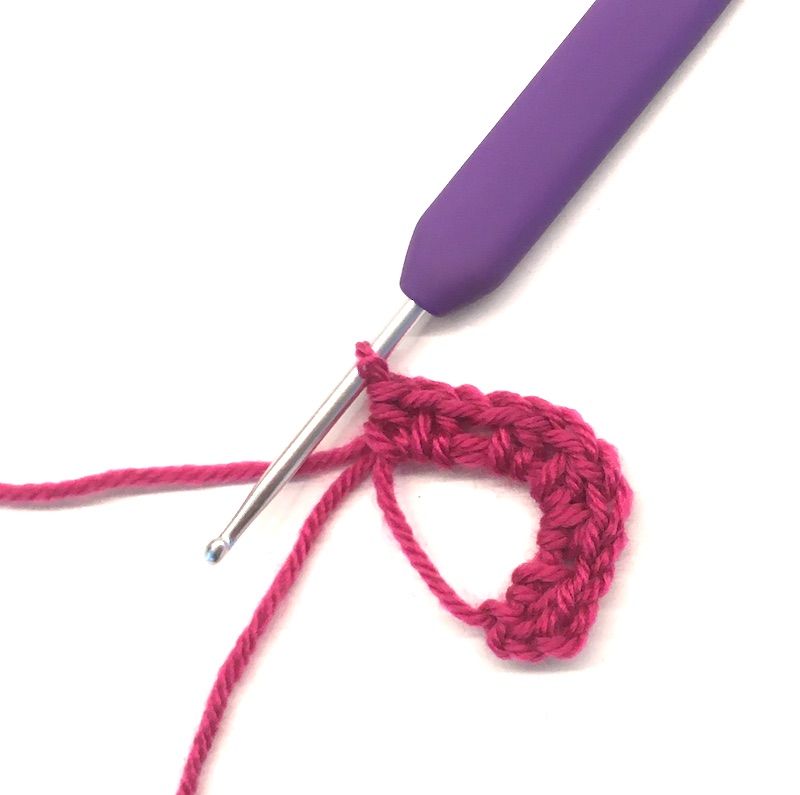
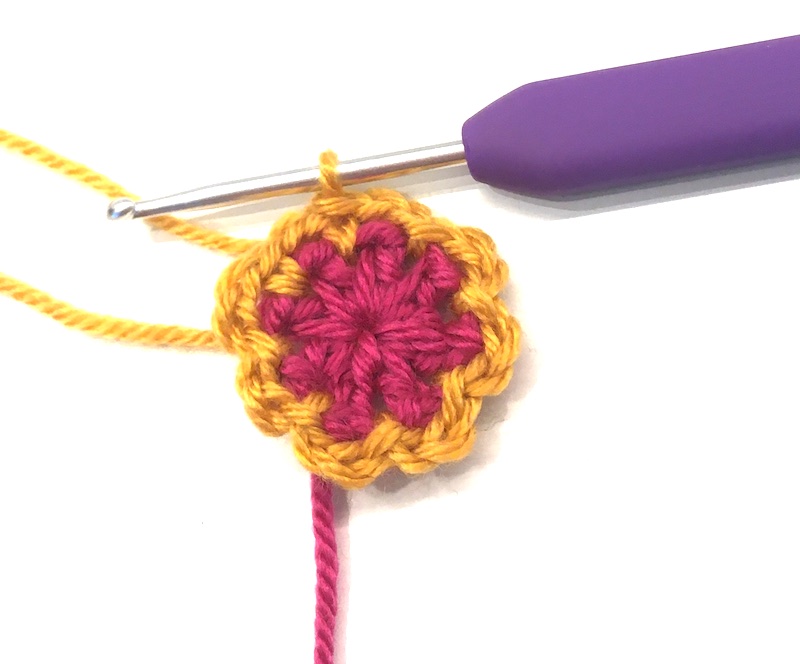
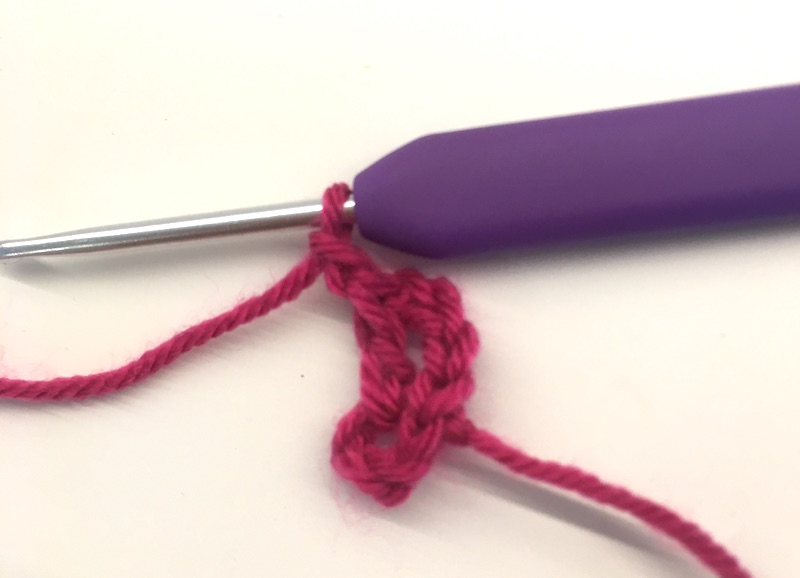
Fasten off. You should now have a circle of spokes – like the beginning of the main square, but a bit smaller.
Round 1 completed
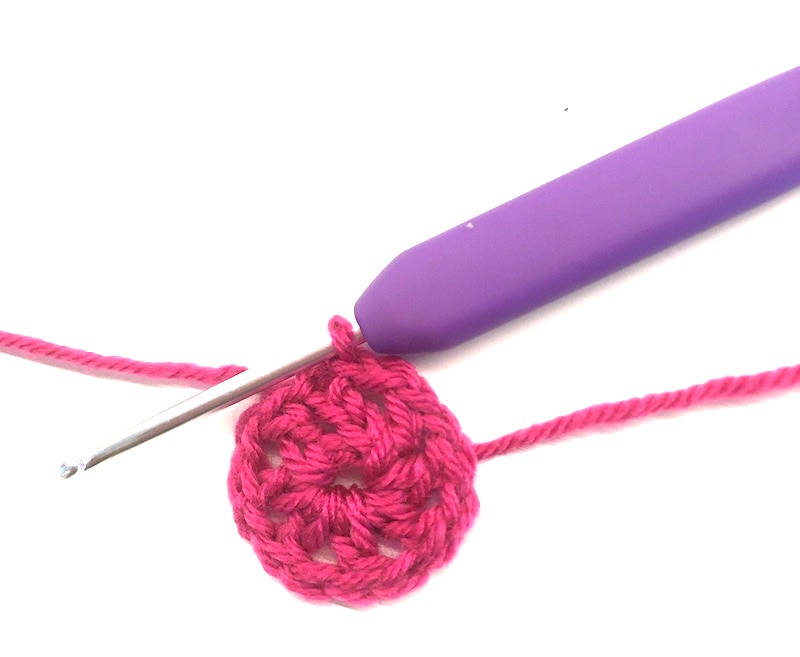
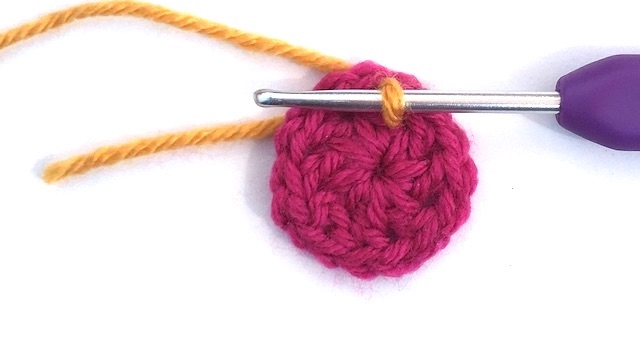
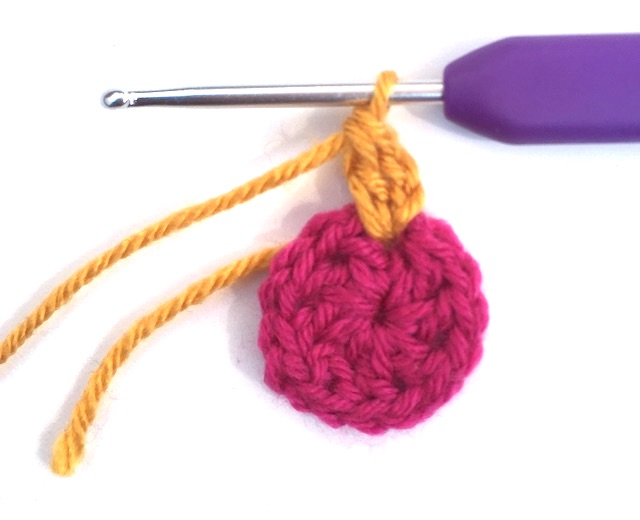
Round 2: Join yarn into a space with a ss, (work 3ch, then slip stitch into the next space) 7 times,
Here’s the start with 3ch and a ss into the next space
another 3ch, and join with ss to the first stitch. Fasten off. It should look like this…
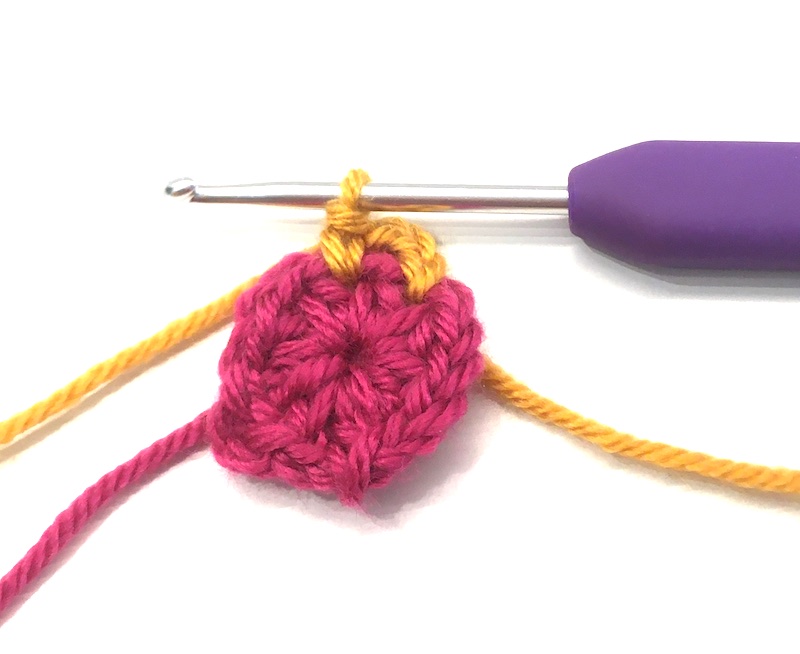
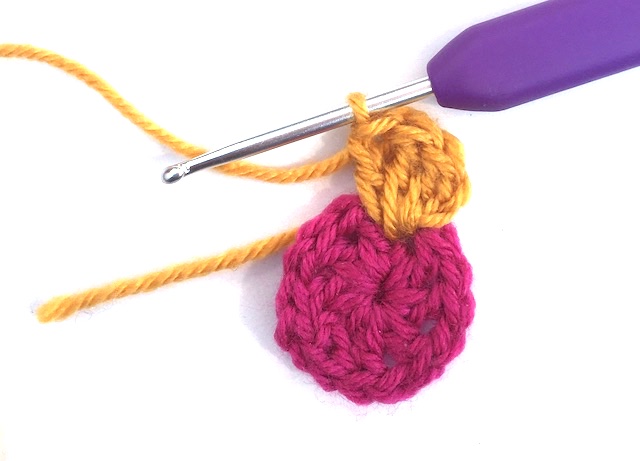
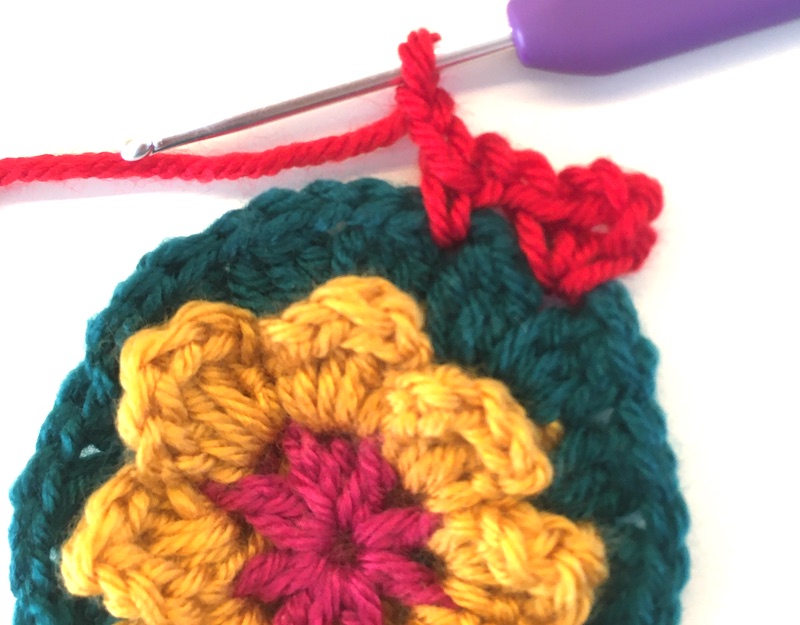
Round 3: Join yarn in a chain space on Round 1, work 1 chain stitch [counts as a double crochet],
Make sure you work through Round 1 (the pink round here)
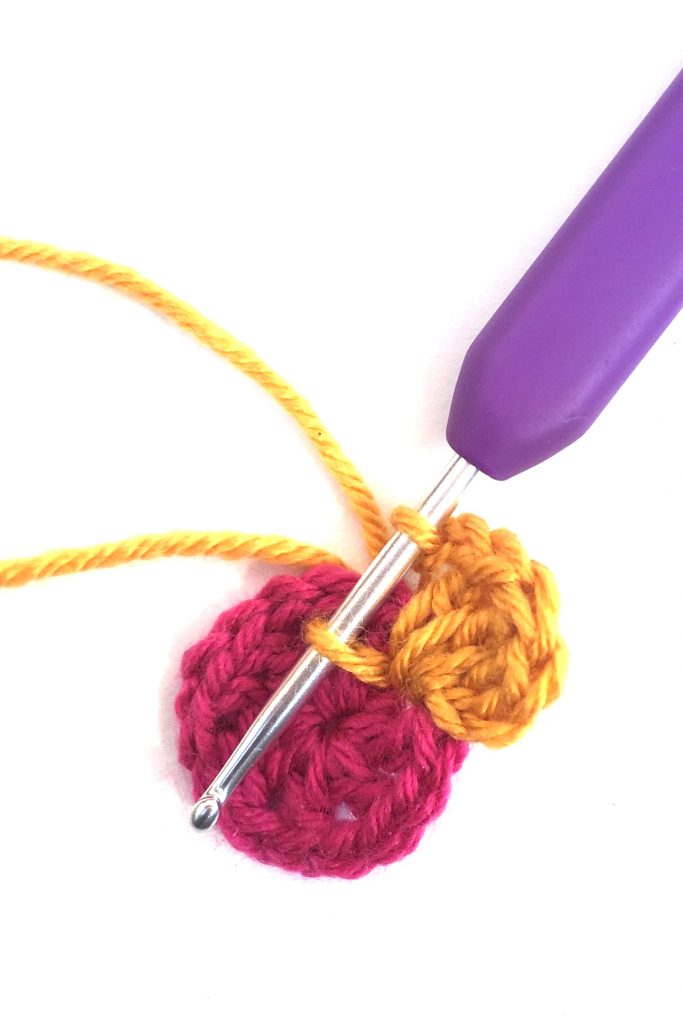
(work 2ch, then a double crochet in next sp on Round 1) 7 times – you’ll have a stitch of the current round sitting next to a stitch from round 2 – here’s the first one done.
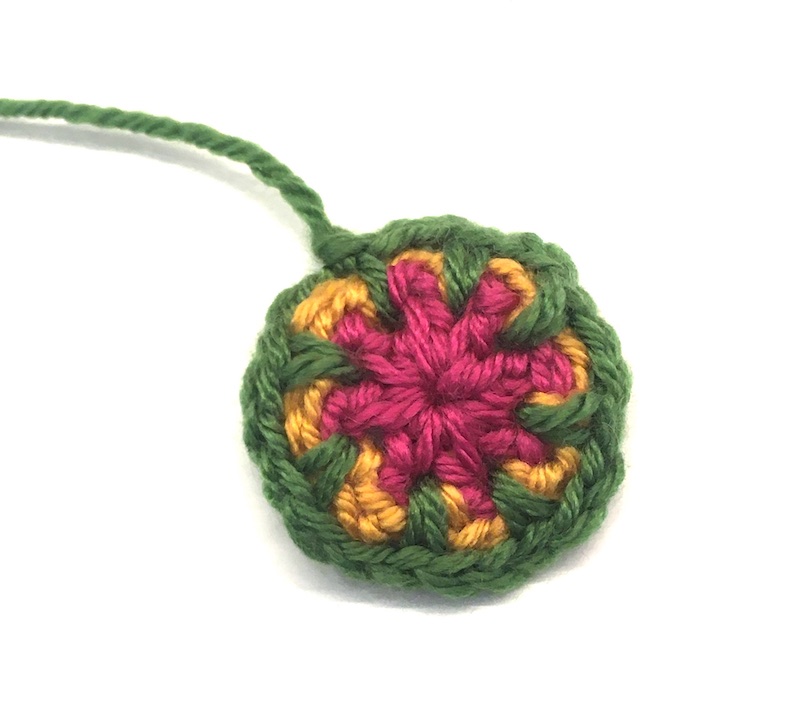
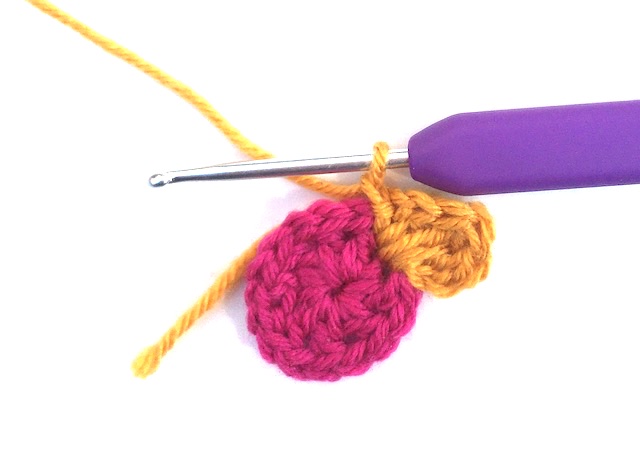
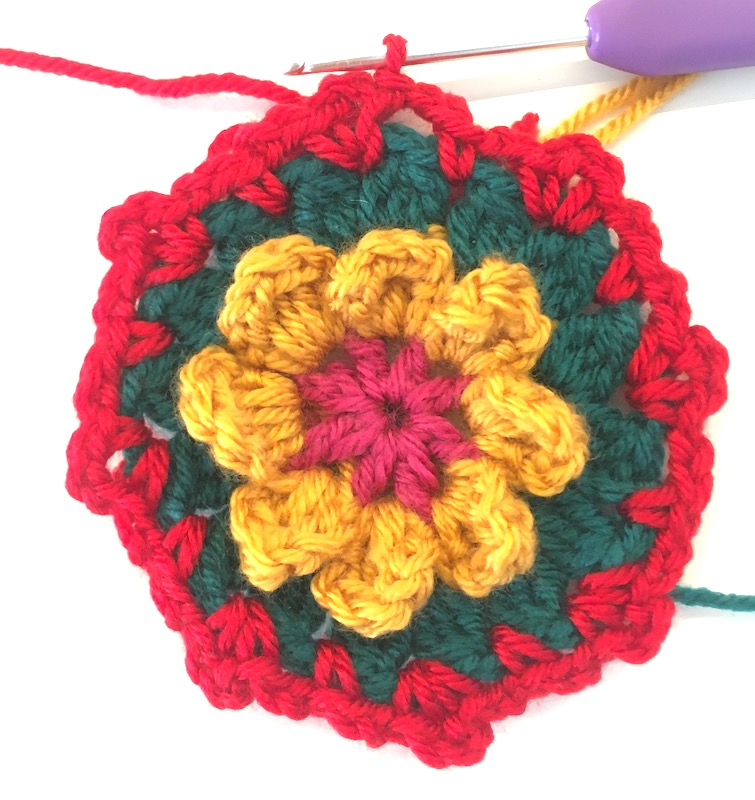
Finally 2 chain stitches, join with ss to the 1st chain. Fasten off. It should look like this…
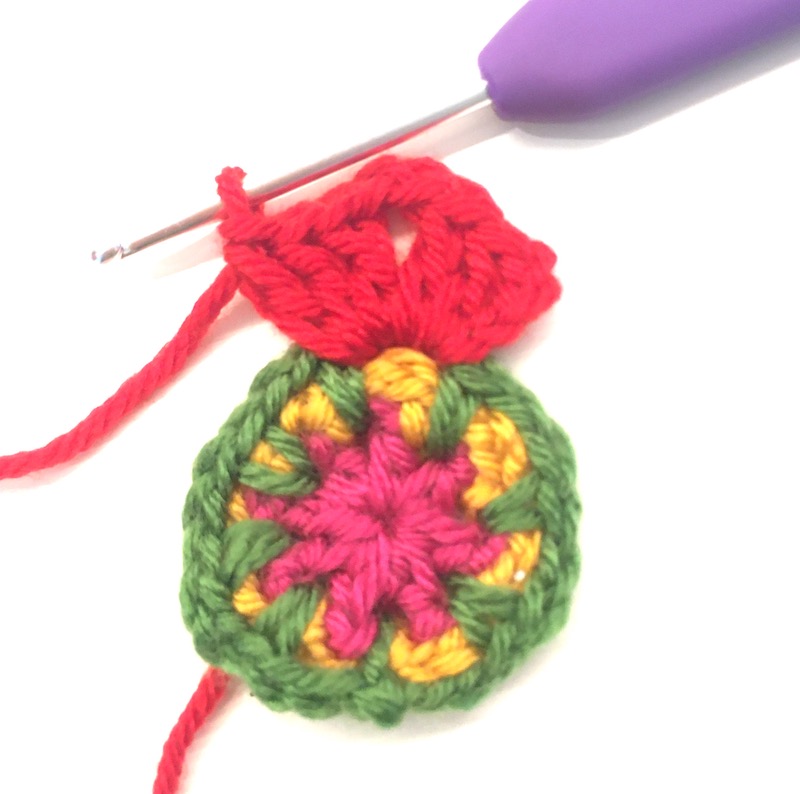
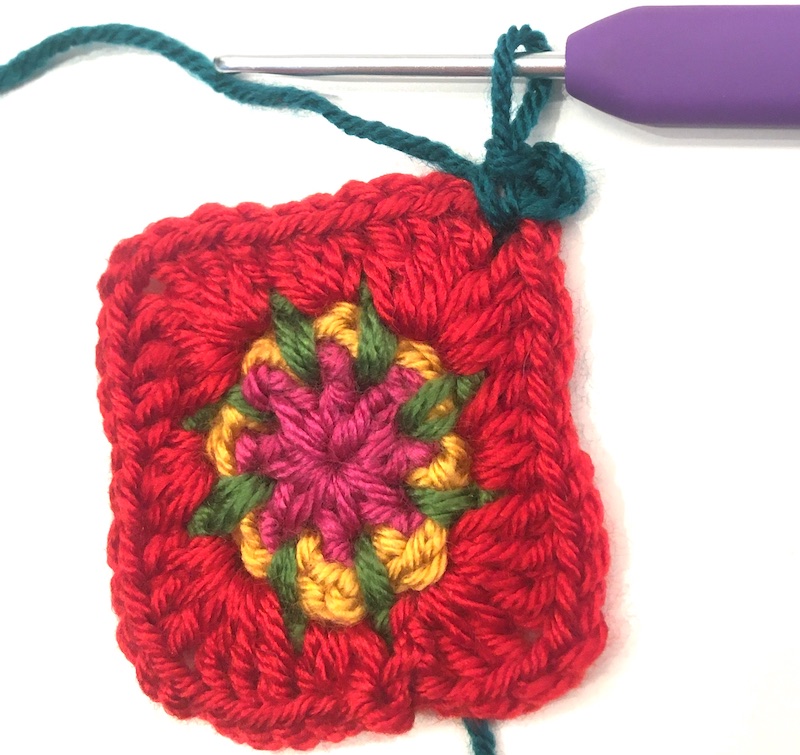
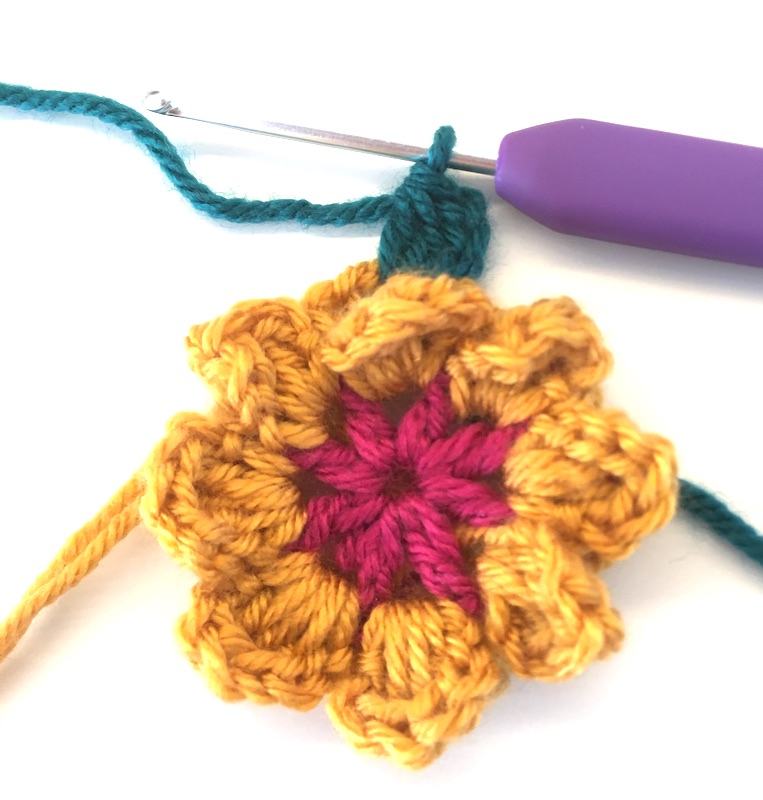
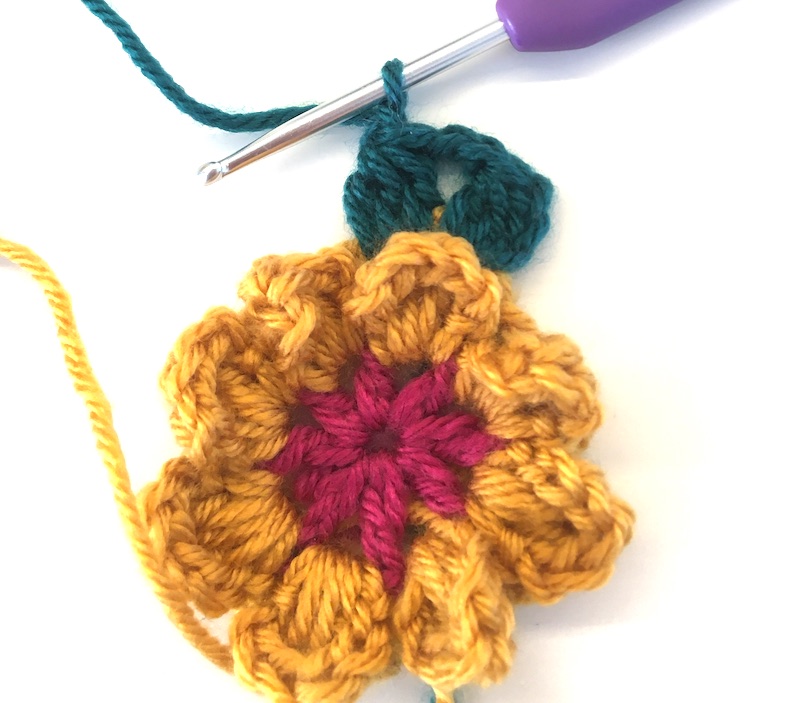
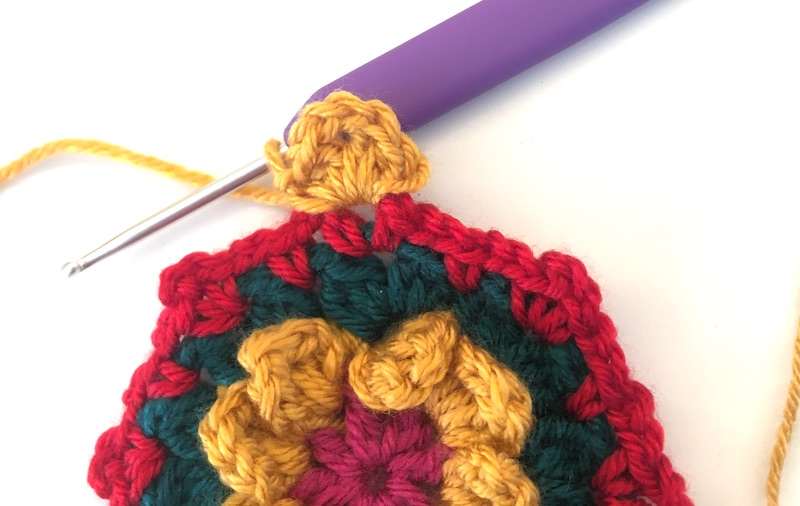
Round 4: Join yarn in a 2-chain space and work (3ch [counts as a treble here] 2tr, 2ch, 3tr),
The first corner
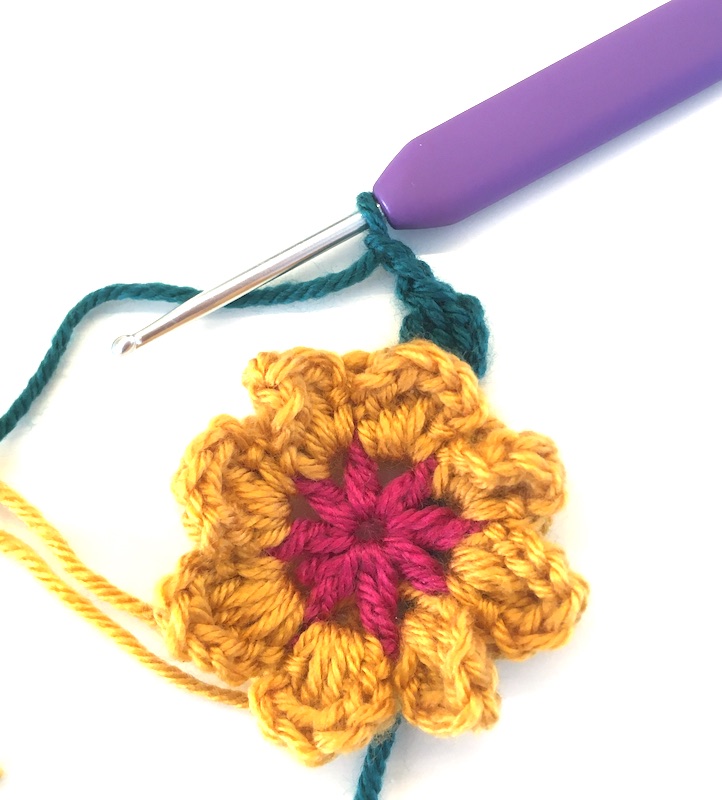
* in the next 2ch-sp, work 3 half trebles,
The first side
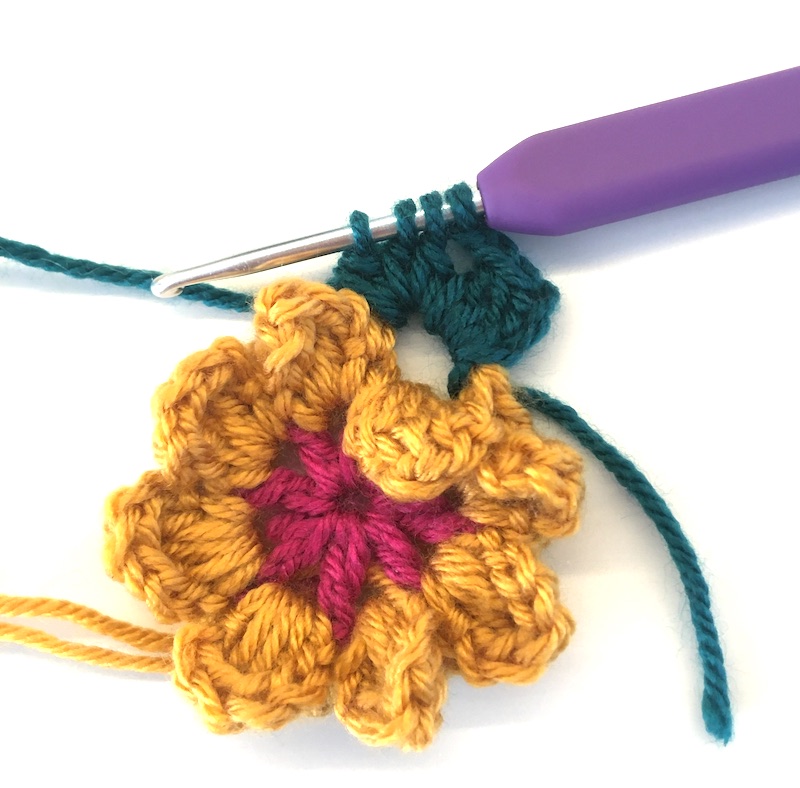
then in the next 2ch-sp work (3tr, 2ch, 3tr).
Another corner
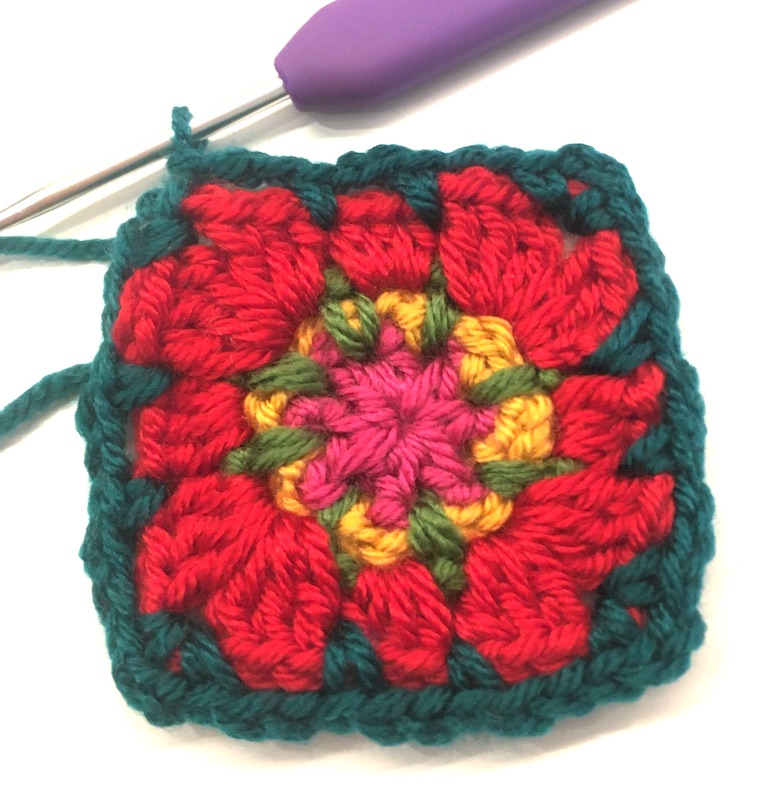
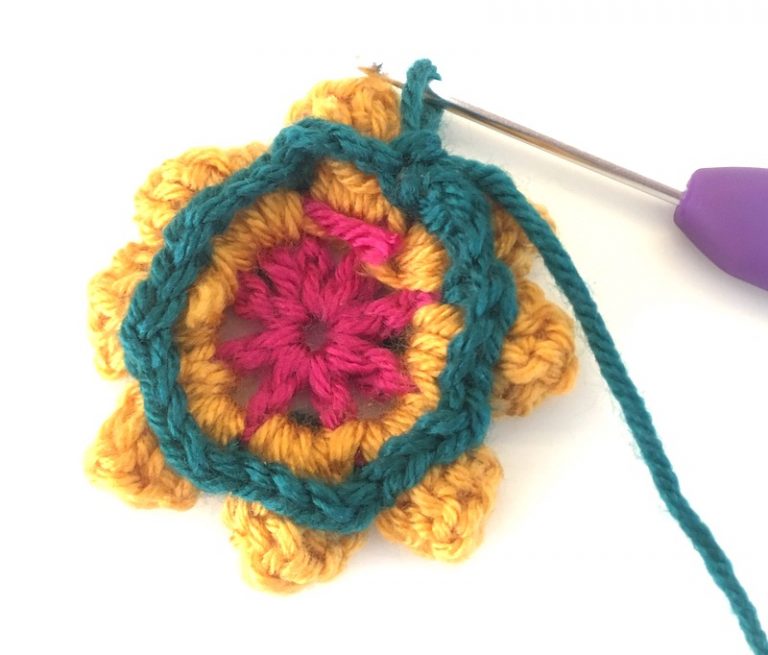
Now go back to the asterisk and repeat from the * twice – you should now have three sides and four corners completed, so just work 3htr in the next 2ch-sp, and join with ss to the third chain. Fasten off. Here’s what that looks like when the round’s finished.
Nearly there – just two rounds to go
Round 5: Join yarn in a corner space and work (3ch [counts as dc and 2ch] plus another dc),
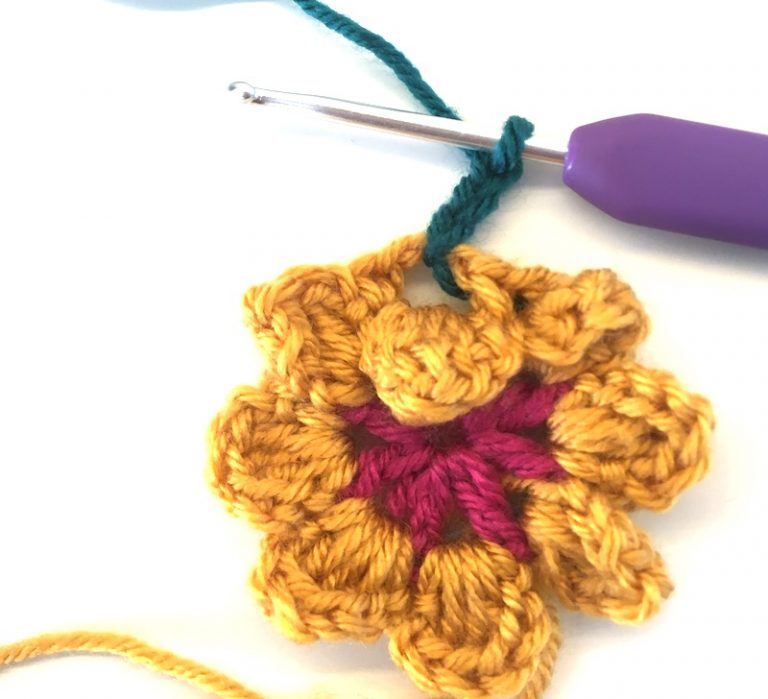
*now work (2ch, double crochet in next space between groups of trebles) twice, [NB these groups of three trebles are quite close together, so make sure you’re working between the groups] then 2ch, dc into the corner space, 2ch and a dc in the same corner space – it should look like this…
Repeat from the asterisk twice, then to finish the round (2ch, and dc in next sp) twice, and finally 2ch, and join with ss to the first ch. Fasten off. Here’s the completed round.
Last round coming up…
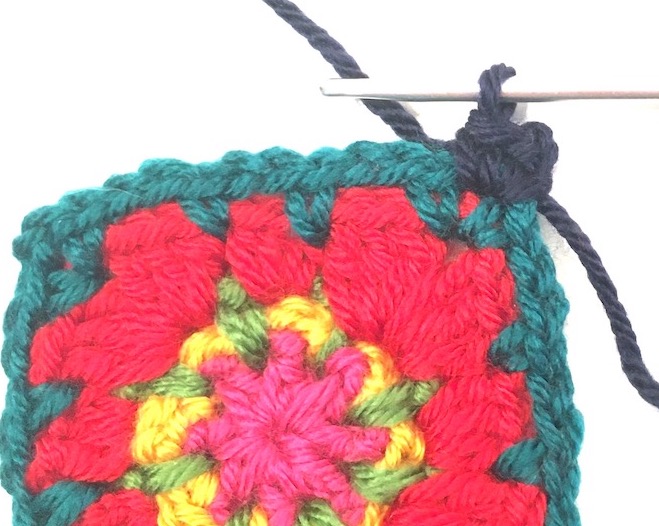
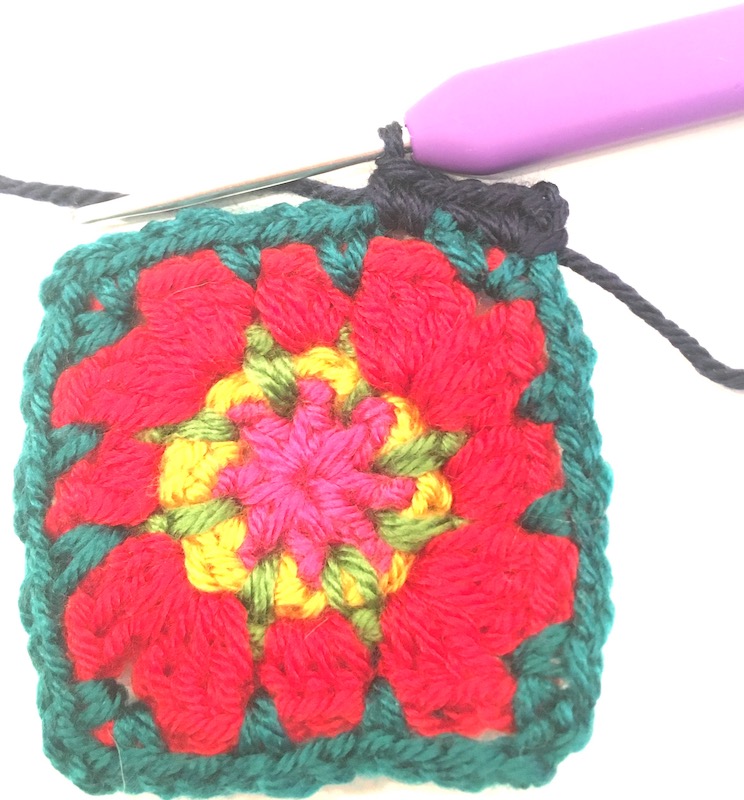
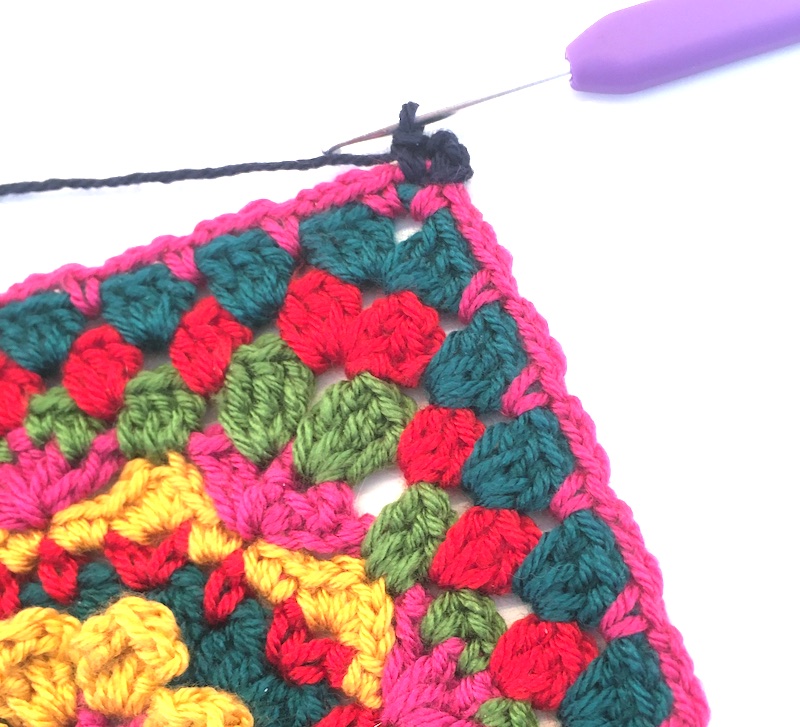
Round 6: Join yarn in a corner space and work (2ch [counts as a dc, plus 1ch], then another dc),
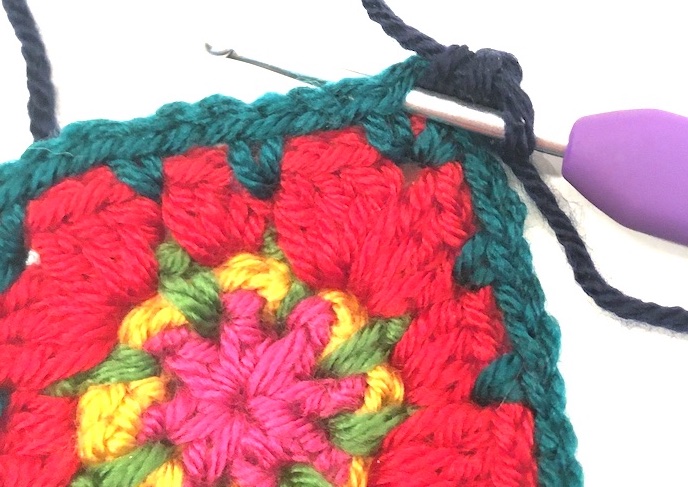
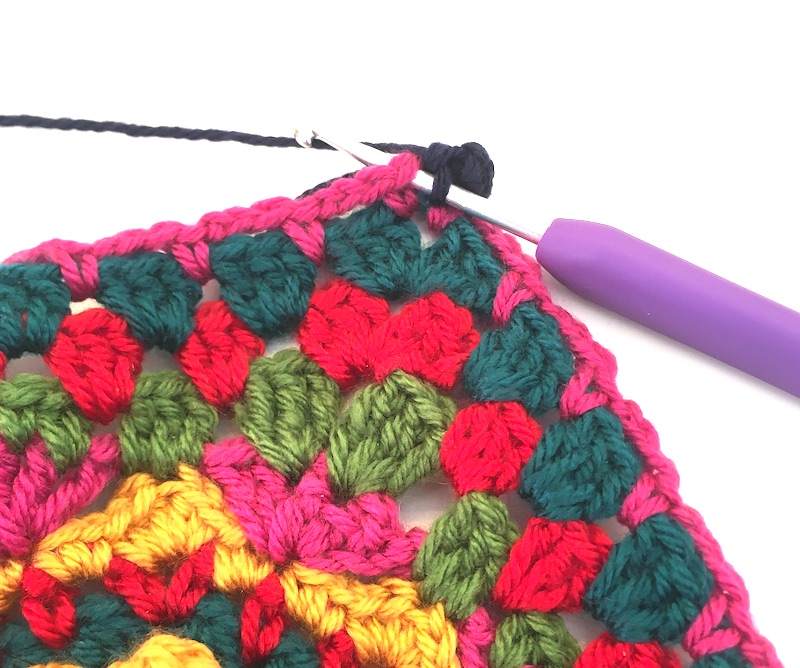
then * (a double crochet in the next stitch, then 2dc in the 2-chain space) this bit in brackets needs doing 3 times,
Remember to work through the top of the dc from the previous round – here’s where the hook goesAnd this is what the double crochet looks like when it’s doneNext comes 2ch in the spaceAnd again, remember to work in the double crochet
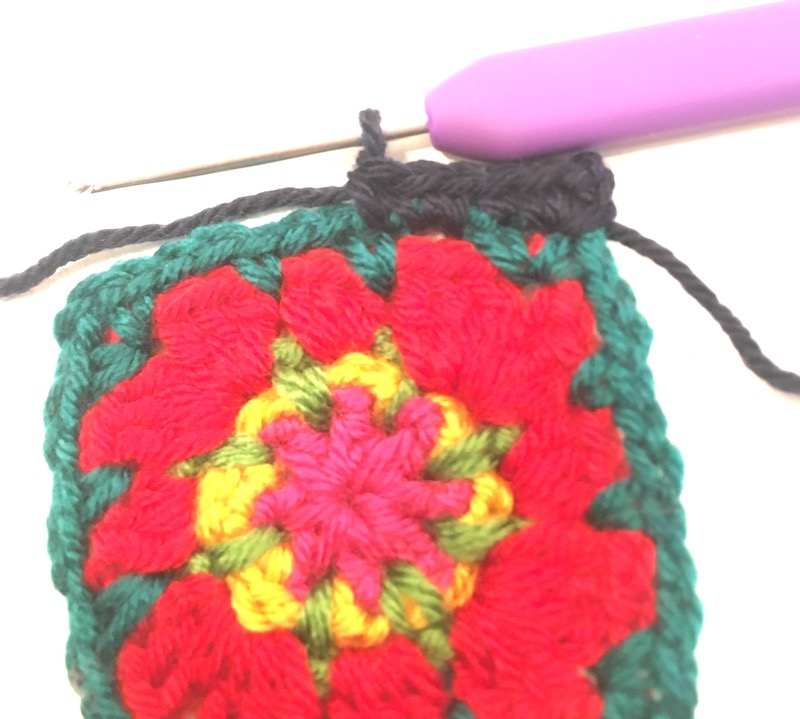
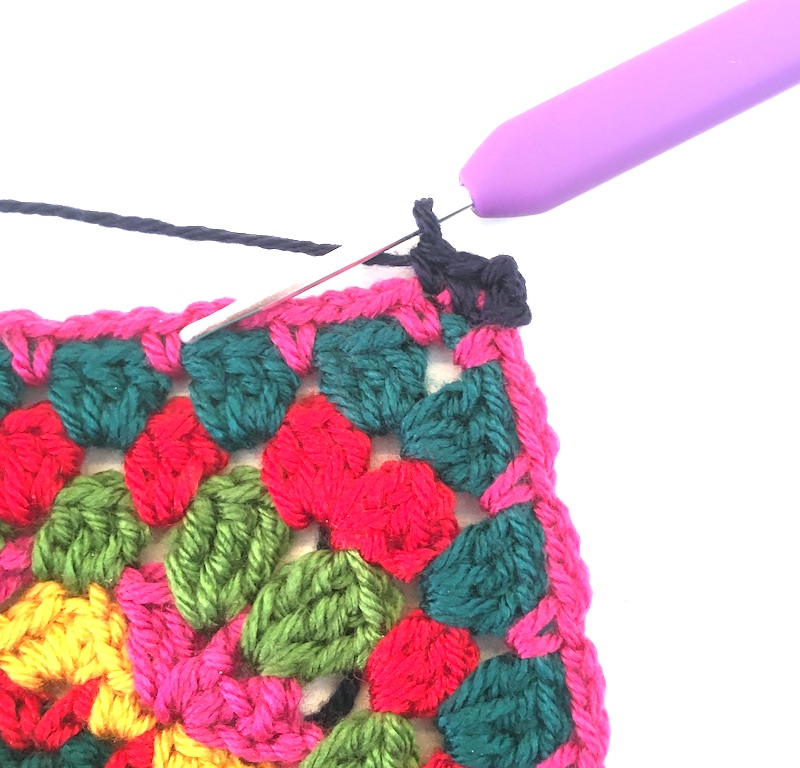
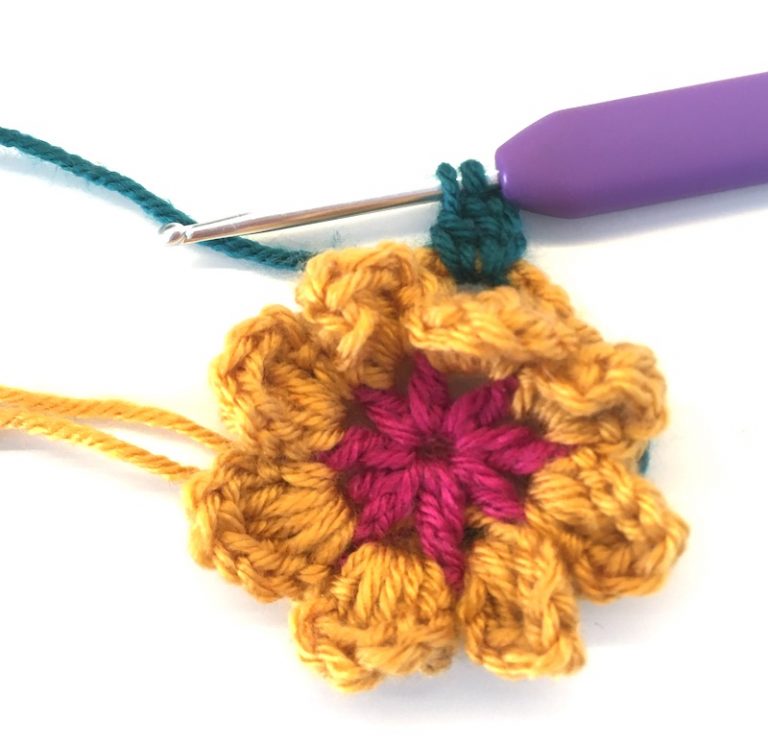
Once you’ve done that bit 3 times, you’re up to the corner, so work a double crochet in the next st, (1dc, 1ch, 1dc) in the corner sp.
This is what it looks like when one side and two corners are complete
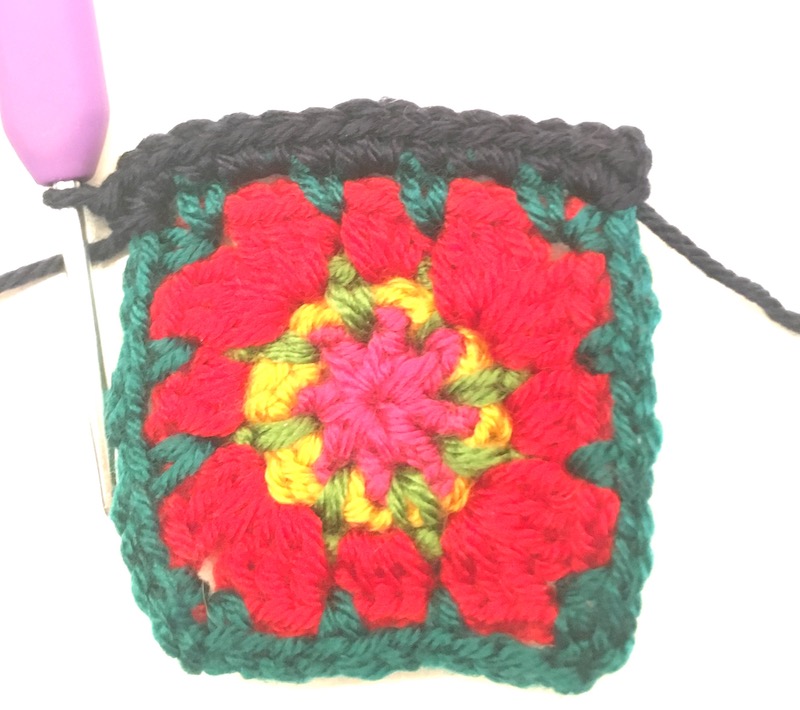
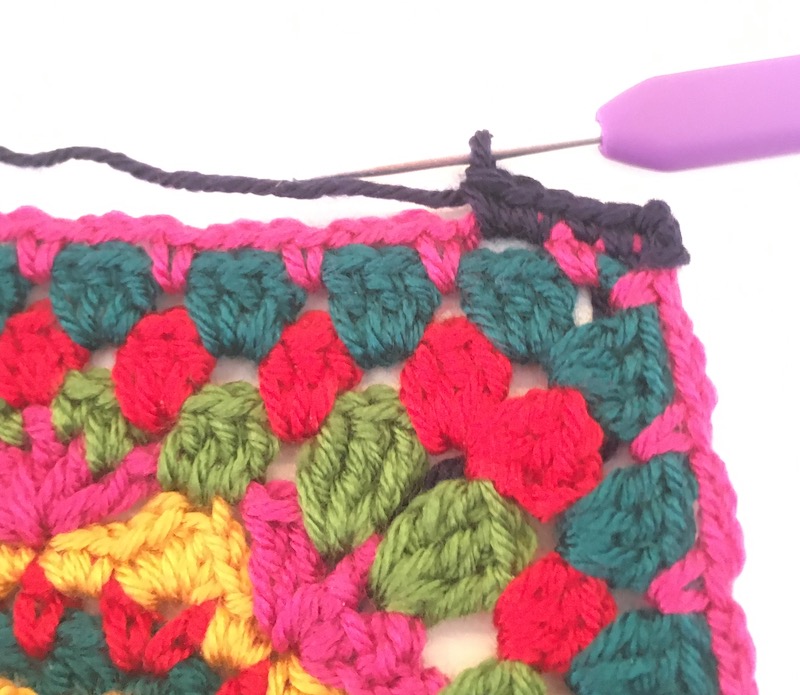
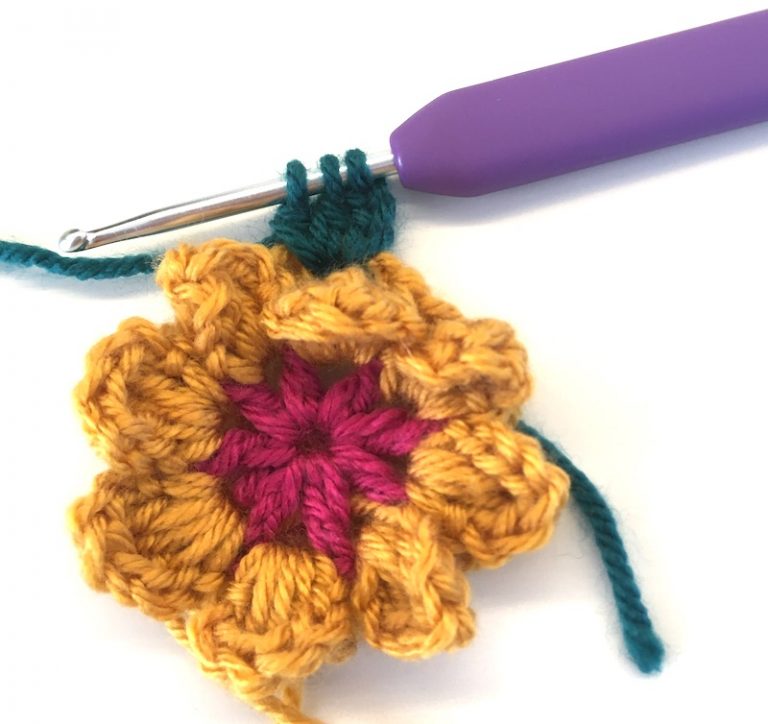
Now go back and repeat from * twice. Now to finish, work (1dc in next st, 2dc in next sp) 3 times, and 1dc in next st, and finally join with ss to first ch. Fasten off.
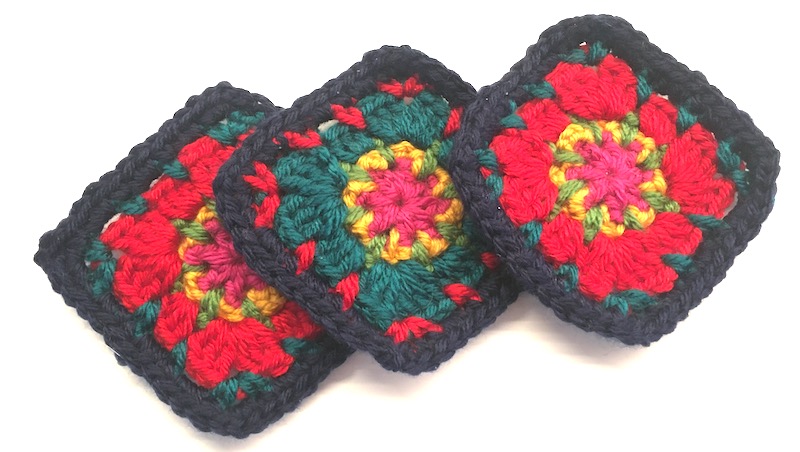
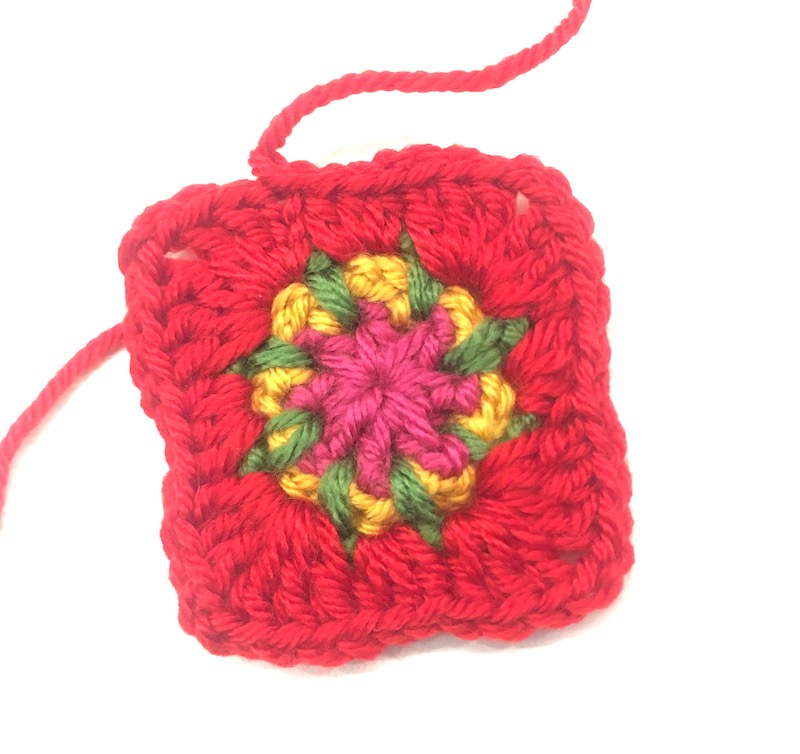
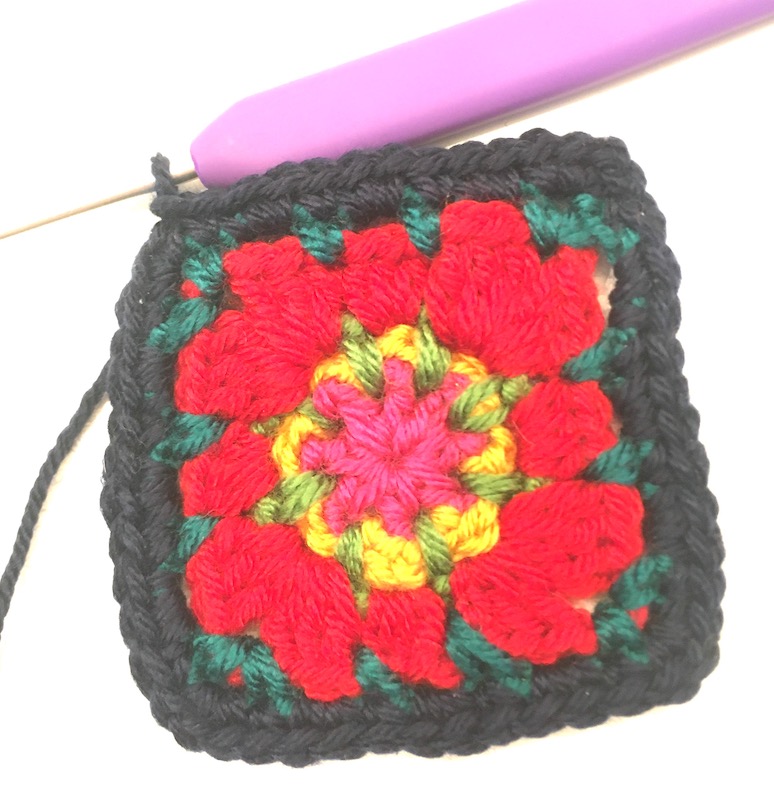
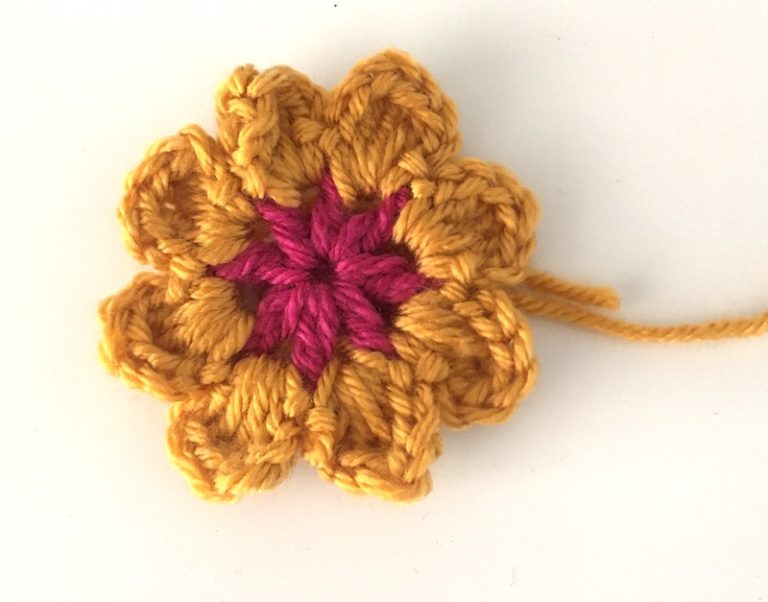
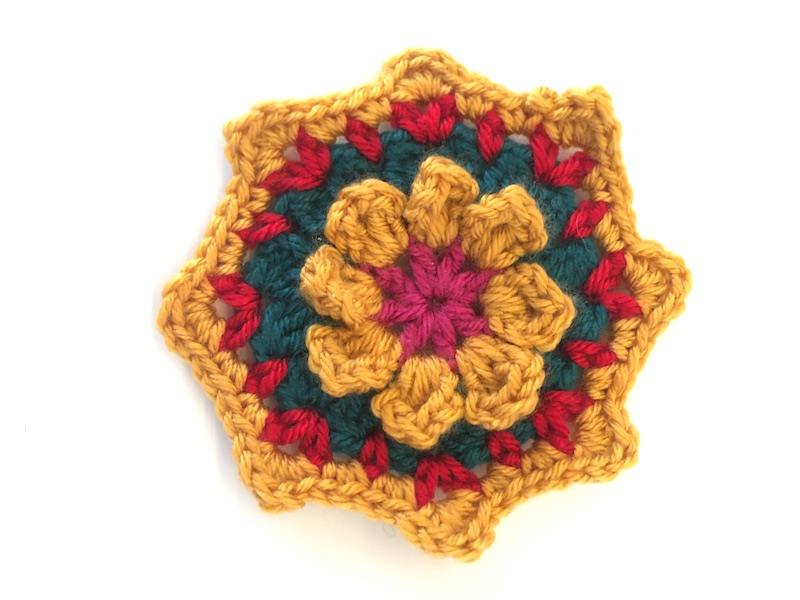
The finished small square looks like this…
You can vary the colours as you like! I’ve chosen to do the final round in the same colour as the final round of the main square, but it’s entirely up to you! You need to make six of these squares – that’s 3 for each side of the bag.
Don’t forget, you need to make 6 of these squares altogether, so get crocheting . Ready for Part 5? Part 5 is here
Share your photos on social media with the hashtag #SpringBagCAL
And if you get stuck – get in touch by email, facebook, instagram or twitter and I’ll try to help.
If you missed the first parts, head back here to begin. And to recap on part 2 (rounds 6-9) see here.
There are just three more rounds left to go to complete the main square and Part 3 tells you how to work these – don’t forget, you need to make two of these. And if you want the standard written instructions, they’re here.
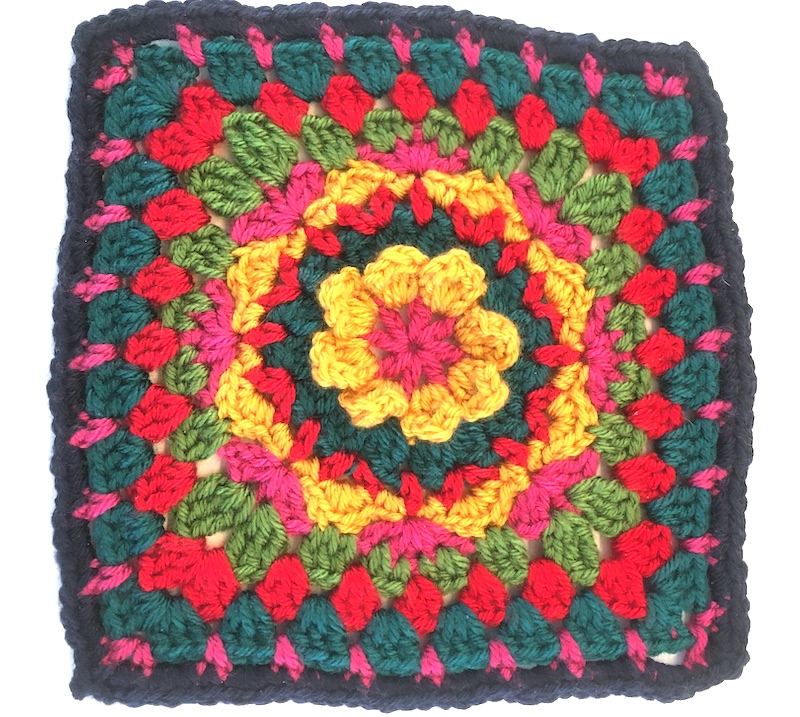
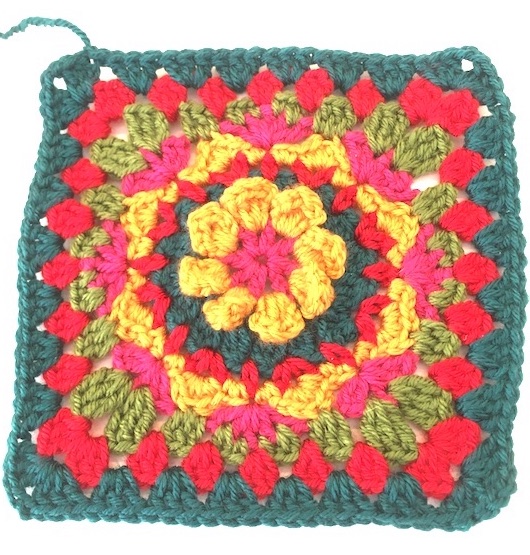
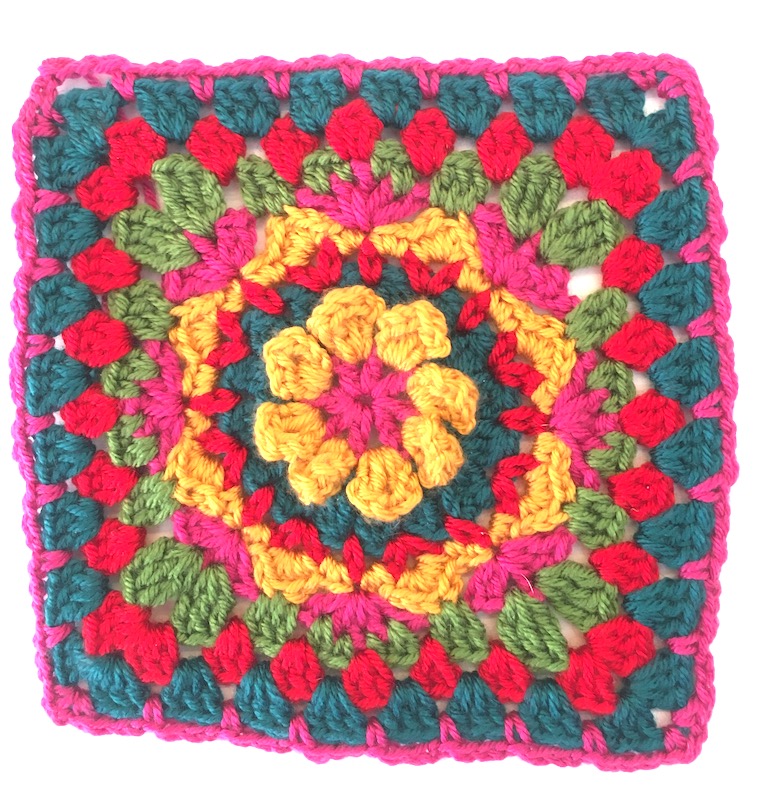
Here’s what the completed square will look like… Again, don’t worry that it’s not exactly square at this point.
The next round is a normal granny square round for anyone who’s made a granny square before – it’s worked with groups of 3 trebles in each space across the sides, and 3 trebles, 2 chain stitches and 3 trebles in each corner.
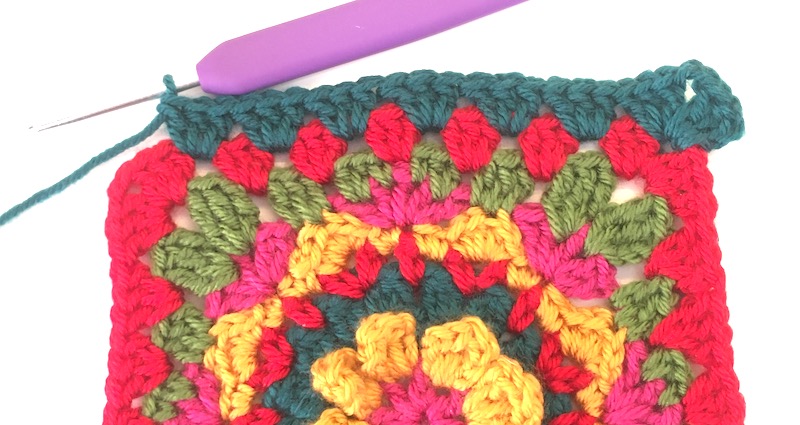
Round 10: Join yarn in a corner, work 3 chain stitches [this counts as a treble here], 2 trebles, 2 chain stitches and 3 trebles.
Here’s the corner
* Now work 3 trebles in each space between the groups of trebles on the row below until you get to the next corner,**
And now the side
in the corner 2-chain space, work 3 trebles, 2 chains, and 3 trebles.
You need to repeat the last bit, from the asterisk * twice – you’ll now have worked 4 corners and 3 sides. To complete the last side, work from the single asterisk * and stop at the double asterisk **. To finish, join with slip stitch to the 3rd ch. Fasten off.
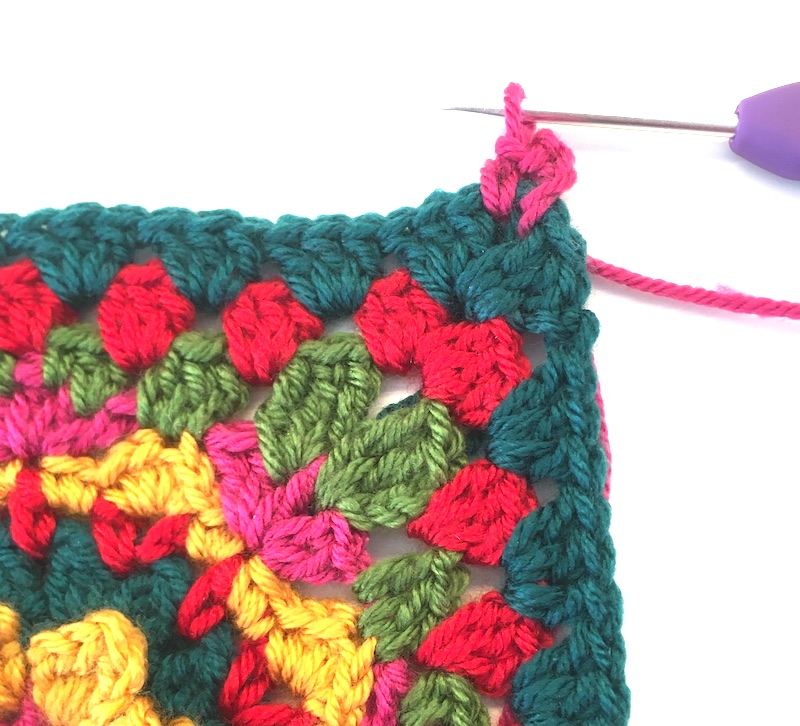
Round 11: Join yarn in corner and work 3ch [this counts as a dc and 2ch], then work a double crochet.
The corner looks like this
*Now work (3 chain and a double crochet in next space)
And here’s the bit you repeat across the side – 3ch and a dc
repeat this step (ie 3ch and a dc in the space) until you get to the next corner,
then work 3 chain **and, in the 2-chain space work (1dc, 2ch, 1dc).
The second corner completed
Now go back and repeat repeat from the single asterisk * twice, then from the single asterisk * to the double asterisk **. Finally join with a slip stitch to the first ch. Fasten off.
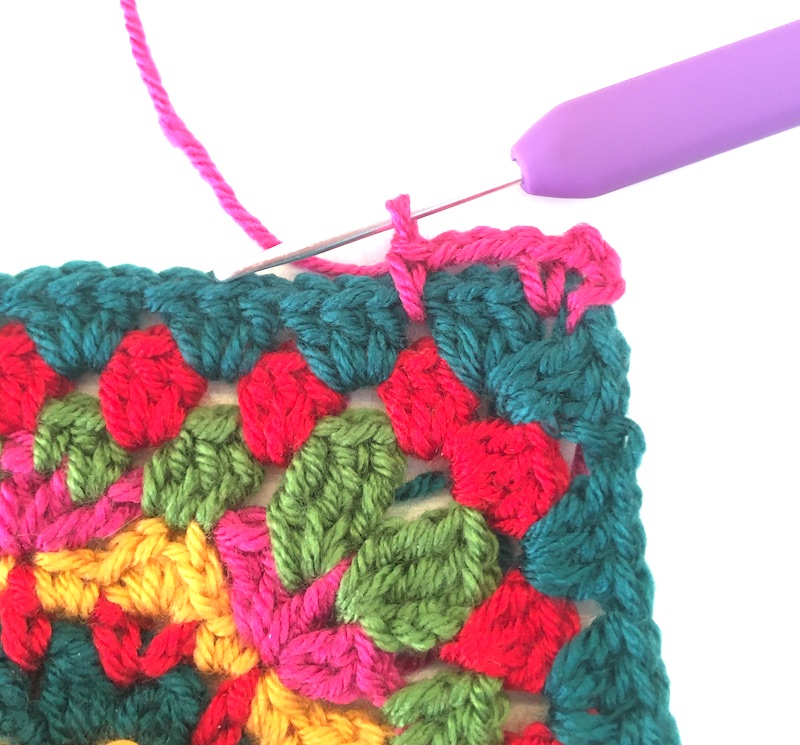
Now for the last round – hurray! This one works a double crochet edging all the way round. You’ll be working both into stitches and through the chain spaces on the previous round.
Round 12: Join the yarn in a corner space, work 3 chain [counts as dc, 2ch], and a double crochet.
Here’s the first corner
Now you need to repeat the same thing all the way across the side – *a double crochet in the double crochet stitch on the row below,
You need to make a dc in the next dc stitch – here’s the hook going through the top of the dcAnd this is what it looks like when you’ve done the dc
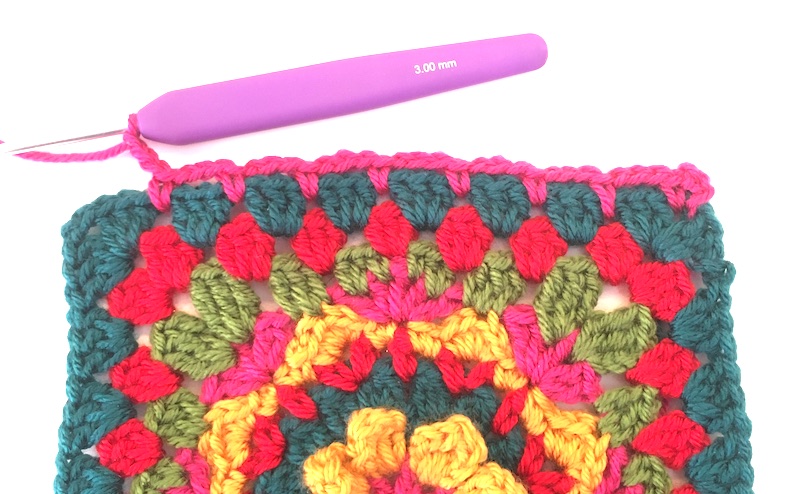
and 3dc in the 3-chain space,
Here are the 3dc in the chain space
when you get to the corner you’ll do a double crochet in the stitch before the corner space ** (Remember that where you joined the previous row together, there’ll be a ss into a chain stitch, and this will be counted as a dc, so don’t forget to work a dc into that)
Don’t forget to work a dc in the last stitch before the corner space
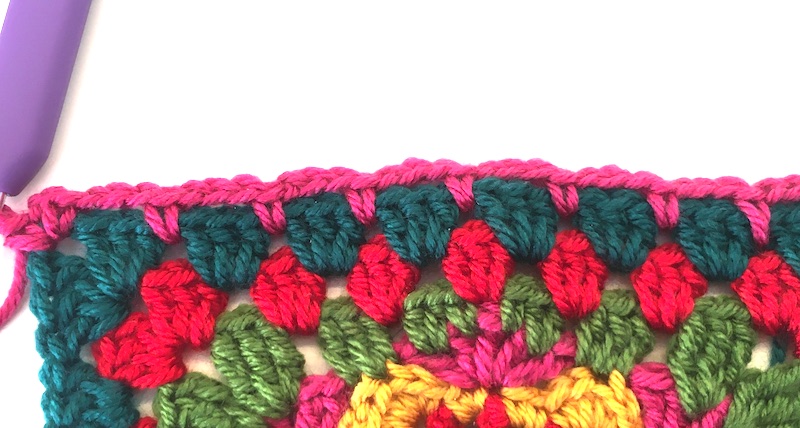
then in the corner space work (dc, 2ch, dc). Now repeat from the single asterisk * twice, then go back and work from * to **. Finally join with ss to first ch. Fasten off.
You should have 35 dc on each side with a chain (at the corners) at each end, so altogether a side is 37 stitches wide.
Next week we’re going to make the small squares that sit across the top of this square and and side panels of the front and back, and the gusset that goes round the bag so make sure you’ve completed your main squares by then…
The next part of the pattern – Part 4 – can be found here . And meanwhile, I’d love to see some of your squares on social media with the hashtag #SpringBagCAL
Don’t forget if you get stuck, just get in touch with me on facebook, email or instagram and I’ll try to help.
Welcome to my spring crochet-along! As you know from my previous blog post, I’ve been designing a granny square bag. During lockdown in the UK, I’ve been finalising the pattern and now that our lockdown has been extended, I thought I’d publish it in sections, so that everyone can complete the Crochet-along with me, and have a bag by the time we’re allowed out again! If you’re an experienced crocheter and just want to head straight to the standard written pattern, head herebut if you’d like to know a bit about the bag first, or if you’re less experienced or you’d like more detailed instructions with pictures, read on…
Construction and materials
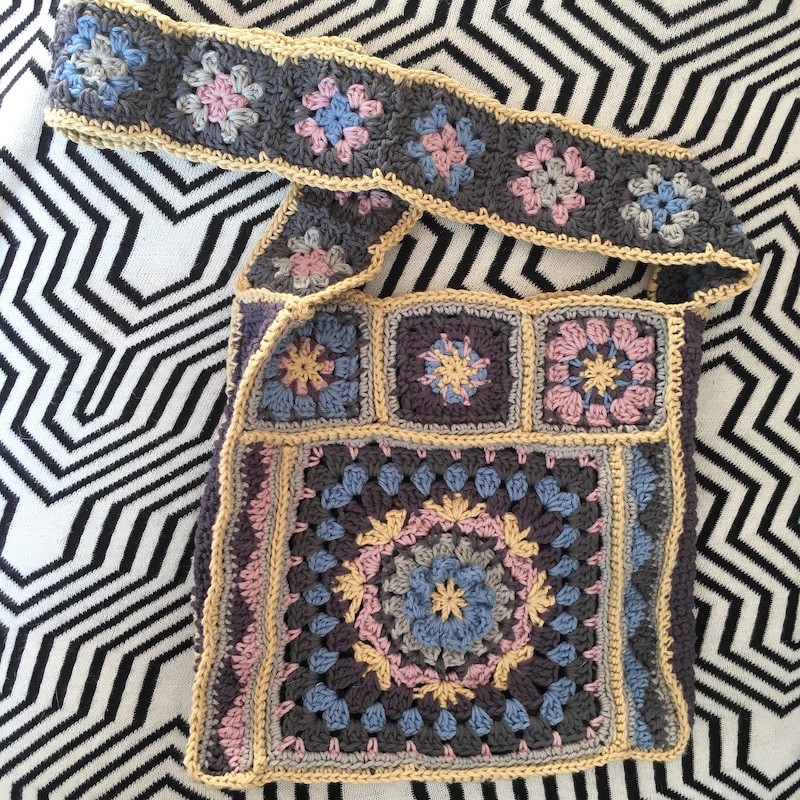
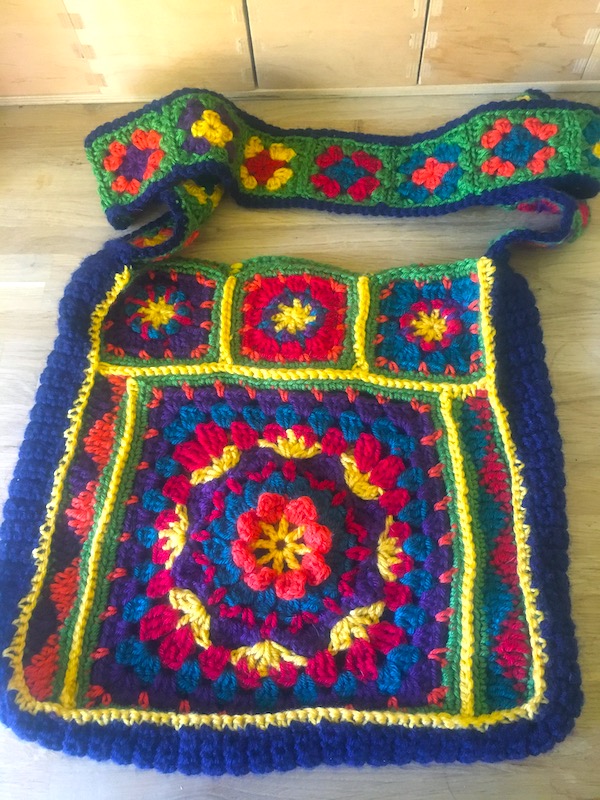
The bag is made up of two large squares, 6 smaller squares, two side strips, a long strip for the gusset and a number of small squares for the handle…
Here’s the first one I made…
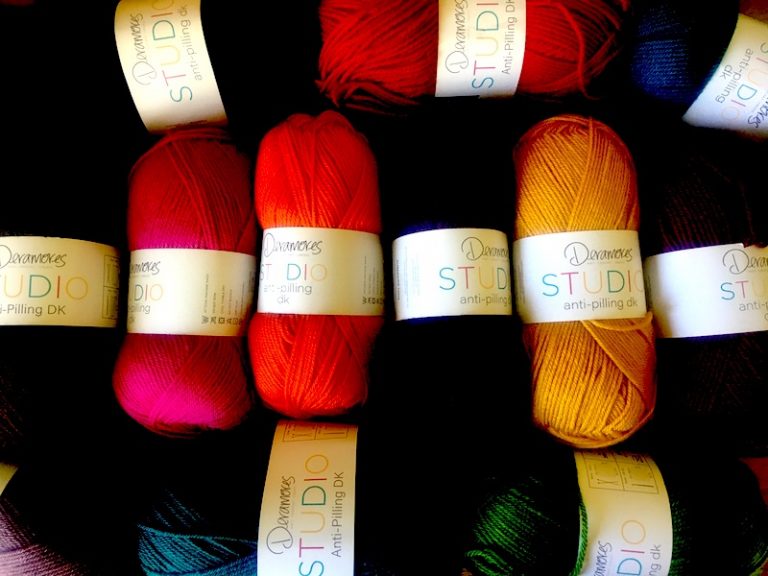
You can make it in any DK yarn – I’ve done versions in Deramores Studio DK which is now available from Lovecrafts.com – there are some lovely bright and jewel-like colours in their range, and it’s not expensive either.
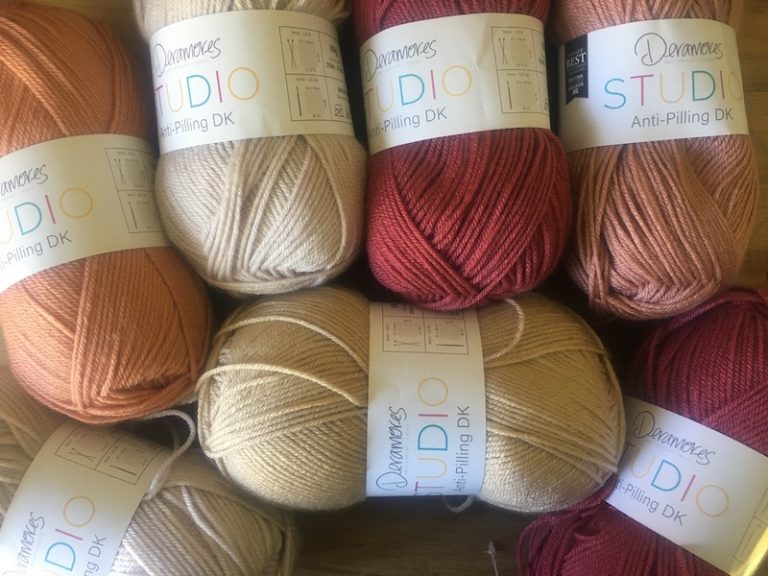
Here’s a selection of the Deramores yarn in more muted colours.
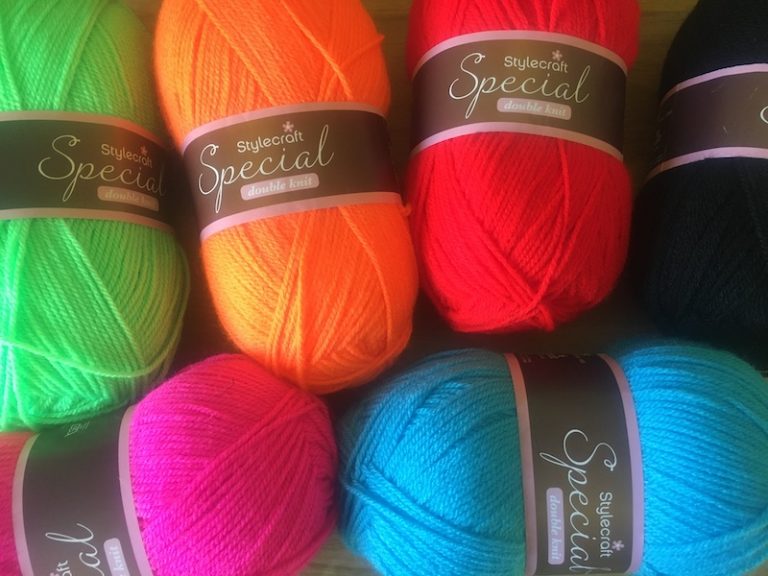
Or how about making it in really zingy colours, like these from the Stylecraft DK range? You can find a wide selection of colour packs of Stylecraft from lincolnwoolpack.co.uk which works out even cheaper.
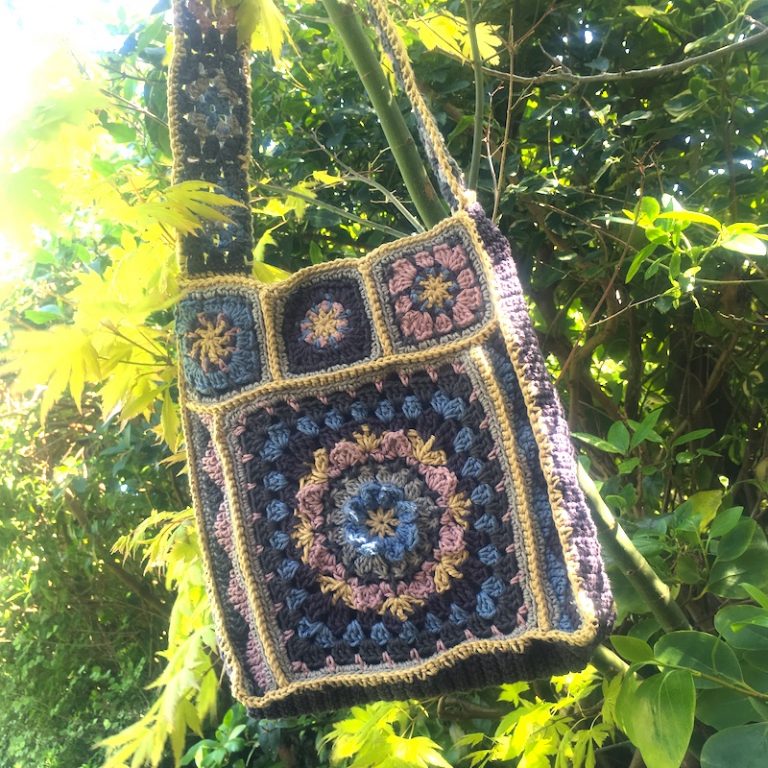
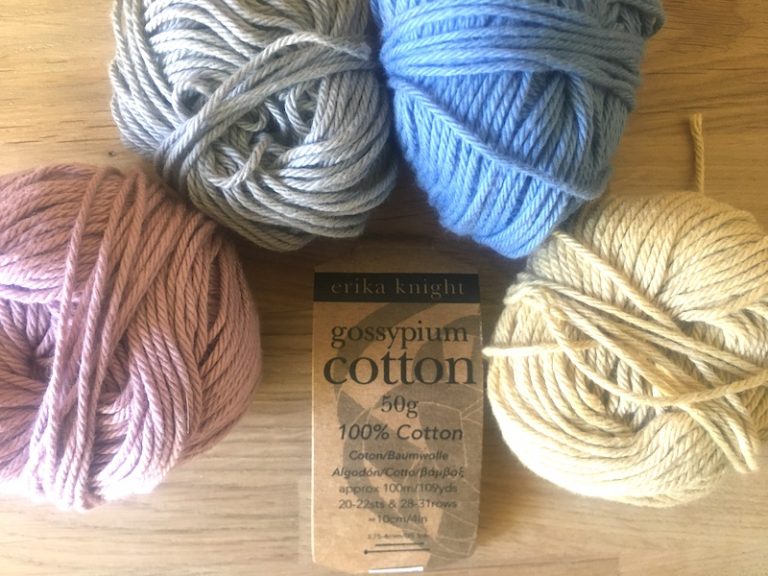
I’ve also made it in the gorgeous Erika Knight Gossypium cotton, so soft and in lovely, muted colours. I just happened to have a range of colours in my stash, and was pleased to finally find a use for them – this is what was left after I’d made the bag.
This is what my second version turned out like…
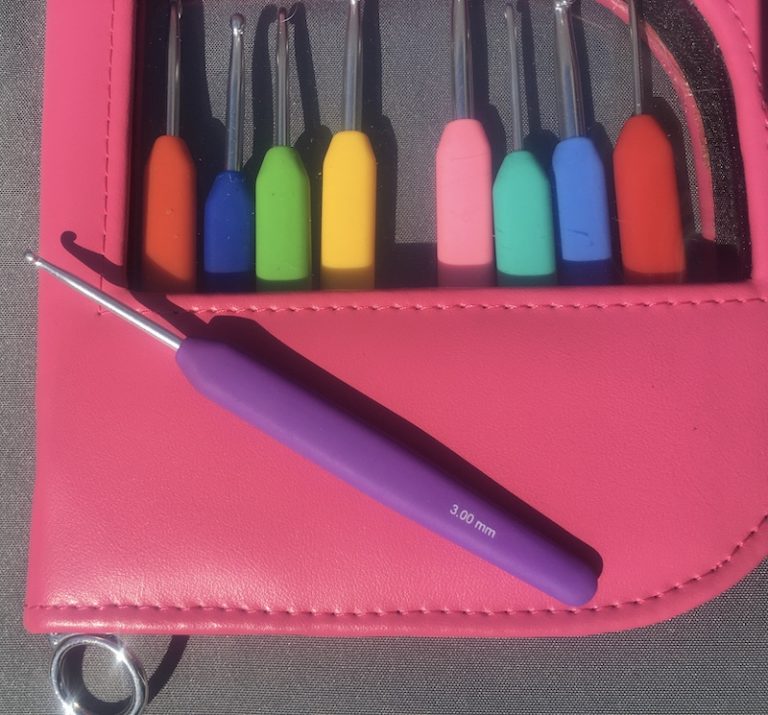
I eventually decided to go with a crochet hook a size smaller than I normally use for DK – 3mm – from my favourite Knitpro Waves hook set. This gave a firmer texture to the pieces, and gave the bag a bit more structure. You may find that the yarn you choose may work better with a 3.5mm hook – either is fine.
In the cotton on the smaller hook, I used six colours, with each using under 50g, though you can use as many or as few colours as you like. Even using a slightly larger hook and the Deramores DK, the project still used under 200g in total.
Making a start on the crochet-along
First of all, I’ll explain all the abbreviations that will be used in the pattern. All instructions are in UK terminology. Don’t forget, if you’d prefer just to follow the standard written instructions, you’ll find those here .
Crochet-along Abbreviations
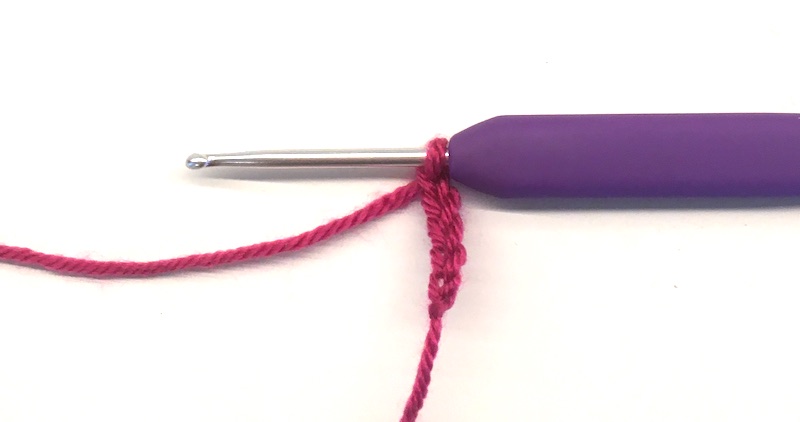
Don’t forget, you start with a slip knot to make the first loop on your hook. See here if you’re not sure how to make one.
Also, when joining in a new colour, simply put your hook through the space or stitch indicated wrap the yarn round the hook at the back of the work, then bring the hook to the front, and work 1 chain stitch [doesn’t count as one of your stitches] to anchor the new yarn. If you can, try to work over the ends of the yarn as you join each new colour in, and there’ll be a lot fewer ends to darn in later. Now you’re ready to follow the instructions for the round.
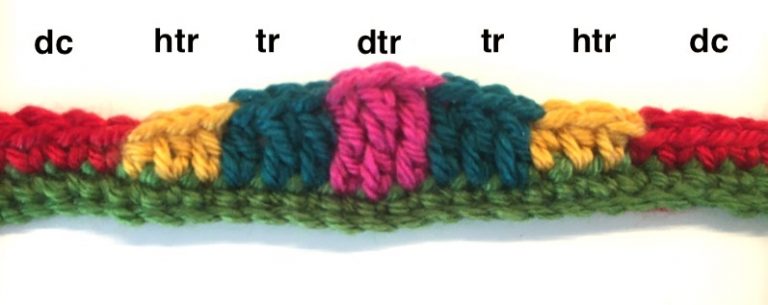
ch = chain stitch– the basic stitch which looks exactly like its name. Just yarn over and pull through the loop – voila – one chain stitch! dc = double crochet – for this you insert your hook through the top of the stitch on the row below or through a chain space as instructed in the pattern, yarn over and bring the hook back to the front (2 loops on hook), yarn over and draw it through both loops. htr = half treble – for this you need to put the yarn over the hook before you insert it through the top of a stitch on the row below or into a space, then yarn over and bring the hook back to the front (3 loops on hook), now yarn over and draw it through all three loops at once. tr = treble – this one is slightly taller than the half treble. Put yarn over the hook, insert it though the top of a stitch or a into a space, yarn over and bring the hook back to the front (3 loops) – this time yarn over and draw it through the first 2 loops, yarn over again and draw it through the remaining 2 loops. dtr = double treble– guess what! This is even taller than the treble – yarn over the hook twice, hook through top of stitch or into space, yarn over and bring hook back to the front (4 loops on hook), yarn over and through 2 loops, yarn over and through the next 2 loops, finally yarn over and through the remaining 2 loops. Phew!
Here’s a picture so you can see the different heights of the stitches – double crochet in red, half treble in yellow, treble in dark teal and double treble in pink.
tr2tog = treble 2 together – yarn over, hook through stitch or into space and yarn over, bring hook back to front (3 loops on hook), yarn over and draw through 2 loops (2 loops on hook), yarn over and hook through stitch or chain space as directed, bring hook back to front again (4 loops on hook), yarn over and draw through 2 loops (3 loops on hook), yarn over and draw through all 3 loops, leaving just one loop on hook. 3tr-cluster = 3 treble cluster– the most complicated one, but not difficult if you follow the steps. Yarn over, hook through stitch or into chain space and yarn over, bring hook back to front (3 loops on hook), yarn over and draw through 2 loops (2 loops on hook), yarn over and hook through same stitch or chain space as before, bring hook back to front again (4 loops on hook), yarn over and draw through 2 loops (3 loops on hook), yarn over, hook through same stitch or chain space, yarn over and bring hook back to the front again (5 loops on hook), yarn over and draw through 2 loops (4 loops on hook), finally yarn over and draw through all 4 loops, so you’re back to 1 loop. rem = remaining – this is easier and self explanatory. sp = space – so is this, but it could refer to a ch-sp ie a space created by one or more chain stitches on the row below, or it could be through the space between two stitches on the row below. It’ll tell you which in the pattern. ss = slip stitch– finally, slip stitch which is a useful joining stitch at the end of rows, or sometimes helps to create shapes like the petals. Just put your hook through a stitch or into a space, yarn over and bring the hook back to the front and straight through the loop on your hook.
Just a quick note, it’s useful if you know how to start using a magic circle, however if you don’t, you can work a few chain stitches and join them into a circle with a slip stitch. The magic circle works best, though, as you can tighten up the centre of the motif…
Here’s what the first round looks like with circle of 4 chain stitches to start, and with a magic circle… You can see the magic circle can be tightened up in the middle, so there is no hole.
So, let’s pick up our hooks and get going. And don’t forget, if you get stuck at any point, just get in touch with me by email on facebook or instagram or in a comment here, and I’ll try to help you.
Here we go
We’ll make a start on the main square which actually starts off as a circle! It doesn’t turn into a square untilRound 7 so today, you’ll end up with a circle. For this first part of the crochet along, we’ll just work up to Round 6, and you can make two of these circles – they don’t even have to match if you don’t want them to – that way your bag will look different depending on which side you choose to have facing outwards. Don’t forget, if you just want the pattern in normal crochet terminology, see here.
MAIN SQUARE (you’ll need to make 2 of these)
Round 1: If you don’t know how to do a magic circle, make 5 chain stitches and join them into a ring with a slip stitch.
To start with a circle, make 5 chain and turn it into a circle with a slip stitch in the first chain
Or start with a magic circle… Now work 4 chain stitches [this counts as a treble stitch plus 1 chain stitch].
Here’s the first four chain of the round
Now working into the centre of the ring or the magic circle, whichever you’re using, work 1 treble and 1 chain seven times, and join with a slip stitch to the third of the chain stitches you made at the beginning.
Make sure you work through the circle rather than into the stitchesNow do another treble and a chain stitchThis is what it looks like at the end of the round
Fasten off this colour. You now have a circle of trebles with a space between each – almost like a wheel with 8 spokes, though the spokes will only become much more apparent after you make the next round…
Now to make the petals…
Round 2: Join the next colour of yarn into one of the one-chain spaces, and work 2 chain stitches, then in the same one-chain space work 1 treble, 1 double treble, 1 treble, and 2 chain stitches and slip stitch into the space again – you should now have one petal. Work one chain stitch. Here’s that bit broken down in pictures…
Join yarn work 2ch work 1trwork 1dtrwork 1 trwork 2ch and ss to basework 1ch
Now make a petal in the next space as before – ss, 2ch, 1tr, 1dtr, 1tr, 2ch, ss into same 1ch-sp, and finish with 1ch – repeat this 6 times more, then make one last chain and slip stitch into the initial space, right next to the first petal. You should have ended up with 8 petals. You should now also see the wheel with spokes effect! Do not fasten off here.
Round 3: Continue in the same colour and make 3 chain stitches – these now have to sit behind the petal, and then make a double crochet in the 1-chain space between this petal and the next. It may be easier if you bend the petal forwards each time so that you can see what you’re doing. Repeat this seven times more, then join with a slip stitch to the first chain you made and you should end up with 8 petals in a circle. Fasten off this colour.
(I’m actually using a different colour in the following picture and have turned the motif round after I finished the round, so that you can see where the chain stitches sit – this is the back of the motif).
Round 4: Join a new colour of yarn into one of the 3-chain spaces, and work 3 chain stitches – which counts as a treble stitch here,
To start with it’s 3ch to count as a tr
now treble 2 stitches together (see the abbreviations if you don’t know how to do this),
This is how it looksafter the first part of the tr2tog – 2 loops on hookAnd after the second part of the tr2tog – 3 loops on hookFinishing the tr2 tog by drawing the hook through all three loops
work 2 chain stitches then a 3treble-cluster (again, instructions above in the abbreviations),
Here’s the 2chAfter third part of the 3tr-cluster with 4 loops on the hookAnd now how it looks when you draw the hook through all 4 loops
*1 chain stitch, then in next 3-chain space, work a 3tr-cluster, 2ch, 3tr-cluster. Now repeat from the * 6 times, finally finishing with 1 chain and a slip stitch to the 3rd chain you made at the beginning of the round. Fasten off.
It should look like this…
Here’s the finished round showing a 3tr cluster, a 2ch sp and a 1ch sp
Now for two more rounds…
Round 5: Join yarn in one of the 2-chain spaces [the 2-chain space is the one between 2 treble clusters] and work 4 chain stitches [this counts as a double crochet and 3 chain stitches] , then a dc in the same space. Now a bit that you need to repeat seven times: work 2 chain, double crochet in the 1-chain sp, 2 chain, double crochet in next 2-chain space, 3 chain, double crochet in the same 2-chain space. Once you’ve done all that seven times, to finish off the round, work 2 chain, a double crochet in the 1-chain space, 2 chain, then finally join with a slip stitch to the first chain you made. Fasten off.
Here’s dc, 2ch,dc which forms the pointy bit, then 2ch and a dc in the 1ch sp and 2ch more. This is what your round should look like at the end
Round 6: Join yarn in a 3-chain space [ie one of the pointy bits] and work 1 chain [counts as a dc], a half treble, a treble, a half treble and a double crochet.
This is one of the pointy bits created by working dc, tr, dtr, tr, dc
Now a bit to repeat seven times: work 2 double crochet in the next 2-chain space, and 2dc in the next 2ch-sp, in next 3-chain space, work a double crochet, a half treble, a treble, a half treble, a double crochet. After you’ve done all this 7 times work 2 double crochet in the next 2-chain space, and 2dc in the next 2ch-sp. Now join with a slip stitch to the first chain. Fasten off.
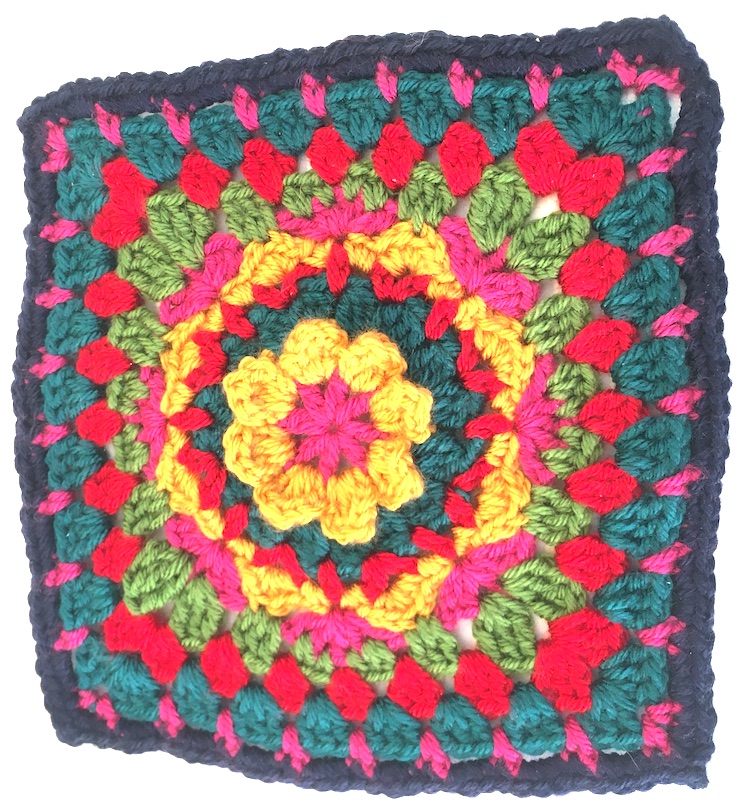
The completed first part of the CAL should look like this
That’s it for this part. So get going with your crochet hook today! And now see here for Part 2.
And don’t forget to use the tag #springbagCAL on instagram or facebook to share your version